

We’ve been working on this project for about a month now, now I’m sharing with you instructions on how to build a root cellar under a garden house or shed. I’m sharing our step-by-step guide to building a root cellar, as we build ours!

Why Root Cellars Are Perfect
I’m a firm believer that if you are prepared, you will not fear, no matter what happens in life. I’ve been taught my whole life to live frugally, grow a garden, preserve the harvest, save for a rainy day, and live as self-reliant as possible. (Matthew chapter 24) (Pharos Dream)
Root cellars are the ultimate for food storage… 100 years ago they put root cellars (or basements that can be used as a root cellar) under almost all farmhouses. I think canning became so popular that people didn’t feel like they needed a root cellar anymore, or somehow along the line root cellar building fell out of practice.
Root cellars are the ideal place for food storage to store fresh garden produce for months without any processing! Being underground keeps root cellars very cool in the summer months and cold but not freezing in the winter. Hence, you get the perfect temperatures with no electric costs.
It’s also very dark in a good root cellar. Dark areas with no sunlight prevent the growth and decay of root vegetables, winter squash, onions garlic, apples, cabbages, and other food storage.
Plus the humidity level in a root cellar is perfect for fresh produce and food storage. Traditional root cellars do not have concrete floors, they use rocks or just left them dirt floors. This earthy floor lets in just the right amount of humidity for keeping potatoes, and other produce in good condition for long periods of time!
First Choose A Root Cellar Location
I fell in love with root cellars after watching Shea Elliot’s root cellar tours on youtube. The problem was… Our water table was too high to build a root cellar under our house (the ideal location in my mind!) My husband was completely against a root cellar under the house… He’s been involved in disaster clean-up companies that had to dry up flooded basements and resulting mold.
However, I was already planning on building a garden house for potting plants and keeping tools, and a shallow root cellar under that would pose no threat to our home! So it was decided… A root cellar under the garden house was the ticket!
Anyone with room for a shed in their yard can build a root cellar under it! You do not need much land, just a small yard works! Our garden house is 12 feet by 16 feet, but you can do any size!
I chose a spot that wouldn’t get much water from neighboring properties or my sprinkler system.
Second – Excavate for Root Cellar
We hired Gary with Wiese Excavating out of Parma Idaho to excavate our root cellar spot. He was great at letting us know how deep we could go. Because our water table is so high (our well is only 26 feet deep.) we only excavated 6 feet down.
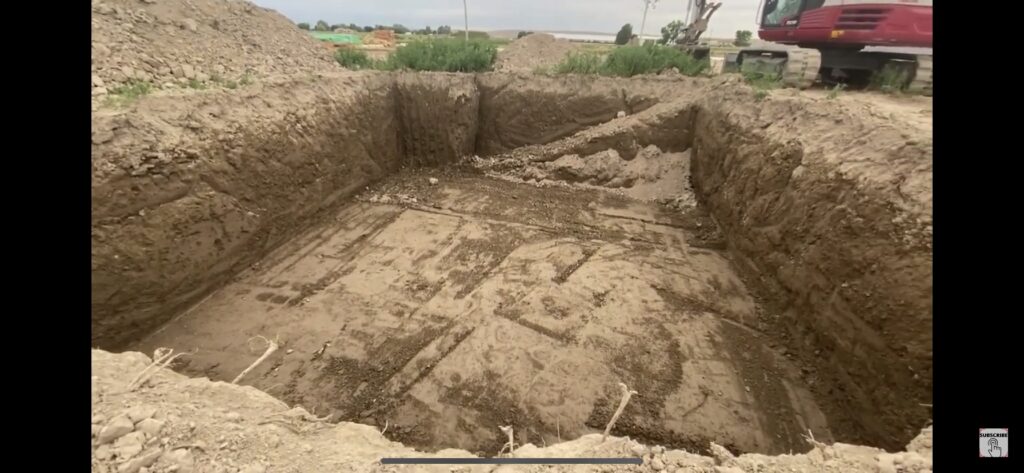
Remember excavators will need to dig a hole a few feet wider on each side so the concrete guys can get in there to work and lay forms. Our excavator dug 2 to 3 feet wider on each side.
Third – Pour Concrete Footers
After excavating, you’ll need to pour concrete footings for the concrete walls of your root cellar. These footers will bear the weight of the concrete walls and garden house or shed above, so they should be thick with rebar to strengthen them.

Our footers are poured about 1 foot thick and 18 inches wide with 2 rebar rods running in the entire footer, and rebar extending up to help support the walls that will be poured on top!
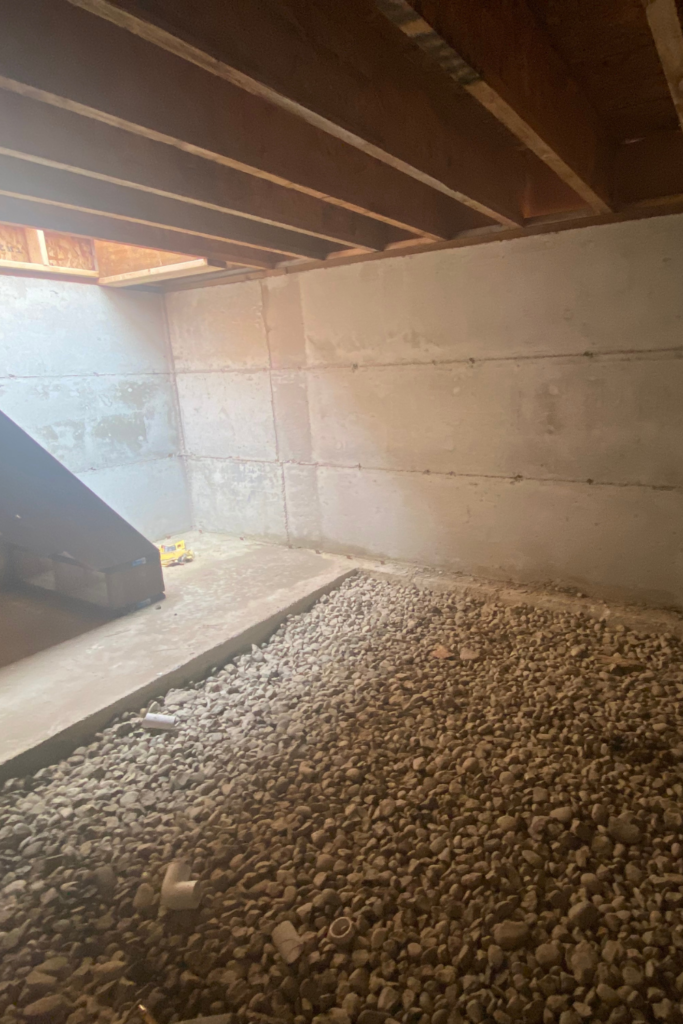
Fill in Root Cellar Floors With Rocks (If using)
We are filling in the dirt floor area of our root cellar with 4 inches of washed rocks. You can also leave this dirt if desired.
Fourth – Pour Concrete Walls

We are using Jarden with substratum concrete for all our concrete work…. This is way too much concrete to buy bags and DIY (unless you are way cooler than we are!)
Our concrete walls will be poured 5 and a half feet tall on top of the 1-foot footers already in place. These walls will be 8 inches thick with rebar throughout to strengthen them.
And those walls have rebar come up through the top every couple of feet, to screw the base plate of the shed above onto.
Fifth – Backfill
After the walls are poured and cured, we backfill the excess areas open around the foundation. We are having our excavator do this, it’s a lot of dirt to move!
After backfilling you will be able to lay your floorboards or I-joists on top of the concrete walls, to support the garden shed floor.
11-1-2022 Update
The root cellar sat through the summer as we were finished building the farmhouse. And I’m super glad we waited to build the garden shed above… Because we discovered a problem! It would start filling with water!
Stairs Down to Root Cellar

If Water Table Is Too High, Instal French Drain
After pouring our walls, while finishing the house this summer, our root cellar filled with inches to feet of water whenever the neighboring farmers irrigated their fields… At first, it was just a couple of inches… No big deal… Until the field right next to us got flood irrigated… Then it was 3 feet of water!
At first, we thought, “no big deal, we will just install a sump pump.” But the amount of water we were getting through the growing season was just too much.
So before moving forward with a garden shed above, we are installing a french drain this coming spring!
French drains direct underground water away from the root cellar foundation.
To install a french drain we are renting a mini excavator, and digging a deep trench around the foundation and out away from the structure. Then, we will be filling those deep trenches with a foot or two of rock and burry it back up.
One of our neighbors close by has a basement that would fill with water every year… Till they installed a french drain. So, this should do the trick for our root cellar too!
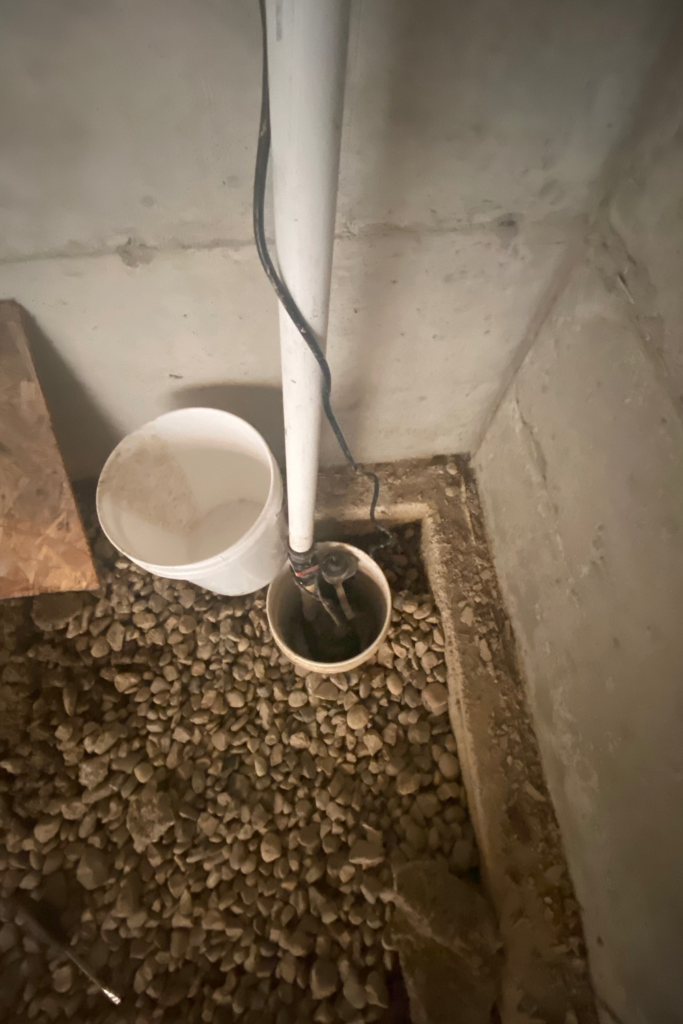
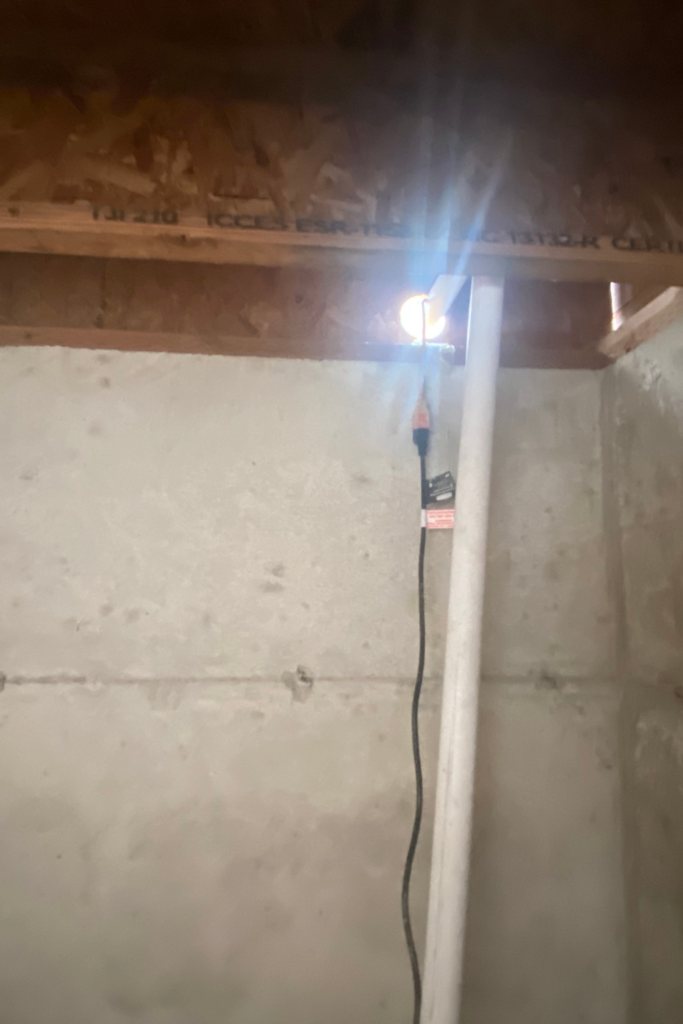
We decided to just go ahead and install a sump pump! We will add a solar panel for the power source after roof is finished.

Build Garden Shed Above Root Cellar Foundation
I will be updating this post as we go… So bookmark this page and check back in a week or two for more instructions!
Root Cellar Stairs

The stairs down to the root cellar had to be more steep because they could only be 6 feel long in the run. It feels more like a ladder than stairs, but that’s just fine with me, just watch your step going down;) We will use under stairs for extra storage…. And we will build a wall right next to the stairs with a door in it to block light and air from above into the dark root cellar!
Building Garden House Above Root Cellar

Food Safety:
Ideal Temperature and Humidity Ranges for Root Cellar Storage:
- Root Vegetables: 32-40°F (0-4°C) and 70-80% humidity. This includes potatoes, carrots, beets, turnips, parsnips, and onions.
- Winter Squash: 40-50°F (4-10°C) and 60-70% humidity. This includes butternut squash, pumpkin, and acorn squash.
- Apples: 32-35°F (0-2°C) and 85-90% humidity.
- Cabbage: 32-35°F (0-2°C) and 90-95% humidity.
- Onions and Garlic: 32-40°F (0-4°C) and 60-70% humidity.
Additional Tips for Optimal Storage:
- Proper Preparation: Before storing food in the root cellar, ensure it’s clean and dry.
- Ventilation: Adequate ventilation is crucial to maintain proper humidity levels and prevent mold growth.
- Regular Inspection: Check your stored food periodically for signs of spoilage, such as mold or rot.
- Temperature Monitoring: Consider using a temperature and humidity gauge to monitor conditions in your root cellar.
- Food Safety Practices: Practice good hygiene when handling and storing food in the root cellar. This includes washing hands before and after handling food, cleaning surfaces, and avoiding cross-contamination.


13 comments
Jessica
we are just breaking ground on our cellar under our mudroom. I’m curious to know how your flooding has been since the perimeter drain and sump pump? Has that pretty well managed the water for you? Would love an update!
Juliea Huffaker
Hi Jessica! How exciting for you guys! Yes, thankfully, we have not had any flooding problems since adding that sump pump! I will be adding an update in the next month or two when harvest is coming is and I’m filling it up! Thank YOU for asking!
Juliea Huffaker
Hi Annette! Ya… that would be nice… But this shed is only 12 feet wide so they had to be that steep;) If you make your shed wider that would work;) Thanks for the comment!
Juliea Huffaker
Hi David… This is just a 12 x 16 square. The root cellar walls are 6 feet high, and the middle of the root cellar room has a gravel floor instead of pouring concrete. I don’t have plans because it’s so simple, and plans aren’t required in my county for so little square footage.
Brea
Hi! Thanks for this article. We are putting a root cellar like this under our new house. Can you give me pointers on how to vent it? I hear you need a vent in and out for air flow. Any info would be great.
juliea
Hi Brea! How exciting… Root Cellars are so wonderful for storing fresh fruits and vegetables without canning or dehydrating! There needs to be two 5 inch pipes (about 5 inches) for venting. We will use PVC. One vent will bring cool air in and the other will let hot air out. The warm air vent will be placed flush with the ceiling, and runs up through the floor and out the roof. This allows warm air to rise then go up and out the pipe. The other pipe will come down through the roof and floor and into the root cellar…. but the end of this pipe is down low to the ground. The low pipe only lets cool air in. This should work because cool air goes down, and warm air rises!
juliea
Im not sure… It would depend on how big your root cellar is. Ours is 16×12. Yours is a bit bigger!
Jay
Do you figure on putting a concrete top on your cellar, which also provides the floor for your garden house? And I presume you are putting vents in the cellar, one high and one low, for ventilation?
juliea
Hi Jay! No we will put a shingled truss on top of the garden shed/potting shed on top on the root cellar foundation! Yes we are putting PVC style vents in for ventalation. One at the ceiling top for hot air to escare and one down low to let in cool air. We may do multiple vents (to help with moisture). Thanks for asking!
David Francis
What are you doing for the shed floor/cellar ceiling? The wording above sounds like you’re talking about the shed roof.
I wanted to do earth top for the root cellar but reading this made me think a shed would be good.
Rodney Zumbach
Can I simply just say what a comfort to uncover somebody who truly knows what they’re talking about when it comes to building root cellars on the internet?
Tom Epegel
Can you update us on the progress?
Melina C
Hey! We were curious how things were progressing ! We are at the excavating stage…. And curious how you’re doing your stairs to get down into it ☺️