


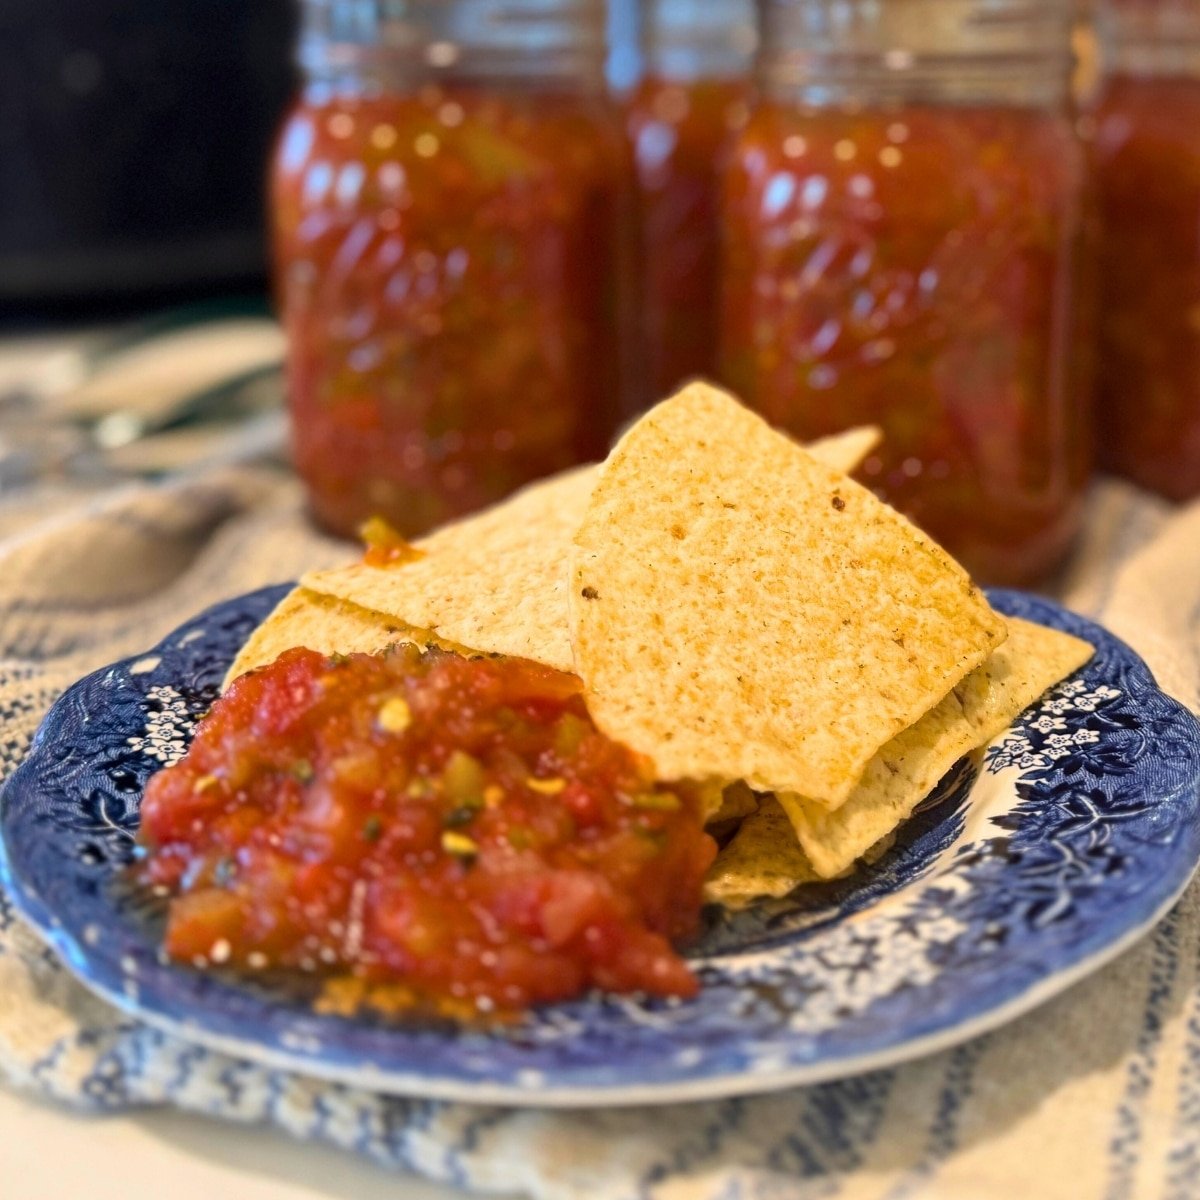
This flavor packed mild salsa canning recipe is a great way to use fresh vegetables from the garden and farmers market!

It’s a fulfilling experience when your friends and family enjoy the fruits of your labor… And it’s a great way to preserve fresh summer produce when tomatoes go on sale at the grocery store!
My kids love to have tortilla chips and fresh salsa for a snack, and it’s so easy, so I love to have this stocked up on in the pantry! The finished jars of the best salsa recipe are beautiful on the pantry shelves, and so satisfying to look at… And they make a great christmas gifts too!
Tools for Canning Mild Salsa
There are a few tools you’ll need, to make canning large batches easier, and to safely can salsa, including:
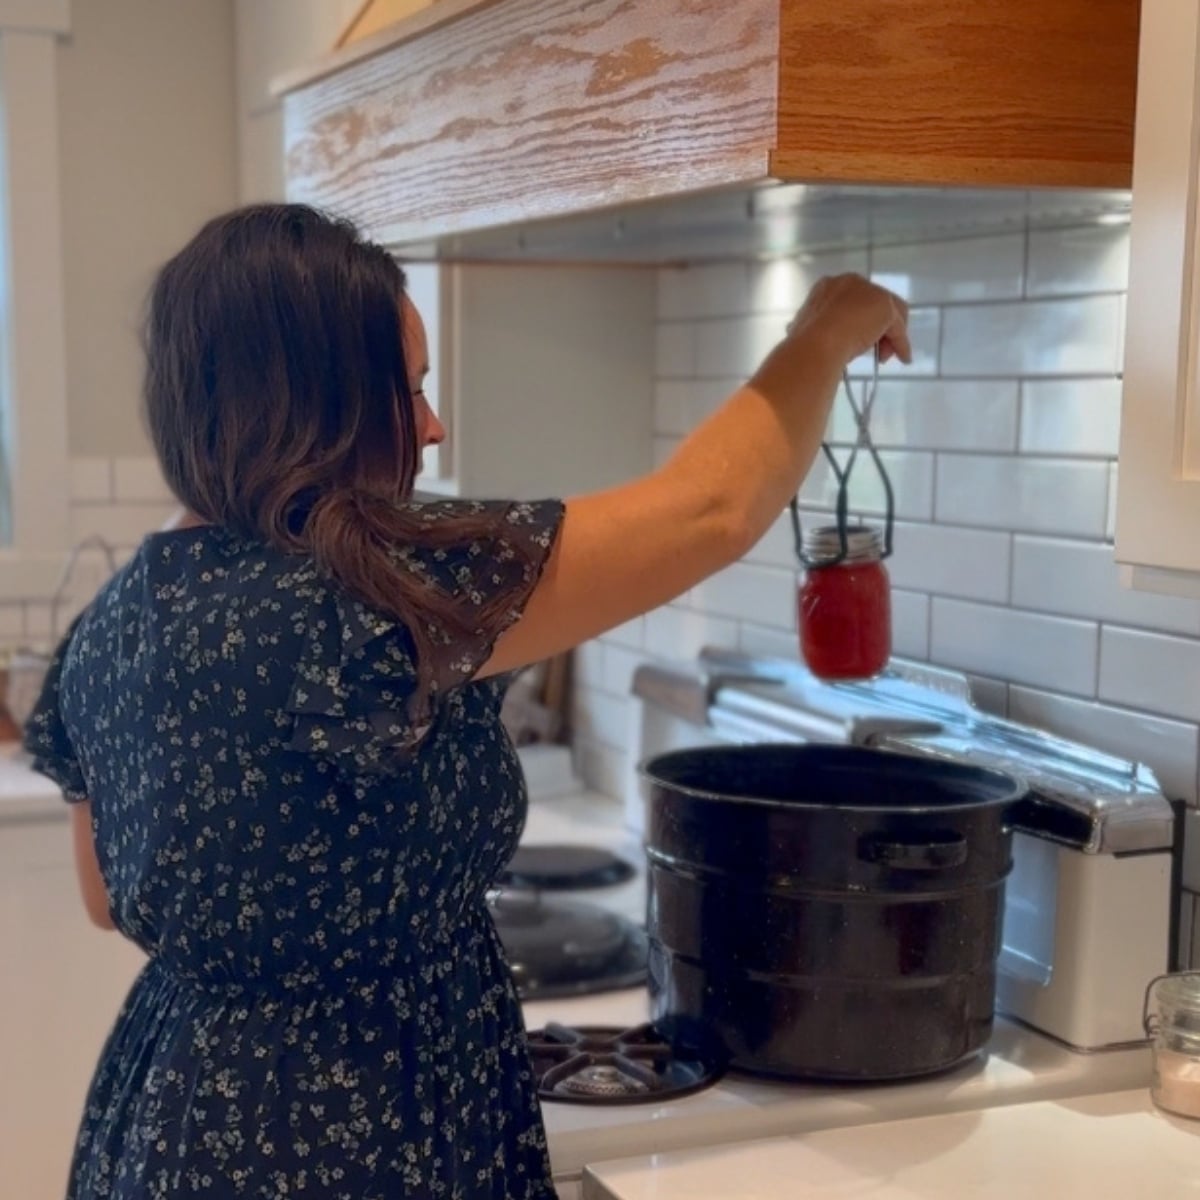
- Large Pot or Water bath canner with canner rack. If you are buying equipment a canning rack with handles makes loading the water bath canner much easier!
- 9 Pint size mason jars and new canning lids. (This recipe is tested and safe for pint size jars, not quart jars.)
- Jar Lifter for lifting hot jars out of water.
- Food Processor (optional for making several batches at a time)
- Baking Sheet (optional to remove tomato skins by roasting them in the oven.)
- Damp Cloth for cleaning rims on filled jars.
- Plastic or Rubber Gloves for protection while cutting peppers!

Tips & Tricks for Your Best Mild Salsa!
I’ve learned a few thing canning this salsa over the years to help make sure your mild salsa canning is a success!
First off, if you’re like me and love a salsa with some serious body, here’s a little secret: chop those tomatoes, peppers, and onions a bit larger! This gives you that wonderfully chunkier salsa we all crave. And speaking of chunky, to avoid a watery salsa situation, always remember to drain off any excess liquid from your chopped tomatoes by placing them in a colander over the sink. It makes a huge difference!
Now, when you’re making your own salsa, you’re the boss of the heat level. This is key: you can always add more heat, but taking it away? Next to impossible! So, I always recommend tasting your salsa before you start packing those jars. If you’re feeling adventurous and want a bit more kick, go ahead and leave some of those pepper seeds or membranes in – that’s where the heat lives!
During the water bath, keep an eye on things! If your water ever stops boiling hard, simply turn the heat up until it’s bubbling vigorously again, and then reset your timer to the beginning. Safety first! Also, if you notice the water level dropping below that crucial 1-2 inches above your can lids, add boiling water to bring it back up to the correct level. Don’t let those jars peek out, the need at least 1 inch of boiling water on top of them always.
Once your jars are out of the canner, resist the urge to snuggle them up together. Don’t put hot jars too close; try to keep them at least an inch apart so they can cool down evenly. And whatever you do, don’t place hot jars onto a cold surface or in a cold draft – that’s a recipe for shattered glass, and nobody wants that!
One last thing to remember: homemade salsas tend to be a bit runnier than what you might buy at the store. If you prefer a thicker salsa once you open a jar, no worries! Just pour off any extra juice before serving. Easy!

Mild SALSA INGREDIENTS
For best salsa results and nutrition, use the freshest veggies! Make sure they aren’t damaged or old. It’s best to can your food from 6-12 hours after harvest!
For safety purposes follow these measurements and instructions to a T! This tested recipe originally came from the National Center for Home Food Preservation, so you know it’s tried, true, and safe. The only changes you can safely make are with herbs and spices. Do NOT alter the measurements of the tomatoes and lemon or lime juice. And please, for your safety, do NOT substitute vinegar for the lemon or lime juice – doing so is not safe. The original recipe calls for 2 tablespoons of oregano, and I’ve happily swapped that, as safely outlined, with 2 tablespoons of cilantro leaves. Because, let’s be real, who doesn’t love cilantro in their salsa?! Here’s what you’ll need for this glorious mild salsa:
Tomatoes: We’re talking 3 quarts of them! I highly recommend using the Roma variety. They’re fleshy with less juice, which means your salsa will be wonderfully chunky with less liquid – exactly what we want!
Homemade spicy or mild salsa canning recipes are usually more watery than store bought… So the best kind of tomato to use is the ROMA tomato variety. Another important tip is, after removing skin and chopping tomatoes, put them in a colander over the sink and drain off excess liquid. Source
Tomato Paste: Two 12-ounce cans of this stuff. It’s our secret weapon for adding a rich, concentrated tomato flavor and body to the salsa.
Lemon Juice (or Lime Juice): 2 cups of bottled juice, at 5% acidity. This is crucial for safety! Do not, I repeat, do NOT use fresh lemon or lime juice here, as the acidity levels can vary too much for safe canning.
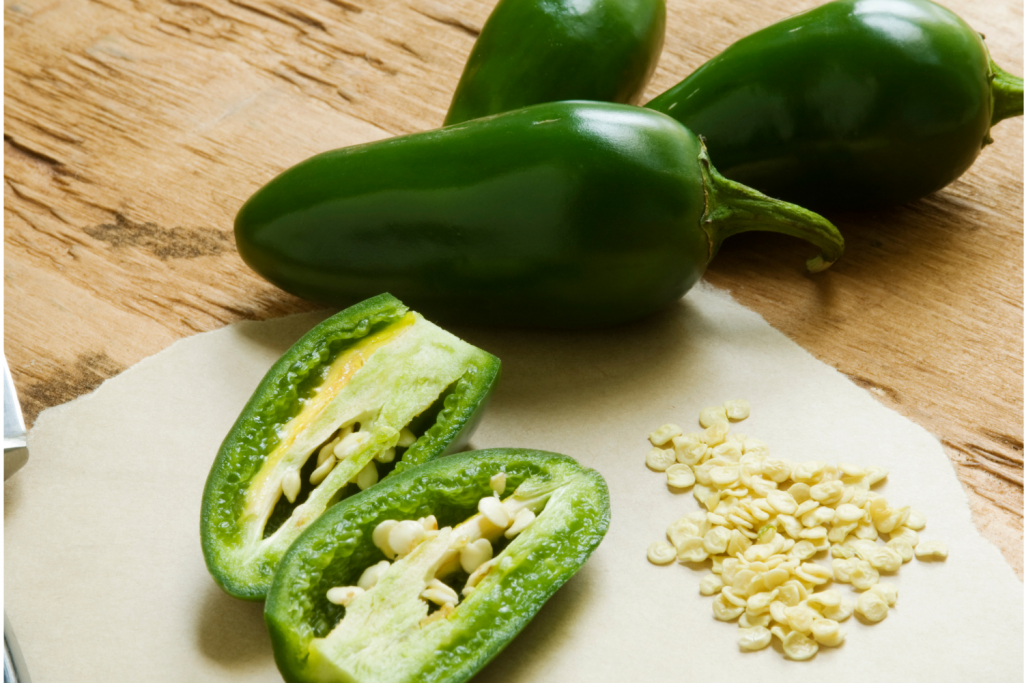
Jalapeno Peppers: 4 of ’em, seeded and chopped small. If you’re not a fan of even mild heat, feel free to swap these out for green bell peppers. You could also use other chili peppers or your favorite hot peppers if you’re feeling feisty, but remember, this is a mild salsa recipe!
Green Peppers (Mild or Sweet): 6 of these beauties, chopped and seeded. Bell peppers or sweet peppers work perfectly here, adding a lovely freshness and bulk to your salsa.
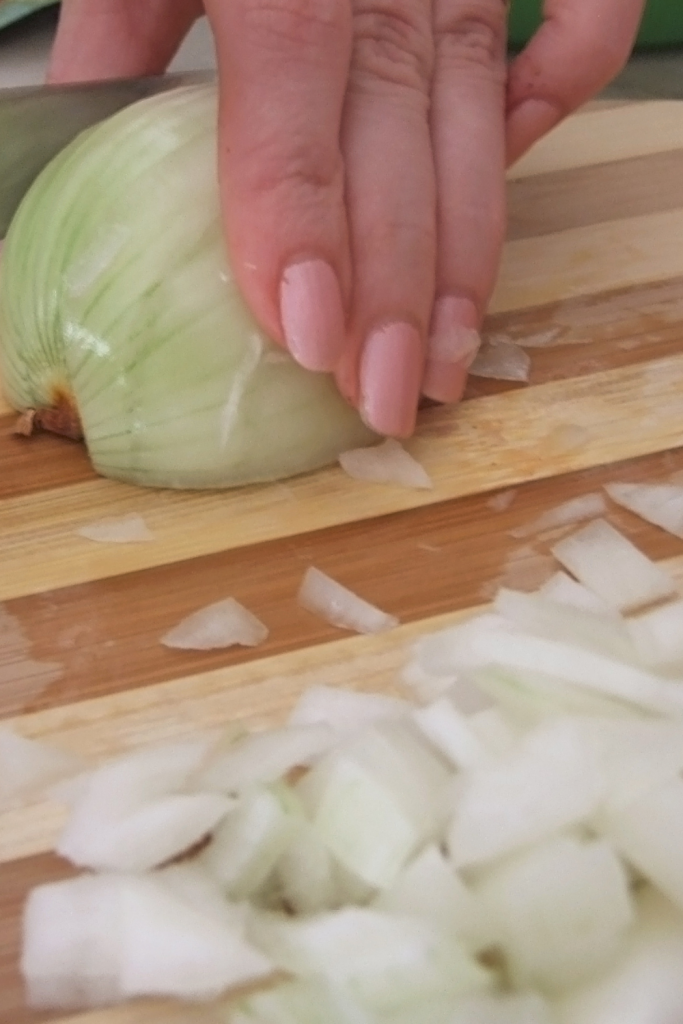
Onions: 3 cups, chopped. They bring that essential savory depth to the mix. Garlic: 4 cloves, minced small. Because what’s salsa without a punch of garlic? Salt: 1 tablespoon. For seasoning and helping to bring out all those delicious flavors. Sugar: 1 tablespoon. Just a touch to balance out the acidity and enhance the sweetness of the tomatoes. Ground Cumin Powder: 1 tablespoon. This spice adds that warm, earthy, classic salsa flavor that we all love. Cilantro: 2 tablespoons. Whether it’s fresh, dried, or freeze-dried, cilantro adds a bright, fresh note that I just adore in salsa! Black Pepper: 1 teaspoon, ground. A little kick to round out the spice profile.

Get Canning!
Alright, time to turn those fresh, chopped ingredients into amazing salsa! First, get your pint canning jars and lids sanitizing in the dishwasher – easiest way! While they’re cleaning, set up your water bath canner. Fill it halfway, place the rack, and start heating the water to 150-180 degrees. You’ll need enough water to cover your jars by an inch or two during processing.
Now, for prep! Wear gloves when handling peppers – your hands (and eyes!) will thank you. Chop off pepper stems, remove seeds/membranes, and give them a chunky chop for the pot. Next, coarsely chop your peeled tomatoes, draining any excess liquid to keep your salsa chunky, not soupy. Add them to the pot with the peppers. Throw in your chunky chopped onions, garlic, and cilantro. Finally, stir in the salt, sugar, and cumin.
Bring that salsa to a boil, then reduce heat and simmer for 30 minutes, stirring often to prevent sticking. Carefully ladle the hot salsa into your hot, clean jars, leaving 1/2 an inch of headspace – that’s crucial for safe expansion during processing. Use a knife to remove any air bubbles, then wipe the jar rims clean for a good seal. Place on the lids, and you’re ready for the water bath!
DO YOU HAVE TO COOK SALSA BEFORE CANNING?
For this mild salsa canning, Yes, you need to cook it first. It’s safer and yields a much better quality of salsa if you cook salsa before canning… here’s what the national center for home food preservations says:
Hot-packing is absolutely the way to go when it comes to getting all that pesky air out of your jars, and it’s definitely my top pick for anything going into a boiling-water canner. When you first hot-pack your food, the color might not look much different than if you’d just tossed it in raw. But trust me on this! Give it a little time in storage, and you’ll see that both the color and flavor of your hot-packed salsas are far superior! Source
DO YOU HAVE TO USE VINEGAR WHEN CANNING SALSA?
NOPE! This recipe is completely safe and uses lemon or lime juice instead! To can salsa safely, you need to add acid, this is usually vinegar, but I do not like the flavor vinegar adds. Hence, this is my favorite salsa recipe for canning!
HOW LONG IS Homemade CANNED SALSA GOOD FOR?
Homemade canned salsa is best if used in the first year! After 1 year, home canned salsa loses nutrition and flavor. After opening a jar, store in the refrigerator for 1 week.
CAN YOU FREEZE SALSA IN MASON JARS?
Yes you can freeze fresh salsa in mason jars as long as they are FREEZER SAFE MASON JARS. Also, make sure to leave a large space at the top unfilled for expansion of fluids when freezing!
DO YOU HAVE TO PEEL TOMATOES FOR CANNING SALSA?
You do not HAVE to peel tomatoes for canning salsa. However, tomato skins can grow the bacteria that causes botulism, so blanch them and remove skins to minimize the risk. Tomato skins can also become tough or fibrous after cooking, so it makes a better salsa if you remove skins too.
More Salsa Canning Recipes
Tomatillo Salsa Canning Recipe
I want to know what YOU think – Please review the recipe card!
Mild Salsa Canning Recipe
Ingredients
- 3 quarts tomatoes I recommend the Roma variety is fleshier with less juice, so they make your salsa chunkier with less liquid. Use fresh peeled tomatoes,
- 2 cans Tomato Paste 12 ounce cans
- 2 cups Lemon Juice at 5% acidity Must be bottled, not fresh. You can also use Lime juice at 5% acidity.
- 4 Jalapeno Peppers or green bell peppers, that have been seeded and chopped small. You can also use chilli peppers, or your favorite hot peppers.
- 6 green peppers mild or sweet, chopped and seeded. You can use bell peppers, or sweet peppers.
- 3 cups onions. chopped
- 4 cloves garlic minced small
- 1 tablespoon salt
- 1 tablespoon sugar
- 1 tbsp ground Cumin powder.
- 2 tablespoons cilantro fresh, dried or freeze dried.
- 1 teaspoon black pepper ground
Instructions
- Place 9 pint canning jars and lids into your dishwasher on the sanitize setting with hot water.
- Get your water bath canner ready be filling it a little over half way, placing the canning rack at the bottom, and heat on the stove. (the water needs to cover jars by 1-2 inches throughout the processing time. Preheat water to 180 degrees.
- Put on your Plastic or rubber gloves and prepare your mild peppers! Chop off the stem ends and remove seeds, membranes and pulp. Then chop chunky, and place into a large pot.
- Chop tomatoes into large chunks, drain off excess water, and place in a large pot.
- Chop onions, garlic, cilantro, chunky and put them into your large pot with other ingredients.
- Add salt, sugar bottled lemon or lime juice, and cumin powder.
- Bring salsa to a boil, then lower the heat to a simmer, and simmer for 30 minutes stirring every few minutes.
- Ladle hot salsa into hot sterilized canning jars, and LEAVE 1/2 an inch headspace at the top! “Headspace” is the unfilled room in the jar above the food and below the rim. This space is needed for expansion of salsa as the jars are processed!
- Remove air bubbles with a knife.
- Wipe rim of the jar clean with a clean damp cloth, or paper towel.
- Top with canning lid and rim.
Notes
Altitude Adjustments for Canning Safety
This is super important for anyone living above sea level! Water boils at a lower temperature the higher you go, which means your food needs a longer processing time to be safely preserved. So, here’s how to adjust your processing time based on your altitude: 1,001 – 3,000 feet: Add 5 minutes to the processing time. 3,001 – 6,000 feet: Add 10 minutes to the processing time. 6,001 – 8,000 feet: Add 15 minutes to the processing time. 8,001 – 10,000 feet: Add 20 minutes to the processing time. Always double-check your local altitude and adjust accordingly for safe and delicious results!Nutrition

About Juliea
Juliea is a mother of six, a sourdough baker, and a homestead builder living in Idaho. Alongside her husband and their horse, Dude, she manages a busy farmhouse and shares her love for scratch-cooking and simple homemaking. Through her blog and YouTube channel, she helps millions of families every year master the art of the handmade home.


10 comments
Ben
the tomatoes is the 3 quarts chopped or whole?
Juliea Huffaker
Hi Ben! The 3 quarts of tomatoes are chopped and ready to go. Thanks for asking
Nicole
What type of onion am I supposed to use?! White? Yellow? A different kind? Thanks!
Juliea Huffaker
Hi Nichole! I use a sweet onion, or yellow and white onions… All three work great in this salsa!
Juliea Huffaker
Hi Carrie… Thank you for pointing that out! Add the bottled lemon or lime juice before bringing it to a simmer… I will fix that in the recipe card!
Gwen
I was wondering do you mean the regular green peppers? I know it’s a stupid question but I hope you will answer it. Thank you for your recipe and time.
juliea
Hi Gwen! I meant green bell peppers;)
juliea
Hello Laura! I use the small sweet peppers, bell peppers, or Anaheim peppers! No you don’t have to use the cilantro! I just really like it;)
Natalie
Is it 1 Tbsp sugar?
juliea
Hi Natalie! Yes, thank you for bringing my attention to that typo! It is 1 tablespoon, and I fixed it on the post! Thank you!