


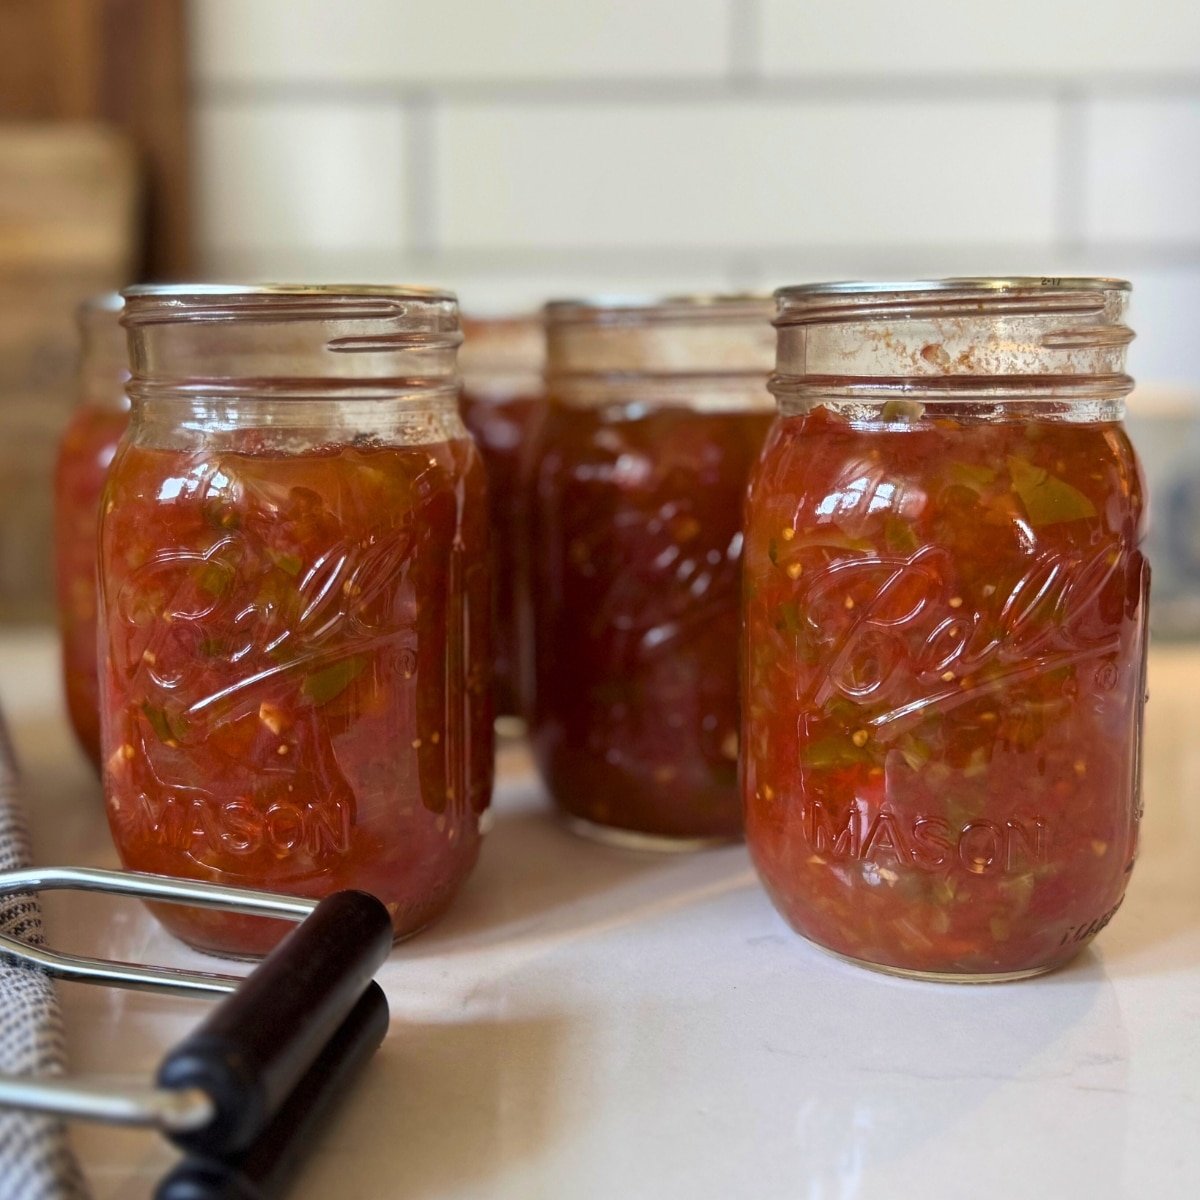
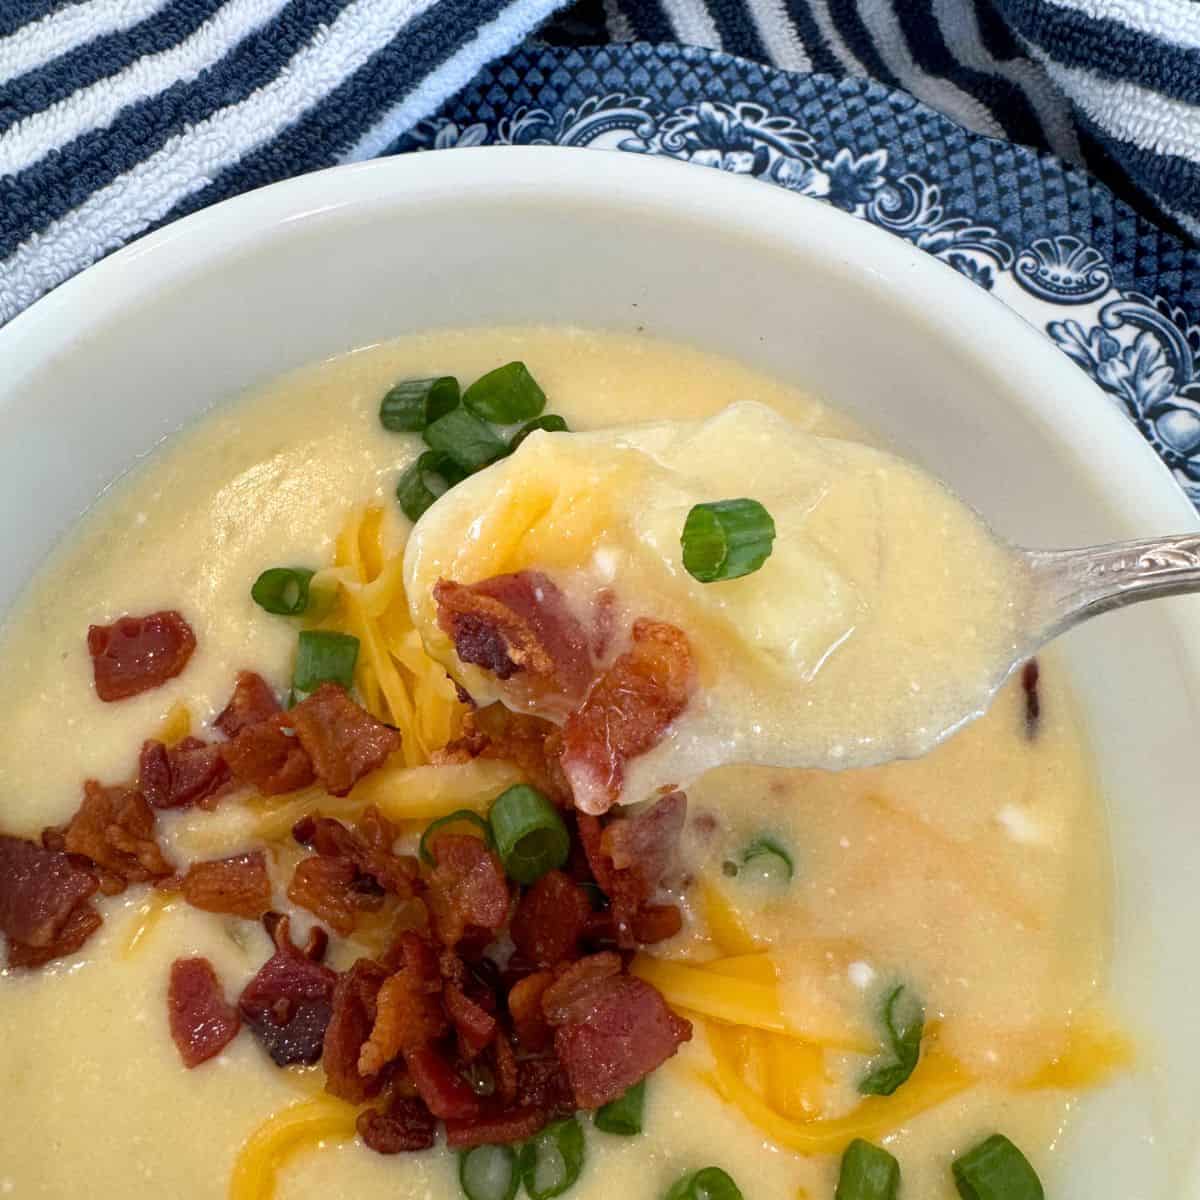
The garden is overflowing with ripe tomatoes and peppers, and this is the best chunky salsa canning recipe to use it up! Yields 7-9 pint jars.
It’s such a fulfilling experience when your friends and family enjoy the fruits of your labor… My kids love to have tortilla chips and fresh salsa for a snack, so I love to stock up on these in the pantry!
The finished jars of red salsa are beautiful on the pantry shelves, and so satisfying to look at… And they make a great Christmas gifts too!
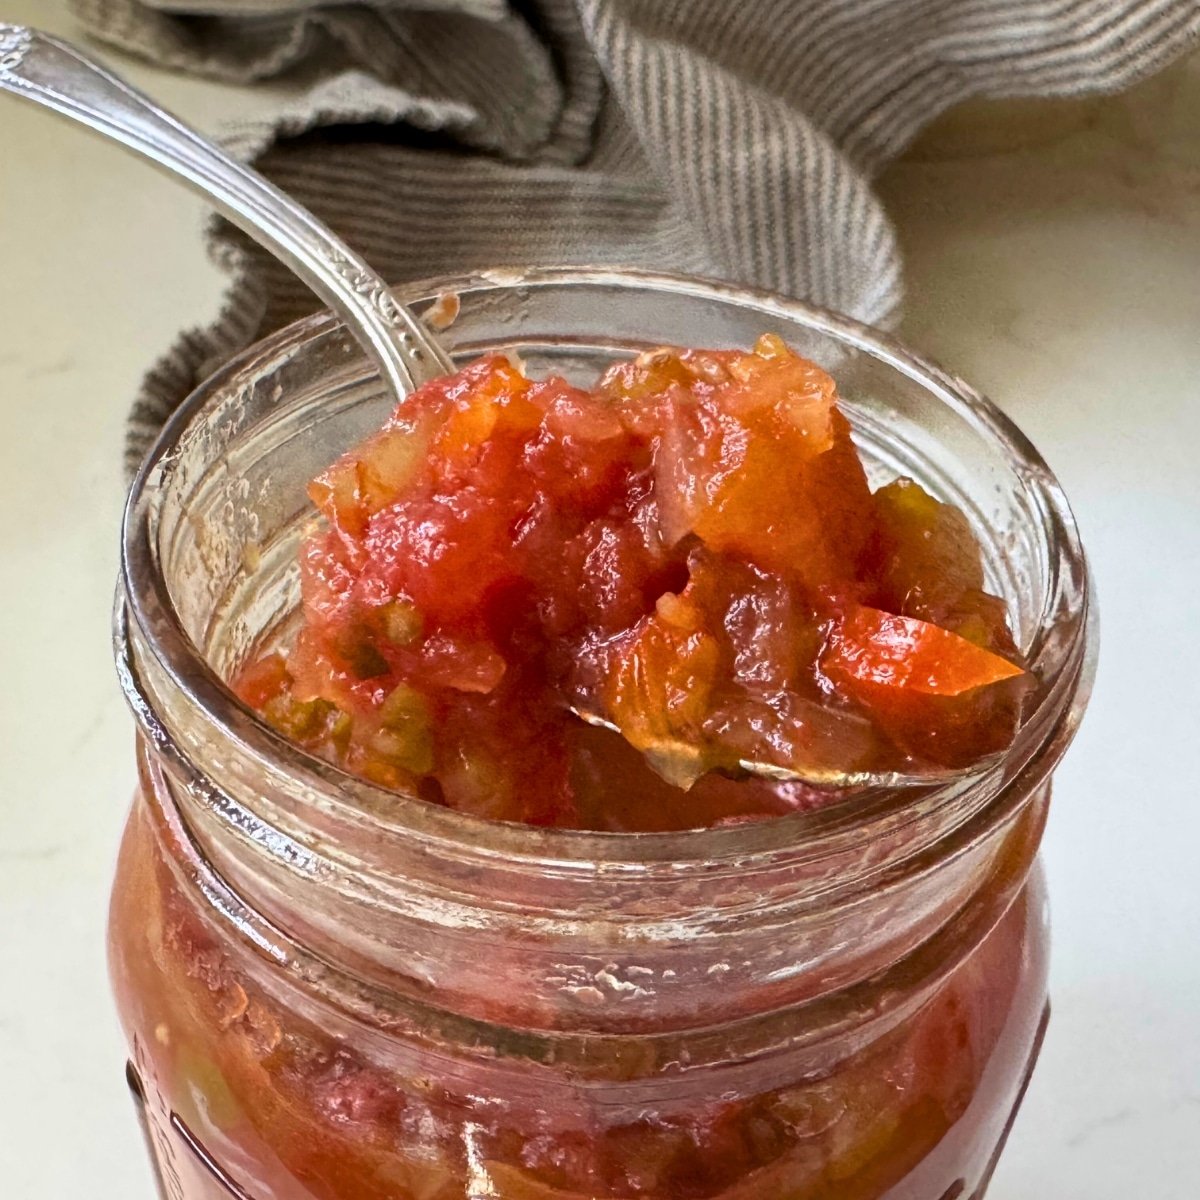
Usually homemade salsa is thinner than store bought. However, this one uses more tomato paste, and other tips for a thicker texture… And I LOVE the flavor that the cumin adds!
Key Ingredients
You can play with the types of peppers for heat, BUT it’s crucial not to reduce the amount of tomatoes or the bottled lemon/lime juice. Changing these proportions can significantly impact the salsa’s acidity, making it unsafe for canning. 🙂
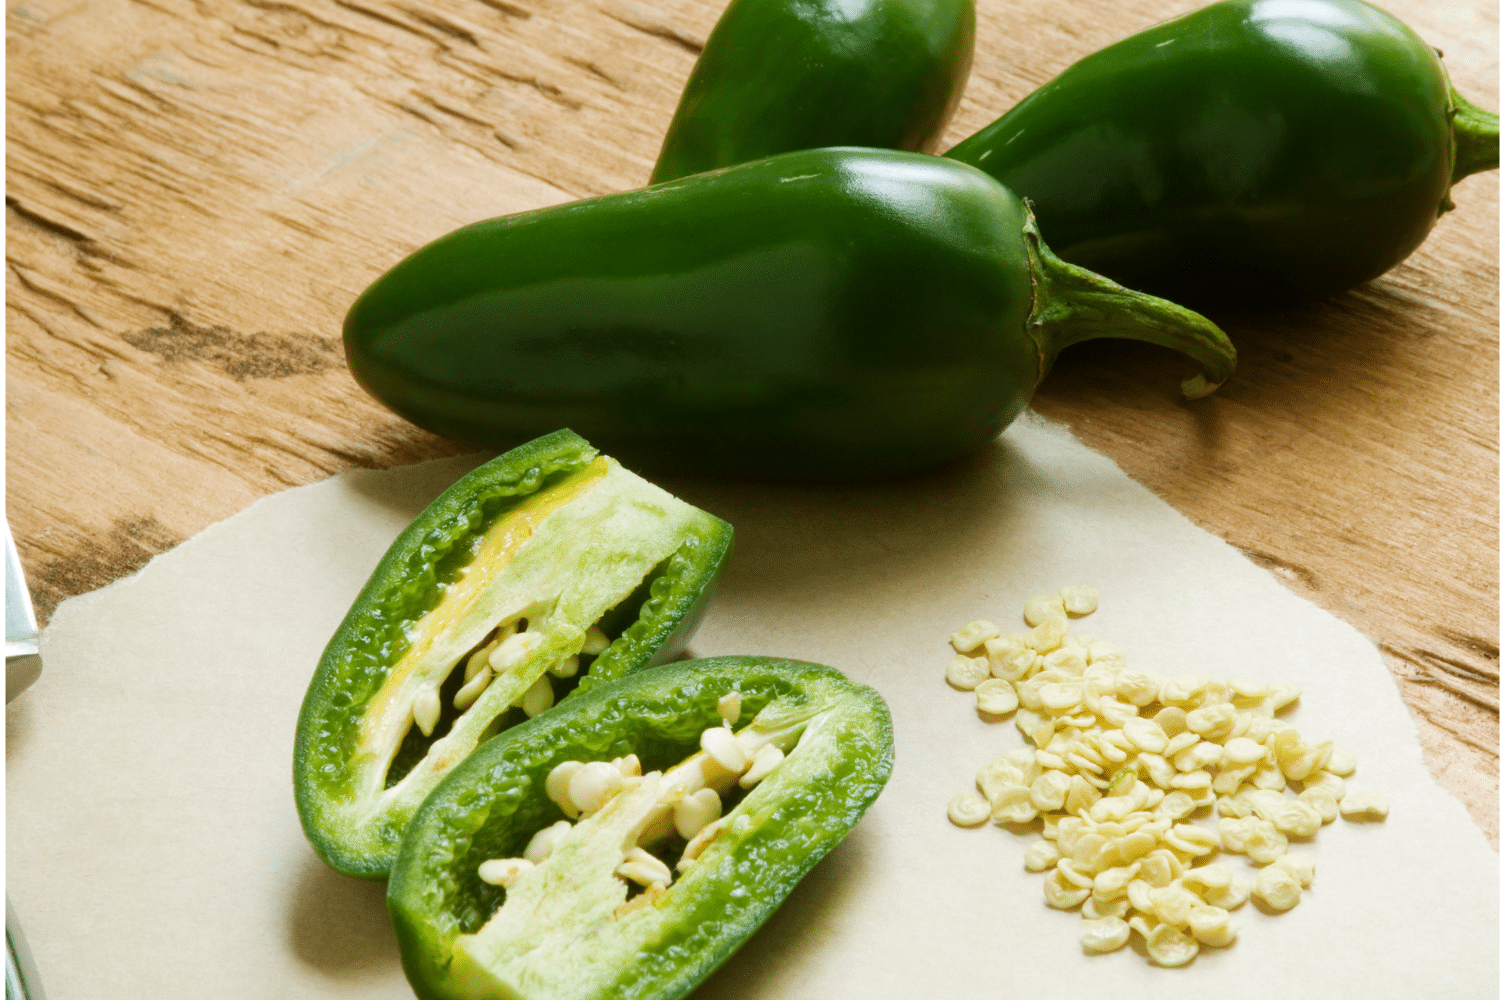
Jalapeno Peppers (6, seeded and chopped) & Long Green Chili Peppers (4, chopped and seeded): These contribute to the heat and overall pepper flavor. Feel free to adjust the quantity or type of hot peppers to suit your preferred spice level.
Fresh Tomatoes (3 quarts, peeled): For a truly chunky salsa, Roma tomatoes are your best bet. They’re meatier and have less watery pulp than other varieties, which helps maintain that desirable chunky texture after cooking and canning.
Tomato Paste: This thickens your salsa up!
Bottled Lemon Juice (2 cups): This is a critical ingredient for canning safety. The acidity from bottled lemon juice (which has a consistent pH) makes your salsa is acidic enough to prevent the growth of harmful bacteria during the canning process. Do not substitute fresh squeezed juice, because its acidity can vary. The most important thing to remember when canning salsa is acidity. This exact amount of bottled lemon juice is required for safe canned salsa that won’t spoil or harbor dangerous bacteria. 😉
Onions (3 cups, chopped) & Garlic (4 cloves, chopped): These aromatics form the flavor base of your salsa, providing a savory depth.
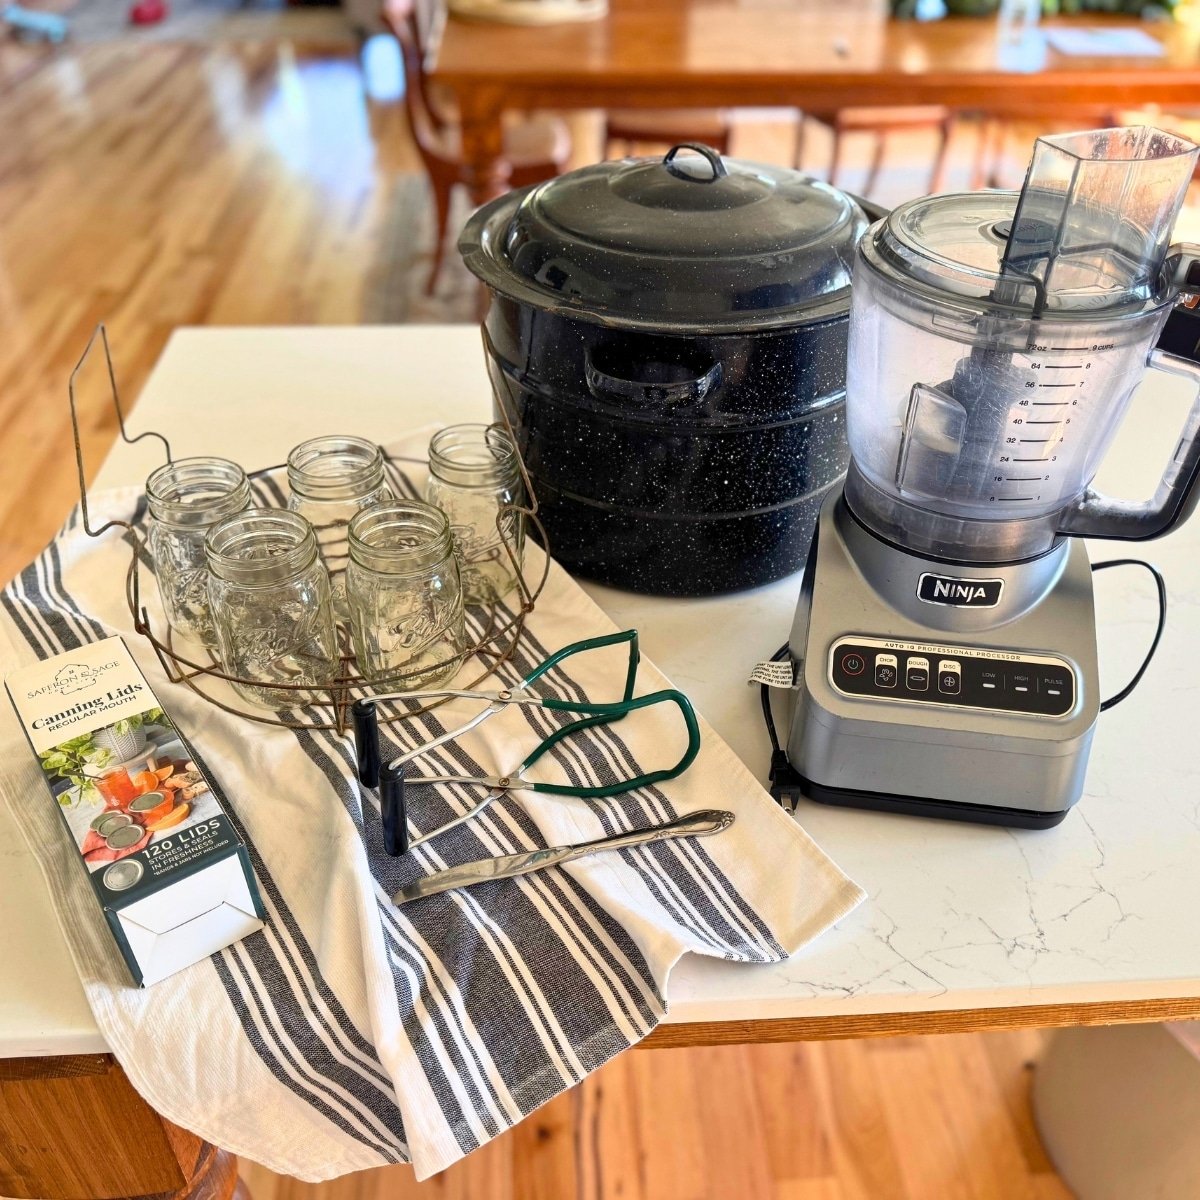
Salsa Canning Tools
Canning large batches of salsa efficiently and, most importantly, safely requires a few specific tools. Here’s why each one is important:
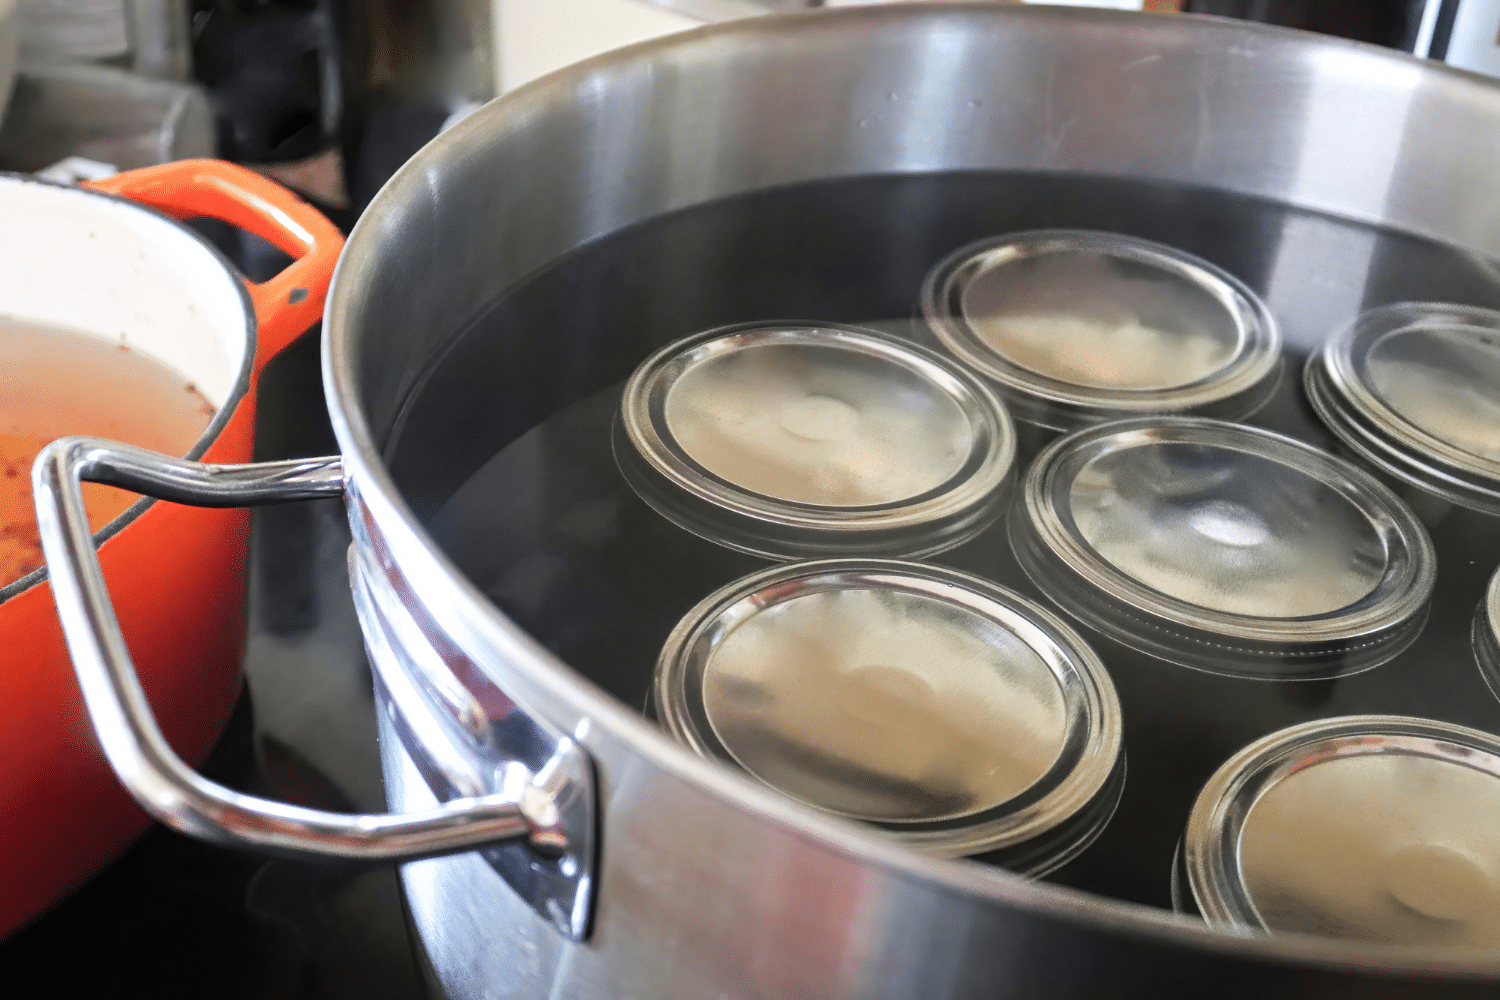
- Large Pot or Water Bath Canner with Canner Rack: This is your main equipment for processing the salsa jars. A water bath canner is specifically designed to process multiple canning jars at one time all submerged in boiling water. A canner rack is crucial for keeping jars off the bottom of the pot (preventing breakage) and allowing for even heat circulation around the jars. A rack with handles makes loading and unloading heavy, hot jars much easier… And can help prevent burns.
- Pint Size Mason Jars and New Canning Lids: Mason jars are made with thick glass that withstands the high temperatures of the canning process. A two-piece lid (flat lid and screw band) creates an airtight seal. New canning lids are absolutely essential for each batch. The sealing compound on the underside of the lid is designed for a single use. Reusing lids can result in a bad seal, spoilage and food safety hazards.
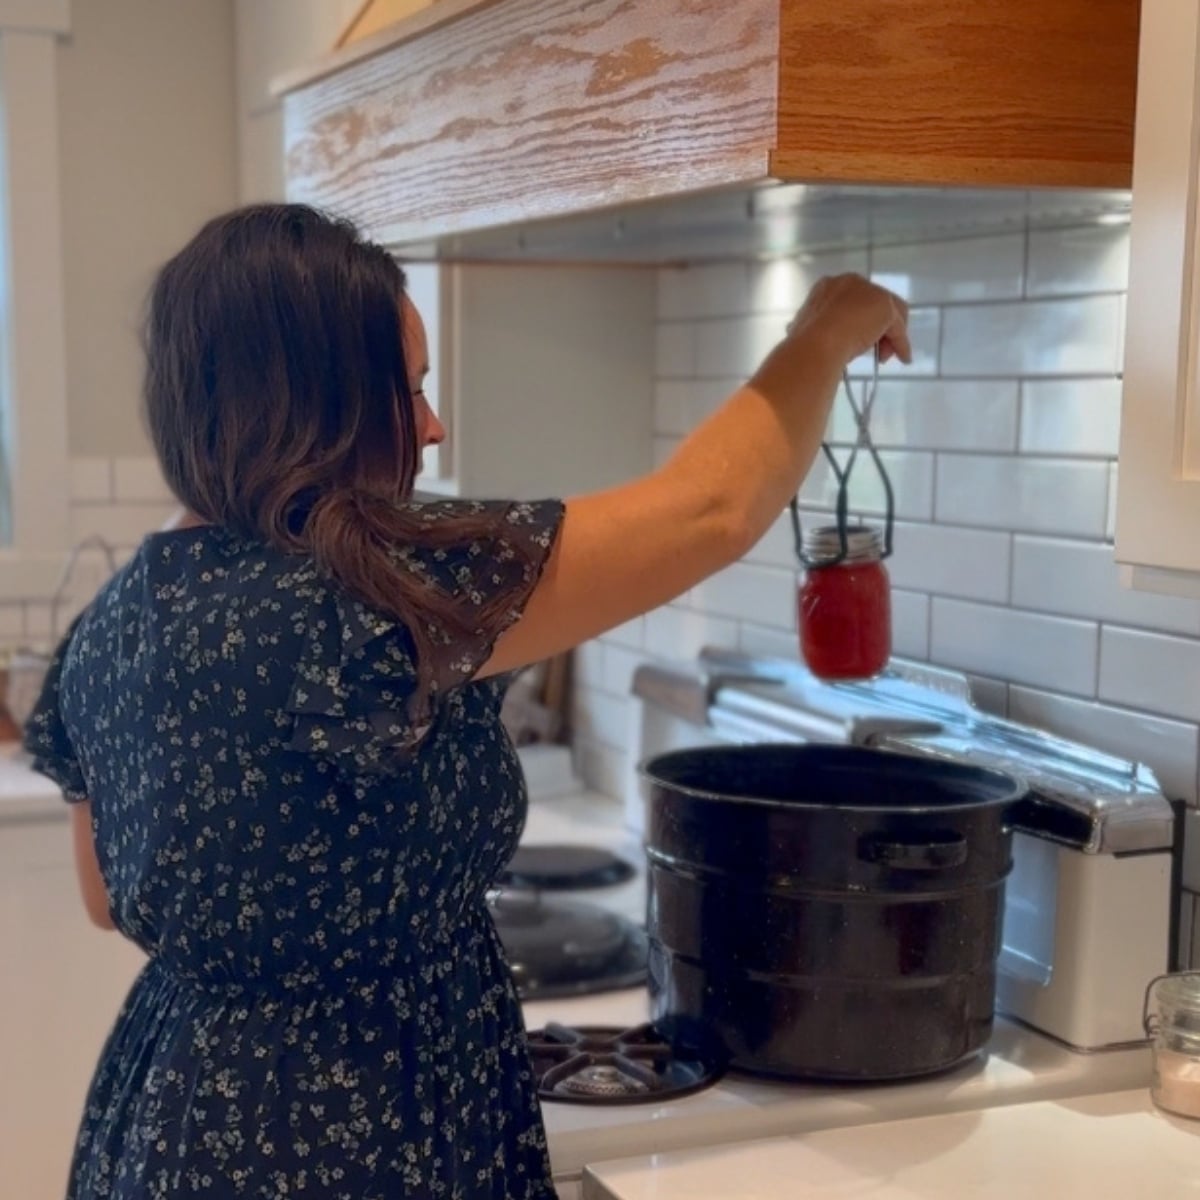
- Jar Lifter: This special tong-like tool is so important for safely handling processed hot jars. It lets you to grip hot jars and lift them in and out of boiling water without burning yourself or dropping them.
- Food Processor: This is optional… BUT, a food processor really speeds up all the prep work of your salsa ingredients. Making salsa means chopping a ton of tomatoes, onions and peppers… This chops large amounts of veg quickly saving you a a ton of time and work!
- Damp Cloth: A damp cloth is for wiping the rims of your canning jars clean before placing the lids. Even a tiny bit of food residue on the rim can prevent a good seal!
- Plastic or Rubber Gloves: Don’t make the same mistake as me… Don’t cut hot peppers, wash your hands and touch your face or your kids faces! IT WILL BURN! When handling hot peppers like jalapeños or chili peppers, gloves are a must! The capsaicin oils in these peppers can cause skin burning. Gloves are a protective barrier, preventing direct contact. Trust me!
Easy Recipe Instructions
Welcome, first-time canners! Making your own chunky salsa for canning is incredibly rewarding. Follow these steps carefully to ensure a delicious and safe product.
Step 1: Prep Your Veggies and Jars
Before you even start chopping, you’ll want to get your ingredients and equipment ready.
- Clean Your Produce: Begin by thoroughly washing all your fresh vegetables under cold water.
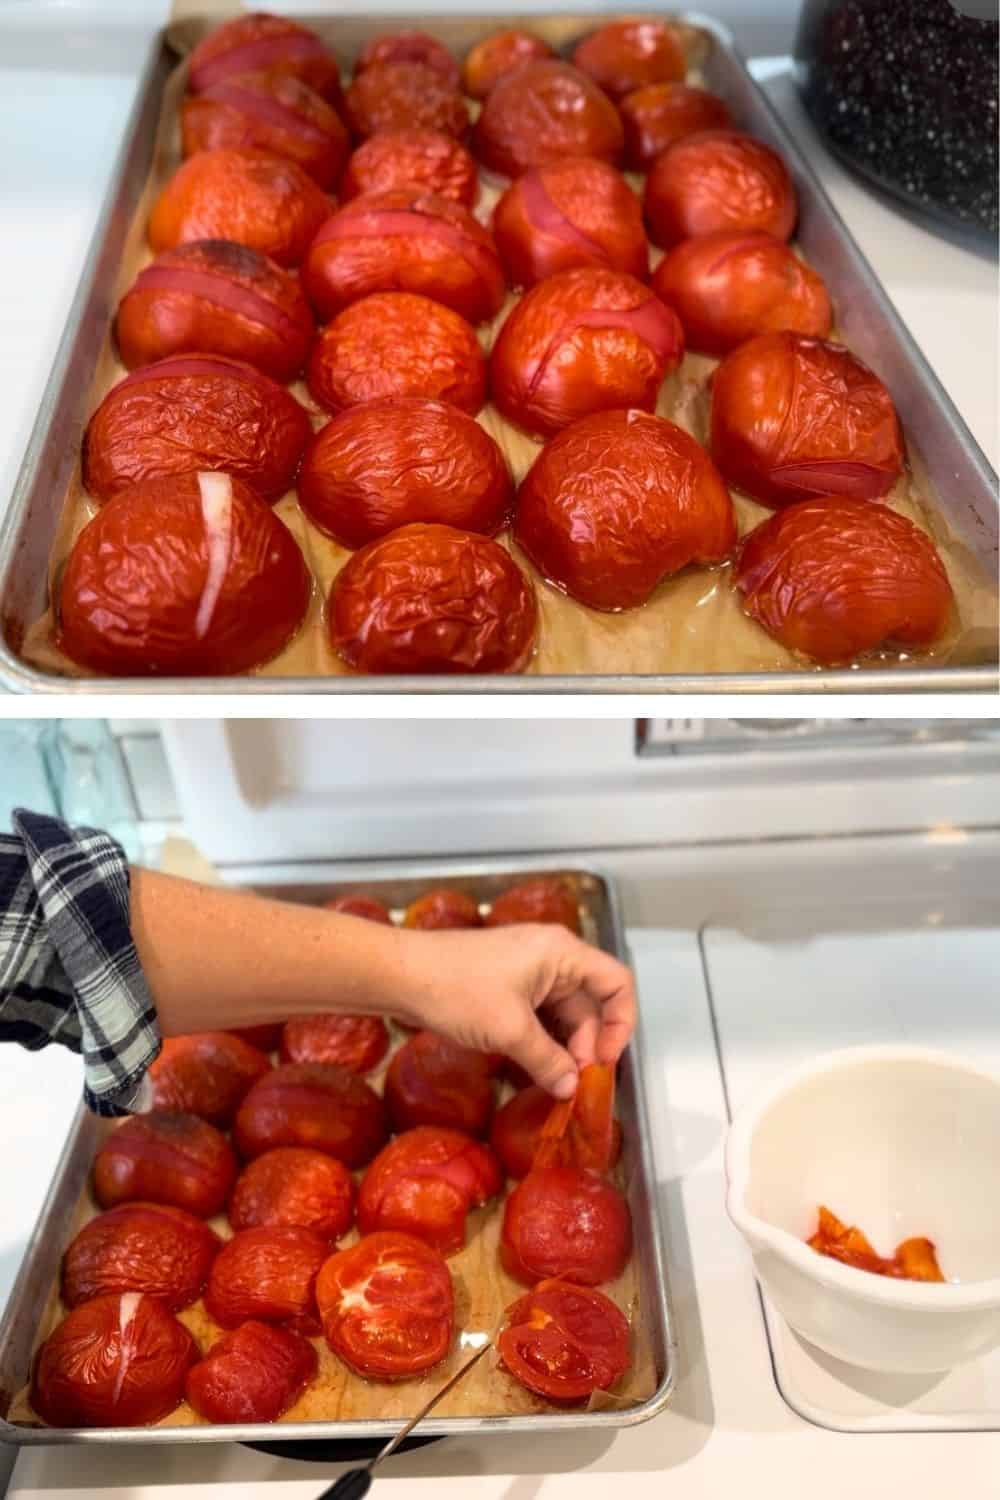
- Peel Those Tomatoes: For a truly chunky salsa, you’ll need to remove the skins from your tomatoes. You can do this quickly by blanching them in boiling water for about 30-60 seconds, then immediately transferring them to an ice bath. The skins will slip right off! Alternatively, you can roast them briefly until the skins crack, then peel.
- Sterilize Your Jars and Lids: Place 9 pint-sized canning jars and their new lids into your dishwasher and run it on the sanitize setting with hot water. This ensures your jars are clean and hot when you’re ready to fill them, which is crucial for safe canning.
Step 2: Get Your Canning Setup Ready
While your jars are sanitizing, prepare your water bath canner.
- Fill the Canner: Place the canning rack at the bottom of your large pot or water bath canner. Fill the canner a little over halfway with water.
- Preheat the Water: Place the canner on your stove and begin heating the water. You’ll want it to reach 180°F (about 82°C) before you add the hot jars of salsa. Remember, the water in the canner needs to cover your jars by 1-2 inches throughout the entire processing time.
Step 3: Chop and Combine Your Salsa Ingredients
Now for the fun part—creating your delicious salsa base!
- Handle Hot Peppers Safely: Put on your plastic or rubber gloves before you start working with the peppers! The oils in hot peppers can cause skin irritation. Carefully chop off the stem ends, then remove all seeds, membranes, and pulp. These parts hold most of the heat, so removing them helps control the spice level. Chop the peppers into chunky pieces.
- Chop Your Veggies: Chop your peeled tomatoes into large, chunky pieces. Then, chop your onions, garlic, and cilantro (if using) into chunky pieces as well.
- Combine Everything: Place all your chopped peppers, tomatoes, onions, and garlic into a large pot.
- Add the Flavorings: Stir in the salt, sugar, and ground cumin powder.

Step 4: Cook Your Salsa to Perfection
This “hot-packing” method is key for excellent flavor and a superior canned product.
Why Hot Pack? This recipe uses the hot-packing method for a reason! While it might seem counter-intuitive to cook fresh salsa, hot-packing removes air from the food, which results in better color and flavor retention during storage. Over time, hot-packed foods consistently outperform raw-packed foods in both appearance and taste.
Simmer Your Salsa: Bring the salsa mixture to a full boil over high heat, then immediately reduce the heat to a simmer. Let it gently simmer for 30 minutes, stirring every few minutes to prevent sticking and ensure even cooking.
Step 5: Fill Your Jars
Careful filling is crucial for a good seal.
- Ladle Hot Salsa: Once your salsa has simmered, carefully ladle the hot salsa into your hot, sterilized canning jars.
- Mind the Headspace: This is very important! Leave 1/2 inch of headspace at the top of each jar. Headspace is the empty space between the salsa and the rim of the jar. This space allows for the expansion of the salsa during processing and helps create a strong vacuum seal.
- Remove Air Bubbles: Use a non-metallic utensil (like a plastic knife or a specialized bubble remover) to gently slide around the inside of the jar. This releases any trapped air bubbles, which can prevent a proper seal.
- Clean the Rims: With a clean, damp cloth or paper towel, carefully wipe the rim of each jar clean. Even a tiny bit of food on the rim can prevent the lid from sealing properly.
- Secure the Lids: Place a new canning lid centered on each jar, then screw on the metal band until it’s “finger-tight” – meaning snug but not overly tight.
Water Bath Canning
There are two different kinds of canning, hot pack and raw pack. This recipe uses the HOT packing method of canning for superior color and flavor of preserved salsa!
Most of us don’t like to cook our fresh salsa too much…However, Hot packing your salsa will actually make it look and taste better in the long run!
When canning chunky salsa, you’ll hear about “hot-packing.” This simply means filling your jars with hot salsa. It’s the top choice for water bath canning because it helps get rid of trapped air. While your salsa might look similar to cold-packed salsa at first, hot-packing really makes a difference in keeping its vibrant color and delicious flavor during storage.
- Turn the heat up to high heat on water bath canner, and get water to a hard boil.
- Using a canning rack or jar lifter, lower jars into boiling water. Keep jars upright so salsa does not get into rim area and cause the seal to fail.
- If the water is not 1-2 inches above the jar lids, add more boiling water to get it up to the right level.
- Put the lid on the water bath canner, and set your timer:
- Process time: If you live between 1000 and 6000 ft elevation process at a high boil for 20 minutes. If you live above 6000 ft process at a hard boil for 25 minutes.
- . Check the canner every so often to make sure water is still 1-2 inches above jar lids, add more boiling water if needed.
- When time is up, turn off burner, and remove lid.
- Let it cool for 5 minutes, then remove jars KEEPING THEM IN THE UPRIGHT position so salsa does not get between seal.
- Set each hot jar at least an inch apart on a towel or wire rack to cool.
- Let jars cool to room temperature for 12-24 hours.
- DO NOT TIGHTEN LIDS OR PRESS ON LIDS! Jars must seal on their own to be safe.
- After 12-24 hours, remove rings and wash jars.
- Store sealed jars in a cool dry place (50-70 degrees) dark place for best results.
- If you have a jar that does not seal, put it in the refrigerator and use within a week.
Processing time kills microorganisms in home-canned foods. Properly canned foods are good if lids seal and jars are stored below 95°F. But, storing jars at 50° – 70°F will increase it’s quality over time.
TIPS for Canning Chunky Salsa
Chop tomatoes, peppers and onions a bit larger for chunky salsa!
To prevent watery salsa, After chopping tomatoes, put them in a colander over the sink and drain off excess liquid!
When you make your own salsa, you control the heat. Remember, you can always add heat, but cooling a batch down is next to impossible. Taste your salsa before packing jars. If you like more heat, leave some of the pepper seeds or membranes in!
Should your water stop boiling hard, turn the heat up till it does again, and start the timer all over again.
When the water level falls below 1-2 inches above can lids, add boiling water to bring it back to the correct level.
Don’t put hot jars too close together, try to keep them at least 1 inch apart so they can cool.
Don’t put hot jars onto a cold surface, or into a cold draft, or they can break.
Homemade salsas tend to be runnier than commercially prepared salsa. If you want a thicker salsa, just pour off extra juice after opening a jar!
Chunky Salsa Recipe Variations
This chunky salsa recipe for canning does NOT use vinegar, and I much prefer the lemon or lime juice flavor over a vinegar flavor, but you cannot safely change this.
I also LOVE the flavor that cumin adds to this salsa recipe, so I’d keep that!
There is NO fresh cilantro in this salsa recipe, you could use a tablespoon of dried cilantro as a seasoning, but not as a chopped fresh ingredient for safety purposes.
Frequently Asked Questions
Do You Have To Cook Salsa Before Canning?
For this chunky salsa recipe for canning, Yes. However, you do not have to, with all recipes. BUT is is much safer and yields a much better quality of salsa if you cook salsa before canning… The national Center for Food Preservations says:
Do You Have To Use Vinegar When Canning Salsa?
NOPE! This recipe is completely safe and uses lemon or lime juice instead! To can salsa safely, you need to add acid, this is usually vinegar at 5% acidity, but I do not like the flavor vinegar adds. Hence, this is one of my favorite salsa recipe for canning… The lemon flavor compliments salsa flavors. When a canning recipe calls for vinegar at 5% acidity, You can safely substitute it for 5% acidity lemon juice or 5% acidity lime juice.
However, when a canning recipe calls for 5% acidity lemon juice (or lime) You CANNOT substitute that for 5% acidity vinegar… That’s because even though they are both marked 5% acidity, lemon juice is actually more acidic than vinegar!
Can You Can Salsa With Water Bath?
If goes without saying at this point.. You probably know by this point that YES, you can can salsa in a waterbath canner! You can also use a pressure canner, but the processing time is different and it is not needed for safety.
How Long Is Homemade Canned Salsa Good For?
Homemade canned salsa is best if used in the first year! After 1 year, home canned salsa loses nutrition and flavor. After opening a jar, store in the refrigerator for 1 week.
Can You Freeze Fresh Salsa in Mason Jars?
Yes you can freeze fresh salsa in mason jars as long as they are FREEZER SAFE MASON JARS. Also, make sure to leave a large space at the top unfilled for the expansion of fluids when freezing!
Do You Have TO Peel Tomatoes For Canning Salsa?
You do not HAVE to peel tomatoes for canning salsa. However, tomato skins can grow the bacteria that causes botulism, so blanch them and remove the skins to minimize the risk. Tomato skins can also become tough or fibrous after cooking, so it makes a better salsa if you remove the skins too.
How Do You Fix Watery Salsa
Home canned salsa tends to be a bit more watery than store bought salsa… After opening a jar of salsa, if you want it to be thicker, just pour off excess liquid! This recipe uses more tomato paste resulting in a thicker salsa.
To prevent watery salsa, use ROMA tomatoes in salsa recipes because they are more fleshy and contain less water than other types of tomatoes. Also, look for a recipe with tomato paste!
DO NOT alter canning recipes to add tomato paste, the ratio of tomatoes to acid in a recipe is to create the correct PH for safe canning. Altering this ratio can cause bacteria to grow in jars and is not safe.
What Is The Best Tomato For Canning Salsa?
Homemade salsa is usually more watery… So the best kind of tomato to use is the ROMA tomato variety. Because Roma tomatoes have more flesh and less water than other types of tomatoes! Another important tip is, after removing skin and chopping tomatoes, put them in a colander over the sink and drain off excess liquid.
You May Also Enjoy These Recipes
Thanks for stopping by Farmhouse Harvest! You may also enjoy my super easy homemade bread recipe. Or try the fresh Pico De Gallo! For preserving, the Strawberry Freezer Jam in super fast, easy and a favorite!
Let me know what YOU think!
If you use this recipe… I’d really appreciate a review… Thank YOU so much!!!
Chunky Salsa Canning Recipe – Easy Water Bath
Ingredients
- 3 quarts of peeled fresh tomatoes – The Roma variety is fleshier with less juice so they make a chunkier salsa!
- 2, 12 ounce cans of Tomato Paste
- 2 cups Lemon Juice bottled at 5% acidity or lime juice at 5% acidity.
- 6 Jalapeno Peppers that have been seeded and chopped small. You can also use chili peppers or your favorite hot peppers.
- 4 long green chilies chopped and seeded.
- 3 cups of chopped onions.
- 4 cloves of Garlic chopped.
- 1 Tablespoon of salt
- 1 Tablespoon sugar
- One tablespoon of ground Cumin powder.
- And a teaspoon of black pepper.
Instructions
- Place 9 pint canning jars and lids into your dishwasher on the sanitize setting.
- Get your water bath canner ready be filling it a little over half way, placing the canning rack at the bottom, and heat on the stove. (the water needs to cover jars by 1-2 inches throughout the processing time. Preheat water to 180 degrees.
- Put on your Plastic or rubber gloves and prepare your peppers! Chop off the stem ends and remove seeds, membranes and pulp. Then chop chunky, and place into a large pot.
- Chop tomatoes into large chunks, and place in a large pot.
- Chop onions, garlic, cilantro, chunky and put them into your large pot with other ingredients: tomato paste and lemon juice at 5% acidity.
- Add salt, sugar and cumin powder.
- Bring salsa to a boil, then lower the heat to a simmer, and simmer for 30 minutes stirring every few minutes.
- Ladle hot salsa into hot steralized canning jars, and LEAVE 1/2 an inch headspace at the top! "Headspace" is the unfilled room in the jar above the food and below the rim. This space is needed for expansion of salsa as the jars are processed!
- Remove air bubbles with a knife.
- Wipe jar rims clean with a clean damp cloth, or paper towel.
- Top with canning lid and rim.
- Turn heat up to high on water bath canner, and get water to a hard boil.
- 13. Using a canning rack or jar lifter, lower jars into boiling water. Keep jars upright so salsa does not get into rim area and cause the seal to fail.
- 14. If the water is not 1-2 inches above the jar lids, add more boiling water to get it up to the right level.
15. Put the lid on the water bath canner, and set your timer:
- 16. Process time: If you live between 1000 and 6000 ft elevation process at a high boil for 20 minutes. If you live above 6000 ft process at a hard boil for 25 minutes.
- 17. Check the canner every so often to make sure water is still 1-2 inches above jar lids, add more boiling water if needed.
- 18. When time is up, turn off burner, and remove lid.
- 19. Let it cool for 5 minutes, then remove jars KEEPING THEM IN THE UPRIGHT position so salsa does not get between seal.
- 20. Set hot jars at least an inch apart on a towel or wire rack to cool.
- Let jars cool for 12-24 hours.
- DO NOT TIGHTEN LIDS OR PRESS ON LIDS! Jars must seal on their own to be safe.
- After 12-24 hours, remove rings and wash jars.
- Store sealed jars in a cool dry place (50-70 degrees) for best results.
- If you have a jar that does not seal, put it in the refrigerator and use within a week.
Notes
Nutrition

About Juliea
Juliea is a mother of six, a sourdough baker, and a homestead builder living in Idaho. Alongside her husband and their horse, Dude, she manages a busy farmhouse and shares her love for scratch-cooking and simple homemaking. Through her blog and YouTube channel, she helps millions of families every year master the art of the handmade home.


15 comments
Fren
This looks great. How can I make it flavorful but also mild, without hot peppers?
Also what is a quart of fresh Roma tomatoes in weight?
Juliea Huffaker
Hello Fren! Thank you… You can substitute the hot peppers with sweet peppers 1 for1… A quart of fresh chopped roma tomatoes is about 1.25 pounds. I hope this helps!
Sandy
I seriously love this.. Why is there a layer of water at the bottom of my jars after they cooled?
Appreciate it!
Juliea Huffaker
Don’t worry if you see a little bit of clear liquid at the bottom of your jars the next day! This is just natural settling. Because we’re using fresh veggies, sometimes the juices separate a bit during the heat of the canning process… It doesn’t mean your salsa is ‘watery’ or unsafe! Just give the jar a good shake right before you open it to mix, and it’ll be perfectly chunky and delicious for your chips.
Juliea Huffaker
You can use lime juice instead of bottled lemon juice IF YOU USE 5% acidity bottled lime juice… You can’t use fresh lime juice because it has a different acidity. I hope this helps!
Beverly Richards
Can I add other peppers like bell peppers in different colors?
Juliea Huffaker
Hi Beverly! Thanks for asking.. Yes! You can use different kids of peppers just keep the same measurements! You can safely replace one type of pepper with another, but you can’t add extra.
Beverly Richards
Can you safely add like bell peppers of different colors also.
Mary
How big is the bottles of lemon juice or vinegar?
Juliea Huffaker
Hi Mary! I buy the big bottles of lemon juice at costco, but you can buy them at most grocery stores… They are 48 fluid ounces each.
Sonya Minnerly
I am assuming that the tomato paste and lime/lemon juice goes in the pot with everything else. I see no mention of them in the instructions other than don’t substitute with vinegar.
Juliea Huffaker
Hi Sonya… Yes they do go in with everything else. Thank you for the heads up!
Juliea Huffaker
So glad you enjoy it Kevin… Thank You!
Juliea Huffaker
In this recipe you can use bottled lemon juice or lime juice… I personally prefer the lime juice!
Juliea Huffaker
Thank you Karly… Tlb is a typo… Thanks of letting me know! It should be TBL, or tablespoon. Fixed… Thank YOU!