


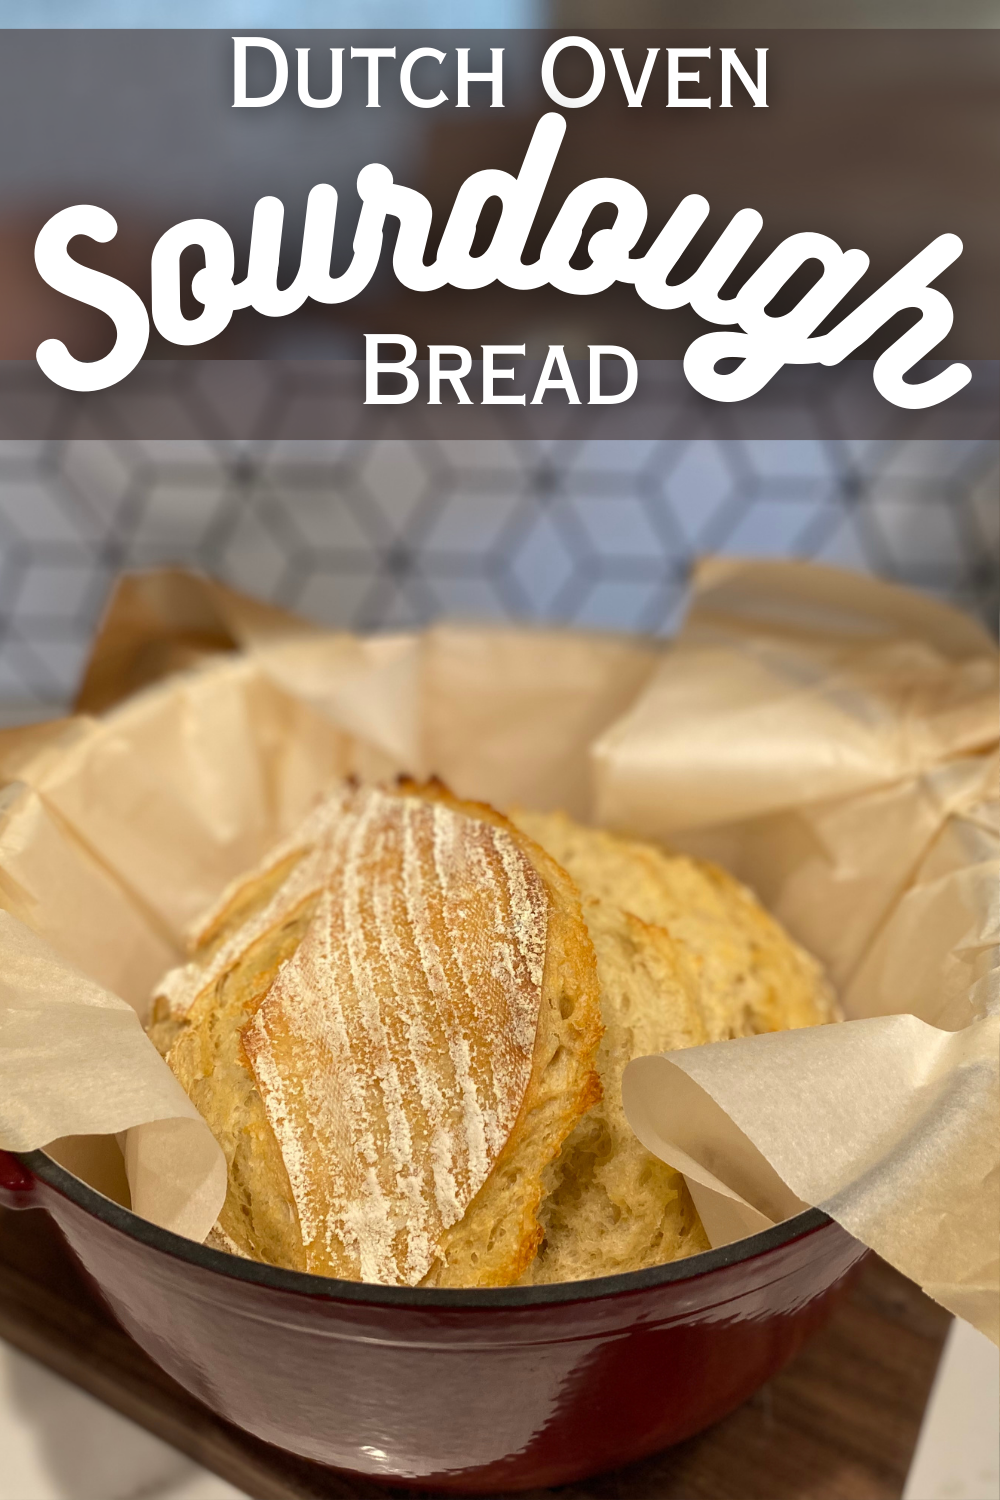
I’ve got a gem of a recipe to share with you – my all-time favorite Dutch Oven Sourdough Bread.
Seriously, this is a game-changer! You can craft your own artisan-style sourdough that is irresistibly light, fluffy, and boasts that iconic, crackling, crunchy crust right from your home kitchen. It’s the stuff dreams are made of, and perfect with soup and salad!
Say goodbye to commercial yeast. We’re diving into a simple four-ingredient wonder that allows your trusty active sourdough starter (mother dough) to work its magic through a long, slow fermentation. This method gets maximum flavor, and the best texture.
Dutch Oven Sourdough for the Best Crust
Baking sourdough in a Dutch oven is essential for getting that beautiful crust (sometimes called the oven spring and bloom)… And here’s why:
Steam Trapping: When you bake the bread with the lid on, the moisture evaporating from the dough itself is trapped inside the pot. This creates a miniature, super-hot steam oven.
Delayed Crust Formation: The steam keeps the surface of the dough moist, preventing the crust from forming too early. This allows the loaf to expand fully before the crust sets, leading to a much higher, fluffier final loaf.
Intense Heat: The preheated cast iron transfers intense, consistent heat directly to the bottom of the loaf, guaranteeing a deep golden color and a wonderfully crunchy base.
Understanding the Key Ingredient Ratios
This recipe uses a simple ratio perfect for easy handling and a great rise… Using a kitchen scale guarantees accuracy, as volume measurements (cups) for flour and starter can vary wildly!
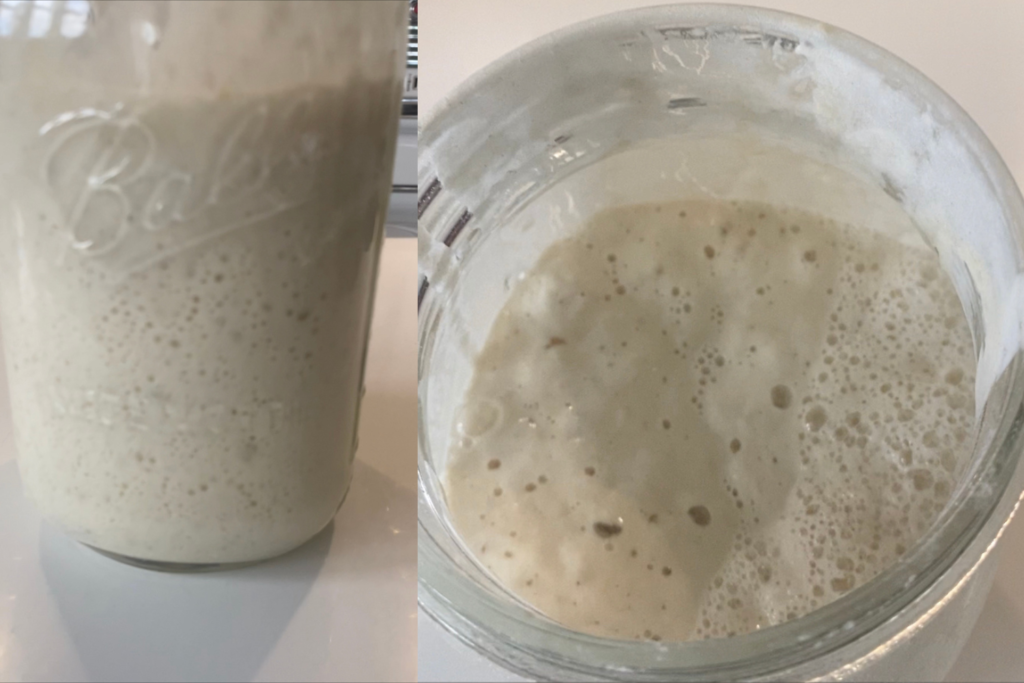
- Active Sourdough Starter: 125 grams ≈ 1/2 cup Must be active and bubbly sourdough starter (100% hydration)
- Flour: 530 grams ≈ 4 cups Sifted All-Purpose or Bread Flour
- Warm Water: 350 grams 11/2 cups Warm water speeds up initial fermentation.
- Salt: 7.5 grams = 11/2 teaspoons Salt is so important for flavor and controlling yeast activity!
The Stretch & Fold Method
This recipe avoids traditional messy kneading by using the Stretch & Fold technique during the Bulk Fermentation phase. This gentle method develops the necessary gluten structure for a lofty crumb without overworking the dough.
Repeat This 4 Times? Each set of stretch and folds builds strength in the dough structure. By resting for one hour between each set, the dough relaxes, allowing the gluten to align and develop without tearing.
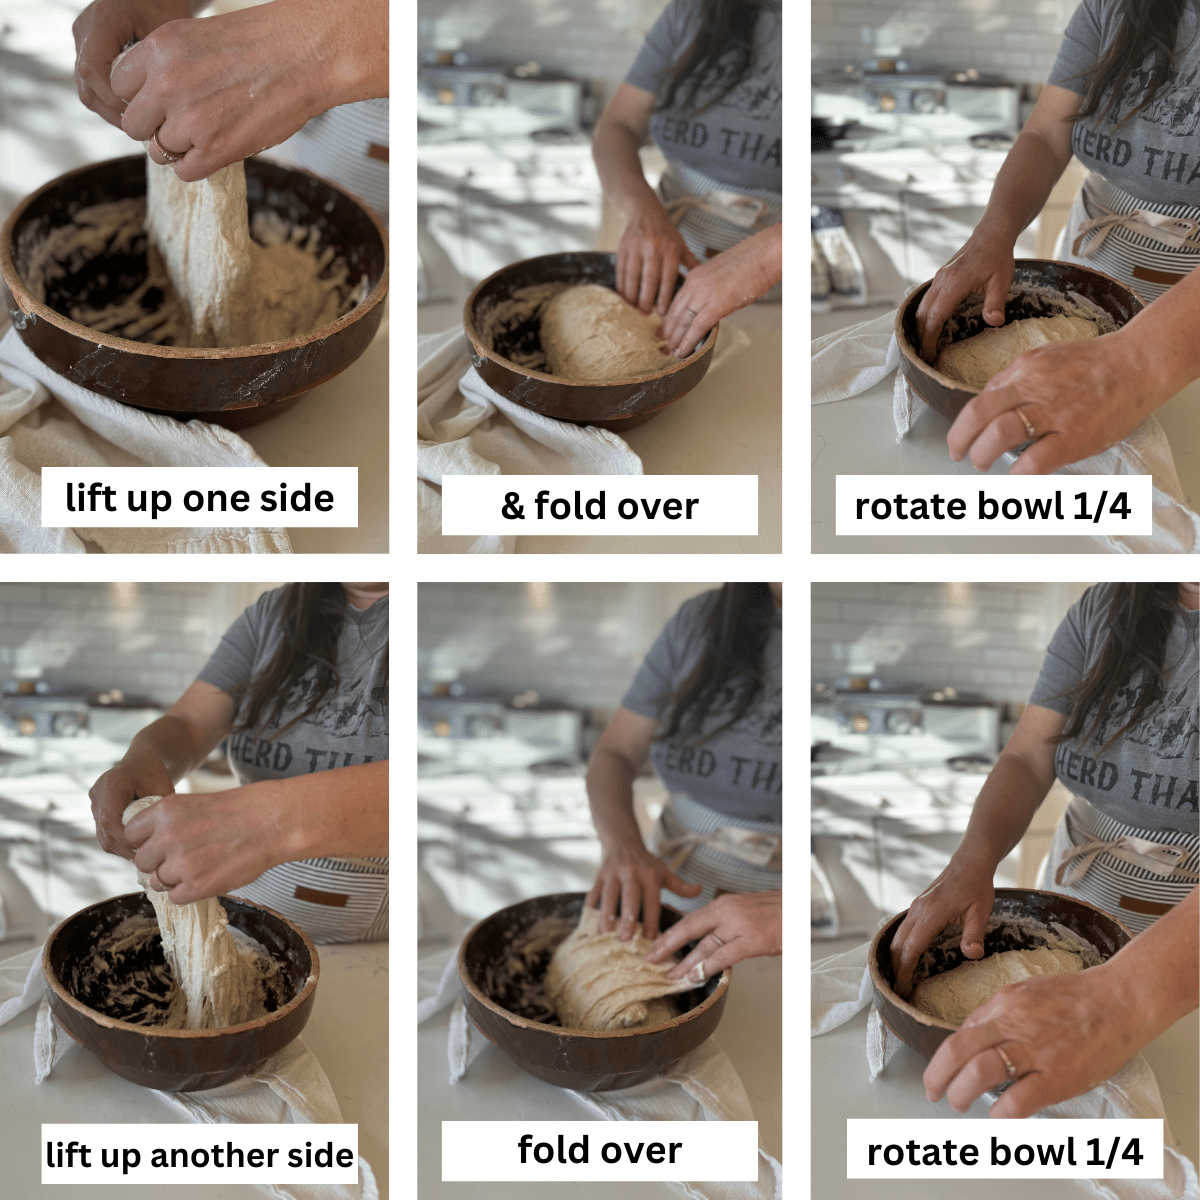
How to do it: With wet hands, grab one side of the dough from underneath, stretch it upward until you feel resistance, and fold it over the center of the dough. Rotate the bowl 90 degrees and repeat on the remaining three sides. That is one set.
Proofing Check: You are looking for a visible increase in size, bubble development, and a dome shape before moving to the final shape.

Easy 2-Day Sourdough Timeline
Mastering sourdough is about timing. Follow this simple 2-day plan to ensure your loaf is perfectly proofed and ready for baking.
Day 1: Mixing, Folding, and Flavor Building (4–6 Hours Active Time)
- Feed Starter: Overnight or 4 hours prior – Ensures your starter is active and at its peak.
- Mix Ingredients: 15 minutes – Combine flour, water, starter, and salt.
- Bulk Fermentation: 3-5 hours (varies by temperature) – Perform the 4 sets of Stretch & Folds. The dough should increase in volume by 30-50%.
- Final Shape: 10 minutes – Shape into a tight boule and place in the banneton.
- Cold Proof Overnight: (12-16 hours) Place in the refrigerator. This develops complex flavor and makes scoring easier.
Day 2: Baking (50 Minutes)
- Preheat Oven & Dutch Oven: 20 minutes – Get the pot screaming hot for max oven spring.
- Score & Bake: 50 minutes total – Bake covered, then uncovered, for a perfect crust.
I want to know what YOU think, Please review the recipe card!
Dutch Oven Sourdough Bread Recipe
Ingredients
- 1/2 cup sourdough starter 125 grams Active & bubbly 100% hydration starter. This takes the place of commercial yeast in common bread.
- 4 cups flour Sifted all purpose. You can also use whole all purpose grain flour.
- 1 1/2 cups warm water cold water will make dough take longer to rise.
- 1.5 teaspoons salt
Instructions
- In a large mixing bowl (not metal) add 1/2 cups of 100% hydration active. (Meaning sourdough starter made equal parts water and flour:)
- Add 4 cups of sifted flour. (Sift or fluff your flour before measuring so it isn't too compact in the measuring cup.)
- Add 1 and 1/2 cups of warm water
- Add 1.5 teaspoons salt. (I use the Himalayan Pink Salt, use your favorite!)
- Use a large wooden spoon to mix the ingredients together. (I do not use a dough whisk or hook in this recipe, the stretch and fold method develops the gluten instead!)
Stretch & Fold Sourdough Bread Method
- Rest: Cover with a clean damp kitchen towel, and let the dough rest in a room temperature warm place for 2 hours. (Or in a warm spot for about 1 hour)
- First time stretch and fold: Uncover the dough, with wet hands pick up one side of the dough and fold it in half, over on top of the other side of the dough. Repeat 4 times by stretching and folding over all four sides of the dough. (The dough does not stick to wet hands as badly as dry hands.)
- Rise: Cover with a clean towel (or plastic wrap), and let the dough rise till doubled again.
- Second time stretch & fold: Uncover the dough, wet your hands, then pick up one side of the dough and fold it in half, over on top of the other side of the dough. Repeat 4 times by stretching and folding over all four sides of the dough. The dough is becoming more bread-like now!
- Rise: Cover with a clean towel, and let rise till doubled again.
- 3rd stretch and fold: Uncover the dough, wet your hands, then pick up one side of the dough and fold it in half, over on top of the other side of the dough. Repeat 4 times by stretching and folding over all four sides of the dough. The dough is even more bread-like now!
- Rise: Cover with a clean towel, and let rise till doubled again.
- 4th stretch and fold: Uncover the dough, wet your hands, then pick up one side of the dough and fold it in half, over on top of the other side of the dough. Repeat 4 times by stretching and folding over all four sides of the dough. The dough is even more bread-like now!
- Shape your dough into a round sourdough loaf.
- Bulk Ferment: Dust a towel, or proofing basket, generously with flour and put it into a large round bowl to rise one last time.
- Final Shape – Turn bread dough out onto a lightly floured work surface, Shape dough into a round loaf by pushing it back and forth to build surface tension on your loaf. Using a bench scraper, Place the dough ball into the floured towel in the large bowl, or into a floured banneton basket. Dust the top of dough ball generously with flour. Cover with a towel by folding over the ends (or use another clean towel.)
- For best results and that chewy texture we all love, Place the bowl into the refrigerator to chill and rise overnight, as bulk fermentation and final rise. (Now you can rest and pick up where you left of the next day!)
Day 2 – Baking Sourdough Bread
- The next morning, when you are ready to bake, preheat your oven to 425 degrees F. and place your best Dutch oven into the oven to preheat too. Preheat together for 20 minutes.
- Score: Cut a 2-foot section of parchment and place it on your counter. Gently turn out your chilled bread dough ball onto a large piece of parchment paper. Lightly dust the top with flour, and spread it evenly over top with your hand, being careful not to push the dough down. Using a very sharp knife or razor blade, score a design into the top of the loaf dough.
- Remove your hot dutch oven from your preheated hot oven.
- Lift your dough loaf into the preheated dutch oven by the ends of the parchment paper. (It's ok for parchment paper to hang over the sides of the dutch oven, it won't burn.)
- Bake: Place the lid on your dutch oven. Use hot pads or towels to put the hot dutch oven back into the preheated oven at 425 degrees. Bake covered for 25 minutes.
- Remove lid: after 25 minutes, remove the dutch oven lid to create that crispy crust.
- Bake uncovered for 25 more minutes! Your loaf should be nice and golden brown on top by now!
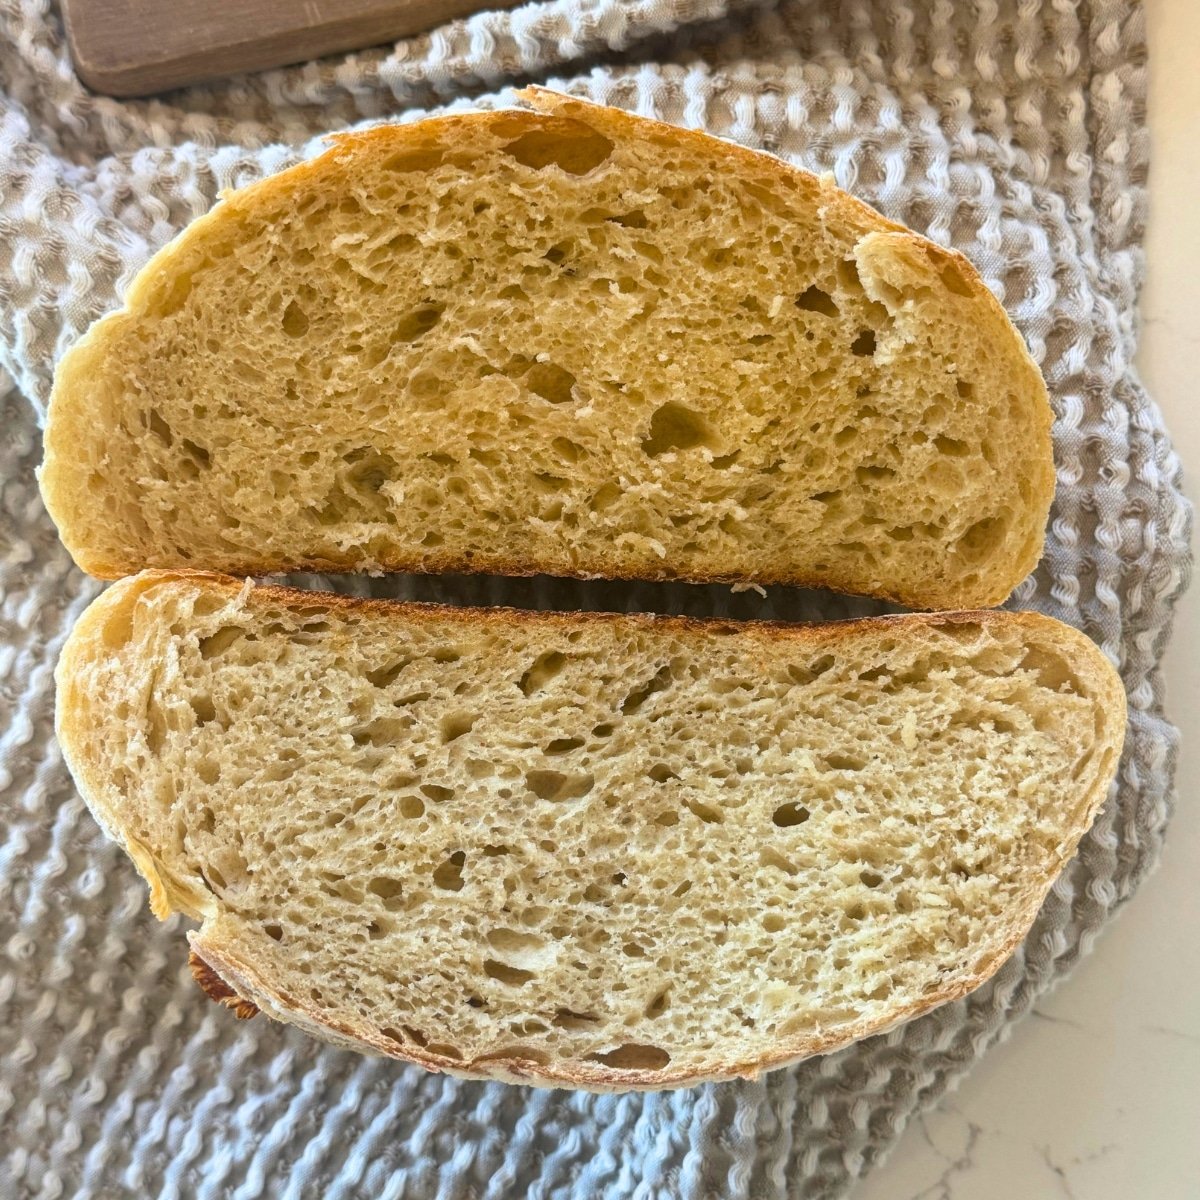
- Remove and place on a safe surface. (I like to use a cutting board or my stove top.) Place your sourdough bread on a cooling rack and cool completely to see all the beautiful air holes! If you cut into your loaf of bread right away the bread will be too soft to hold its form with all the beautiful air holes. It will taste amazing but doesn't look quite as wonderful. Enjoy!
Notes
Nutrition

About Juliea
Juliea is a mother of six, a sourdough baker, and a homestead builder living in Idaho. Alongside her husband and their horse, Dude, she manages a busy farmhouse and shares her love for scratch-cooking and simple homemaking. Through her blog and YouTube channel, she helps millions of families every year master the art of the handmade home.


2 comments
Juliea Huffaker
Hi Jolene! It may be over fermenting… I always bake my bread early the next day. Because it has cups of starter in it, it ferments faster than most sourdough recipes… Which is why you can bake in one day one. It only needs to be refrigerated for about 4 hours till it can be baked. So if you leave it in the fridge for too long it will over ferment and not rise like it should. I refrigerate mine from 4-10 hours. 24 hours is too long. Also, make sure you flour your towel or banneton basket liner really well so it doesn’t stick.
Juliea Huffaker
Hello Frank! Thank you so much for trying my recipe… Yes, you stretch and fold around your dough bowl on each side, so 4 stretch and folds…. Then let it rise a gain, and stretch and fold on all 4 sides of your dough, then let it rise again and then stretch and fold on all four sides of the dough bowl… So you let it rise and do stretch and folds 4X’s. So yes a total of at least 16 stretch and folds… You can also do more, but not less. Thank you for your question!