


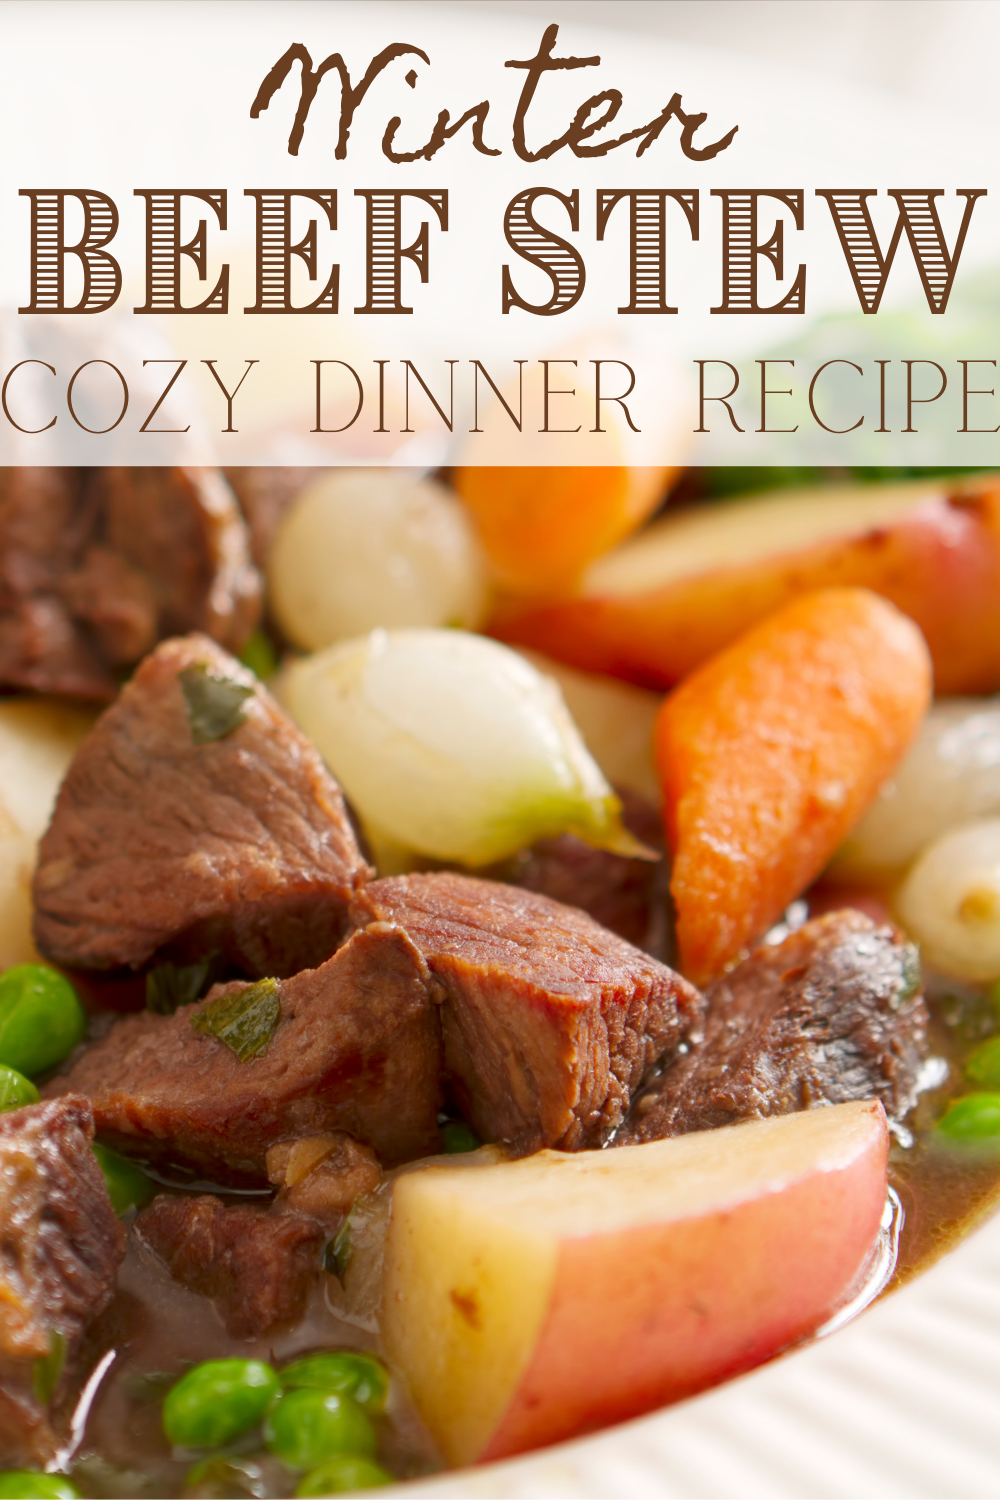
Capture the taste of sun-ripened tomatoes for a cold winter nights with this tomato soup canning recipe!
Why This Is the Best Tomato Soup Canning Recipe
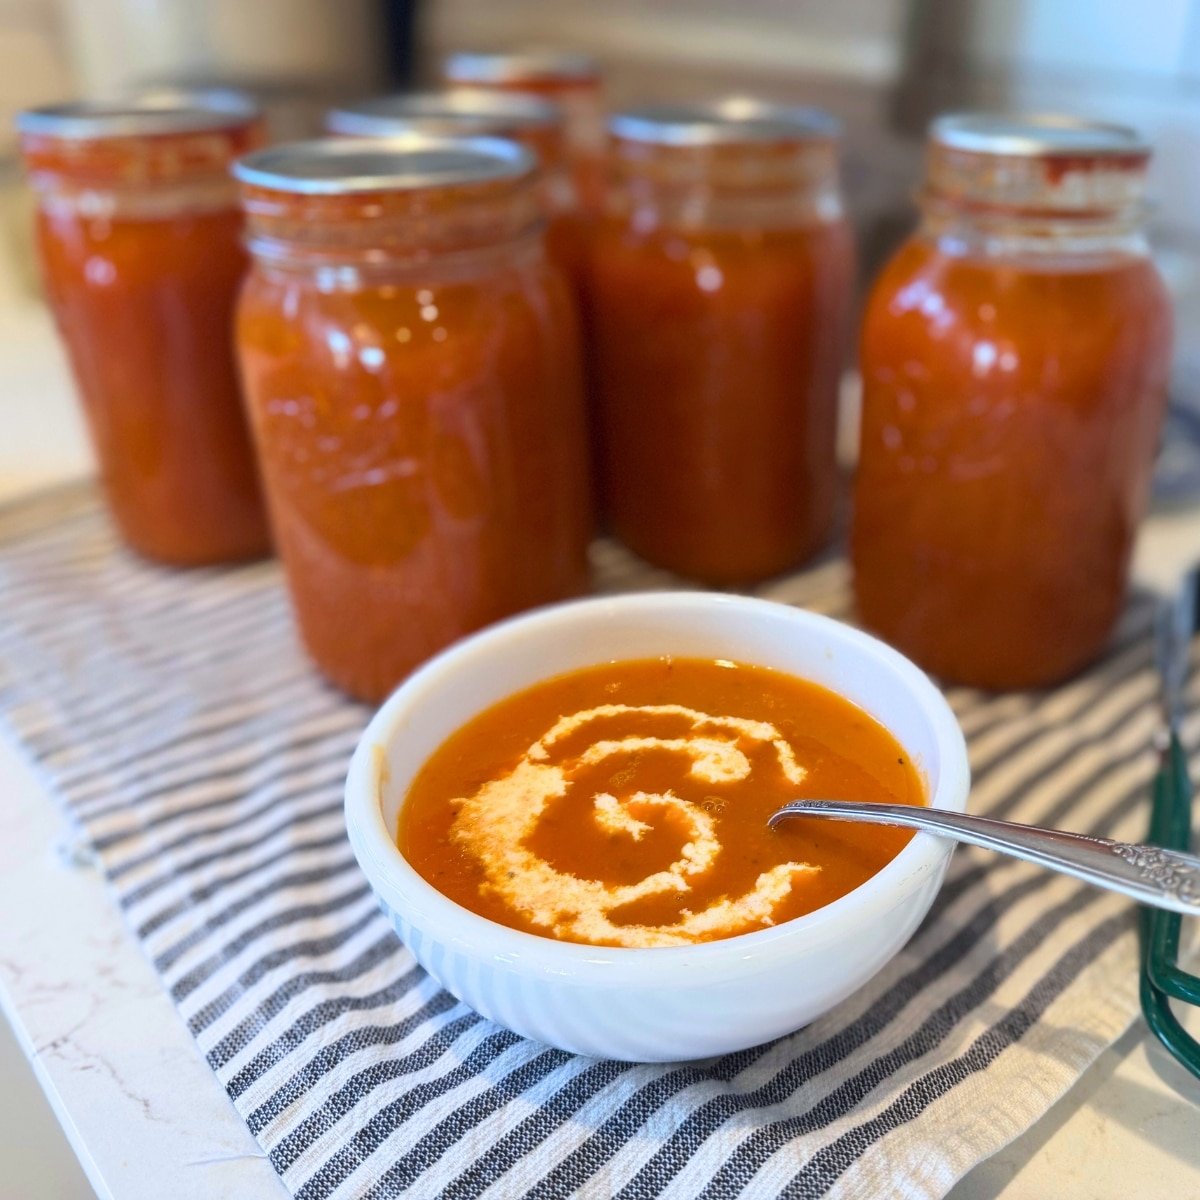
This flavorful tomato soup isn’t condensed, and does not requires diluting… It’s ready-to-serve batch that simply needs a quick reheat, and a swirl of heavy cream added right before it hits the table for that creamy tomato soup we all love.
I’ve made a few tweaks to this recipe originally from The Complete Guide to Pressure Canning, dialing back the olive oil, swapping out the onion variety for a smoother flavor, and leaning into the cozy combination of rosemary and thyme!
I know that making ingredient changes in pressure canning can sound intimidating, but the modifications I’ve made (swapping herbs, reducing fat, adding sugar, and changing onion variety while keeping the same volume) are all considered safe under tested canning guidelines.
Grab your jars and your pressure canner – it’s time to fill your pantry with the best homemade canned tomato soup!
The Ingredients & Safe Modifications
When it comes to pressure canning, adhering to a tested recipe is non-negotiable for safety. However, this doesn’t mean all ingredients are strictly off-limits for modification. Certain components, particularly flavorings, can be adjusted without compromising the heat penetration required to eliminate harmful bacteria like C. botulinum.
Here are the specific changes I made to the original recipe and why they are still considered safe for home pressure canning:
Fat Content (Olive Oil): Reduced from 3 Tbsp to 2 Tbsp. Reducing the fat is acceptable. The danger lies in increasing the amount of oil… A reduced amount poses no risk.
Onion Type: I substituted 4 medium Spanish onions for 2 cups chopped yellow onion. (The final chopped volume remained consistent with the original recipe.) Low-acid vegetable quantities must be maintained. However, the type of bulb onion (Spanish, yellow, white, red) is interchangeable in equal measure! Since the final volume of chopped onion was the same as the original recipe, the density and pH balance were preserved. 😉
Herbs & Spices: I substituted the original bouquet (bay, parsley, oregano, thyme) for 1 sprig of fresh rosemary and 2 sprigs of fresh thyme, and omitted the cayenne pepper. Substituting or eliminating them (including the cayenne pepper) does not affect the density, pH, or processing time of the soup.
Sugar Increased the sugar to 1/4 cup: Sugar, like salt, is added for flavor and preservation quality, not for safety in pressure-canned foods. It can be reduced, eliminated, or slightly increased without compromising the safety protocol.
Is This Tomato Soup Safe for Pressure Canning?


Pro Tips & Tricks for a Perfect Batch
To make sure your canned soup is safe and bursting with flavor, keep these tips in mind while you work:
Tomato Quality is Key: Since tomatoes are the star, choose the best you can find. Roma or paste tomatoes are ideal because they have fewer seeds and less water content than slicing tomatoes, giving you a richer, thicker base even before canning. Always peel your tomatoes for the best texture. A quick dunk in boiling water followed by an ice bath makes the skins slip right off!
Herb Extraction: We used fresh rosemary and thyme for a cleaner, brighter flavor. When you tie your herb sprigs together (creating a bouquet garni), leave a long piece of kitchen twine hanging over the edge of the pot. This makes it easier to discard the spent herbs before pureeing the soup.
The Venting Phase: Venting your pressure canner for the full 10 minutes before securing the weight or closing the vent is mandatory. This critical step ensures that all of the ambient air is removed from the canner and replaced with pure steam, guaranteeing you start at a true, accurate processing temperature and pressure. Don’t skip or rush this!
Headspace Check (and Re-Check): The 1-inch headspace is vital for this recipe. If you fill it too high, the contents can siphon out and contaminate the seal. You can use a headspace tool to measure precisely after you have filled the jar and removed any air bubbles!
The Creamy Finish: You can’t add cream, milk, or any dairy product before canning. But you can add it before serving! Heat the soup gently on the stove, then remove it from the heat and stir in heavy cream until you reach your desired consistency. Serve immediately with crusty sourdough bread or grilled cheese sandwiches!
I want to know what YOU think, Please review the recipe card!
Tomato Soup Canning Recipe (Ready-to-Serve)
Equipment
- 1 Pressure Canner at least 7 quarts
- 1 jar lifter
- 1 large stock pot at least 7 quarts
- 7 quart jars with new lids and bands
Ingredients
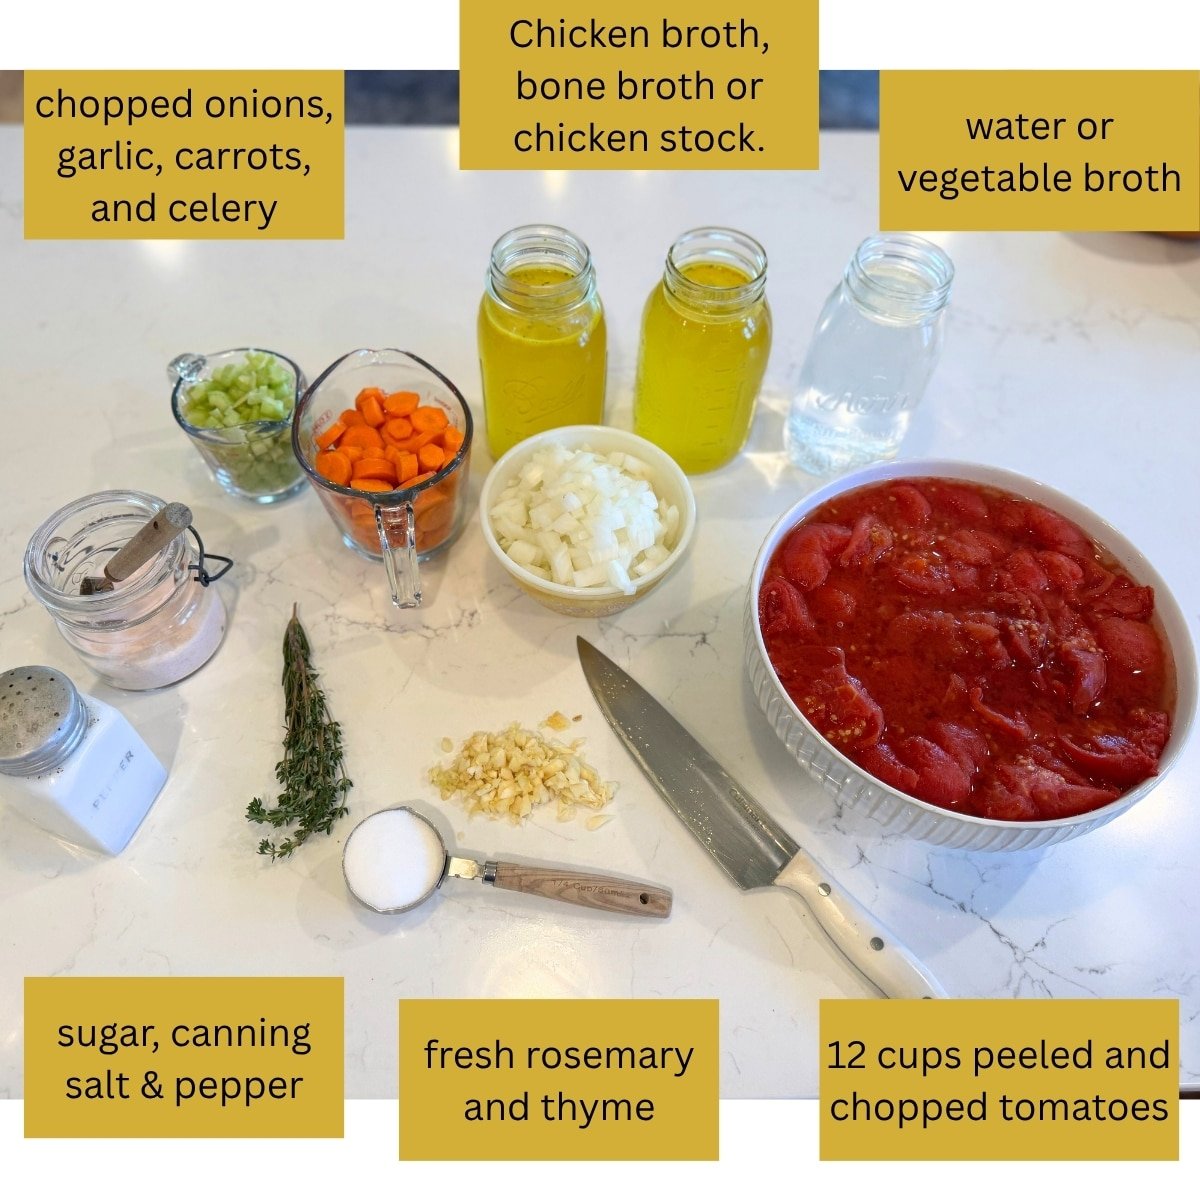
- 12 cups ripe tomatoes such as Roma or plum, peeled, cored, and chopped
- 8 cups chicken broth or chicken bone broth
- 4 cups water or vegetable broth
- 2 cups yellow onion chopped
- 2 cups carrots peeled and chopped
- 1 cup celery chopped
- 8 cloves garlic minced
- 2 Tbsp olive oil reduced from original 3 Tbsp
- 1/4 cup granulated sugar increased from original
- 2 teaspoons canning salt or to taste, optional for flavor
- 1 teaspoon ground black pepper
- 1 sprig fresh rosemary substituted for original herb blend
- 2 sprigs fresh thyme substituted for original herb blend
Instructions
Step 1: Prep Ingredients & Jars
- Prepare your onions, garlic, carrots, celery, and tomatoes by washing, peeling, and chopping them. Set aside.
- Prepare your pressure canner according to the manufacturers instructions. And seven quart jars (or fourteen pint jars), lids, and rings.
Step 2: Sauté Aromatics
- In a large stockpot (at least 7 quarts), heat the 2 Tbsp of olive oil over medium heat. Add the onions and garlic and sauté until the onions are softened and translucent, about 5–7 minutes.
Step 3: Simmer & Puree Soup Base
- Add 8 cups of chicken broth, 4 cups of water/broth, 1/4 cup of sugar, salt, and pepper to the pot.
- Tie the rosemary sprig and two thyme sprigs together with kitchen twine to create a bouquet garni. Add the herb bundle to the pot and simmer for 10 minutes.
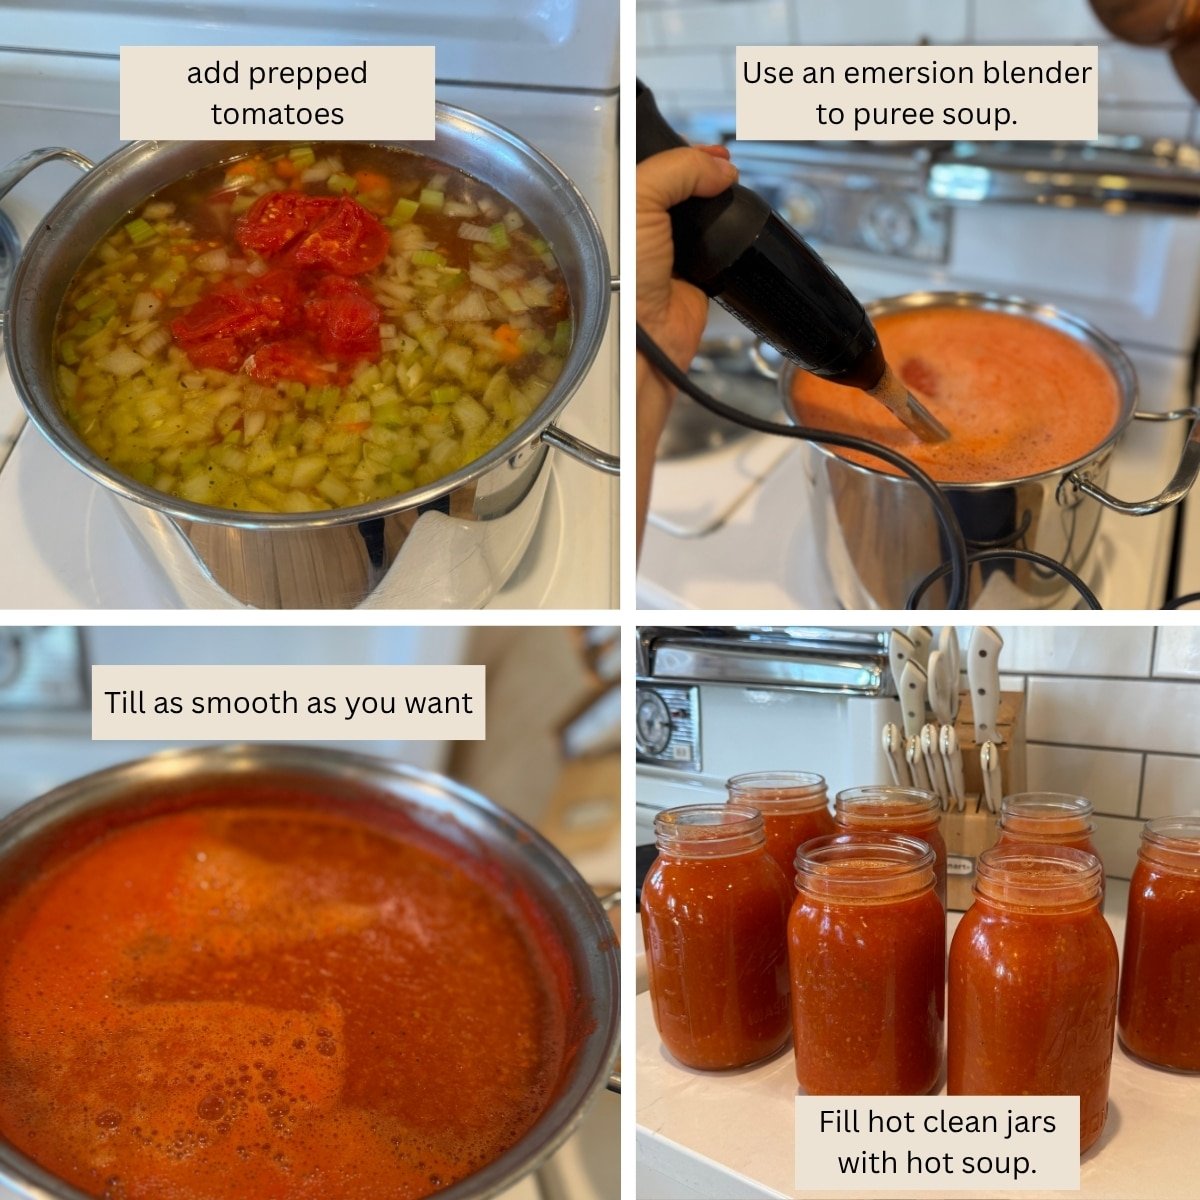
- Add the chopped tomatoes, the chopped yellow onion, chopped carrots, and chopped celery.
- Bring the soup to a boil, then reduce heat and simmer uncovered for at least 10 minutes, or until the liquid has slightly reduced and the flavors have blended. Stir occasionally.
- Remove and discard the herb bundle.
- Use an immersion blender to puree the soup until smooth… Or work in batches using a regular blender (carefully!). Then return to pot and simmer another 5 minutes to heat through.
Step 4: Pack the Jars
- Using a ladle, fill the hot jars with the hot soup mixture, ensuring it's distributed evenly.
- Leave a 1-inch headspace at the top of each jar.
- Wipe the rims clean with a damp cloth, center the lids, and secure with the rings fingertip-tight.
Step 5: Pressure Can
- Place the jars in the preheated and prepared pressure canner.
- Secure the canner lid and vent the canner for a full 10 minutes.
- Close the vent and bring the pressure up to the required 11 PSI (based on 0-1,000 ft altitude) or consult your canner manual for higher altitudes.
- Process quart jars for 75 minutes (pints for 60 minutes) at the correct PSI.
- When processing is complete, turn off the heat and allow the canner pressure to return to 0 PSI naturally. Wait at least 2 minutes, then carefully remove the lid. Wait 10 more minutes before removing hot jars.
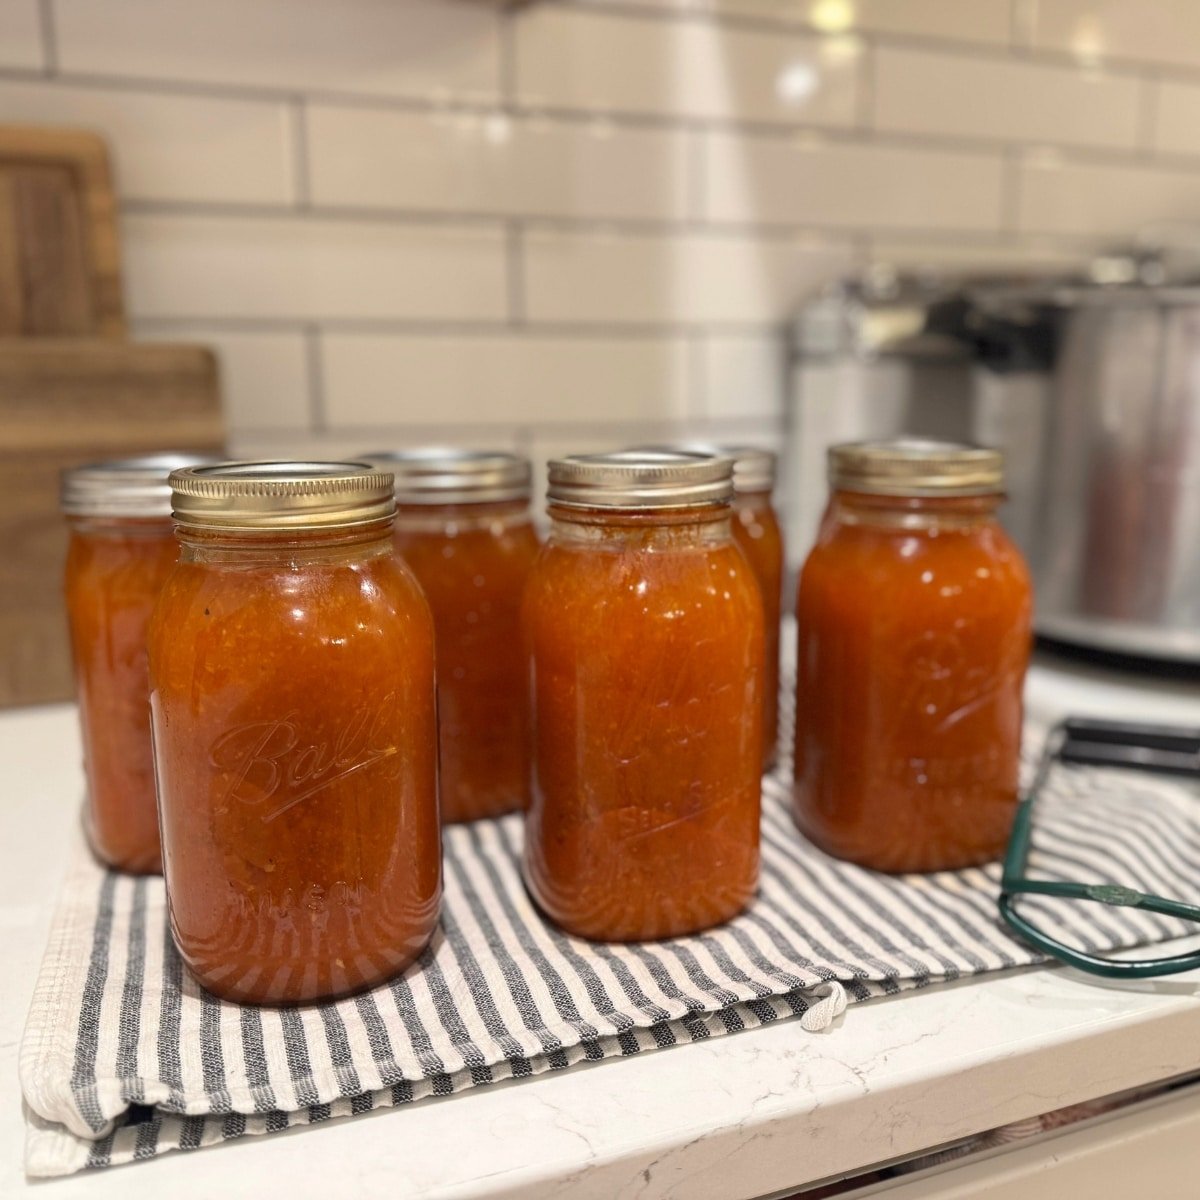
- Remove the jars and place them on a towel-lined surface to cool for 12–24 hours before checking seals.
Notes
Nutrition

About Juliea
Juliea is a mother of six, a sourdough baker, and a homestead builder living in Idaho. Alongside her husband and their horse, Dude, she manages a busy farmhouse and shares her love for scratch-cooking and simple homemaking. Through her blog and YouTube channel, she helps millions of families every year master the art of the handmade home.


1 comment
Charalyn
Made this yesterday and had to try it- and made it for lunch today! It’s absolutely delicious!