


Every good family has a recipe that stops conversations cold—the one that brings a rush of memories back with a single bite. For us, it’s Grandma’s famous soft caramels recipe.
These aren’t those sticky, hard little things you find mass-produced in a bag… These are true, old-fashioned, soft-as-velvet caramels with an intensely deep, buttery flavor and that satisfying chew you can only get from a perfect family recipe.
Grandma always swore the secret was a generous hand with the heavy cream and never letting that candy thermometer sneak past the 240∘F Firm Ball Stage—a lesson she learned the hard way (and we get to reap the rewards!).
Upgrade the annual Christmas cookie tradition! Grab the candy thermometer and fill your kitchen with the rich, warm sense of nostalgia. Trust me… These will be the treats you wrap up and pass down for generations!
Great caramel starts with great tools…
The Pan: Use a heavy-bottomed, stainless steel saucepan. Thinner pots are the enemy of smooth caramel; a heavy base ensures slow, even heating and prevents scorching.
The Thermometer: Before you start, check your candy thermometer’s accuracy! Place it in boiling water—it should read 212∘F (or slightly lower, depending on your altitude). If it’s off, adjust your target 240∘F accordingly. No need to ruin a batch because your thermometer is fibbing. 😉
Pro Tips & Tricks (Straight from Grandma’s Kitchen)
Caramel making is less about luck and more about patience. Follow these golden rules to guarantee a perfectly soft, chewy batch:
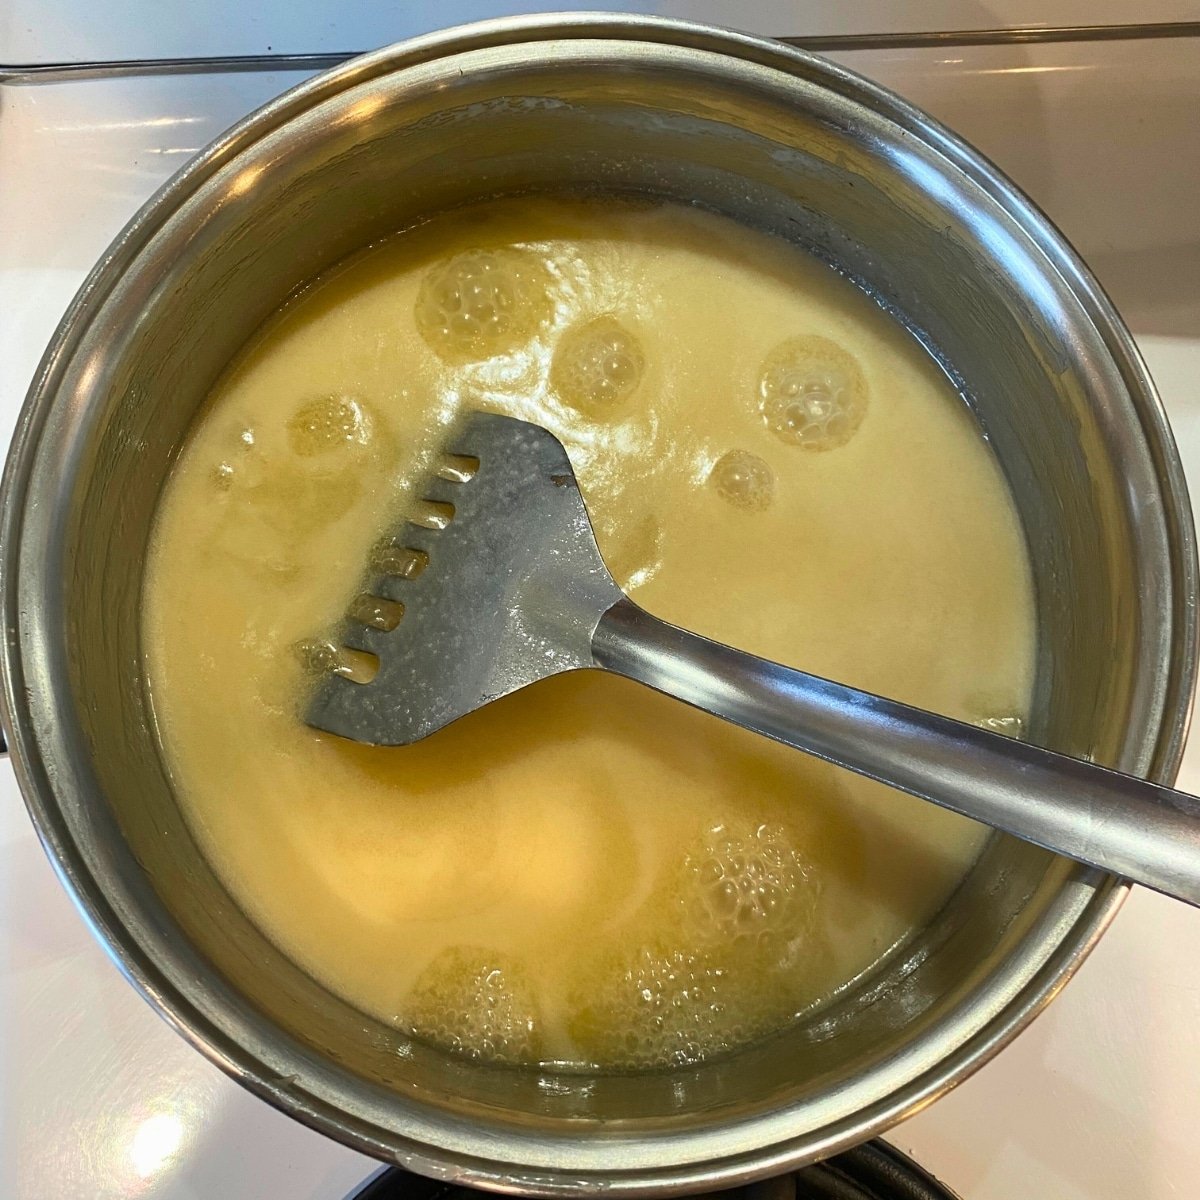
Simmer, Don’t Scorch: Grandma’s secret weapon is patience. You noted that you should aim for a slow simmer, not a violent, rolling boil. Cooking the caramel gently allows the flavors to deepen and the temperature to rise slowly, giving you far greater control and reducing the risk of scorching.
Scraping the Pot: You have to stir constantly, especially as the mixture thickens and the temperature rises. Use a flat-edged, heat-resistant spatula (a wooden spoon just won’t cut it, it needs a flat edge!) and scrape the entire bottom and corners of the pan as you stir… Caramel is prone to scorching on the bottom, which leaves a permanent, bitter taste throughout the entire batch, this prevents that!
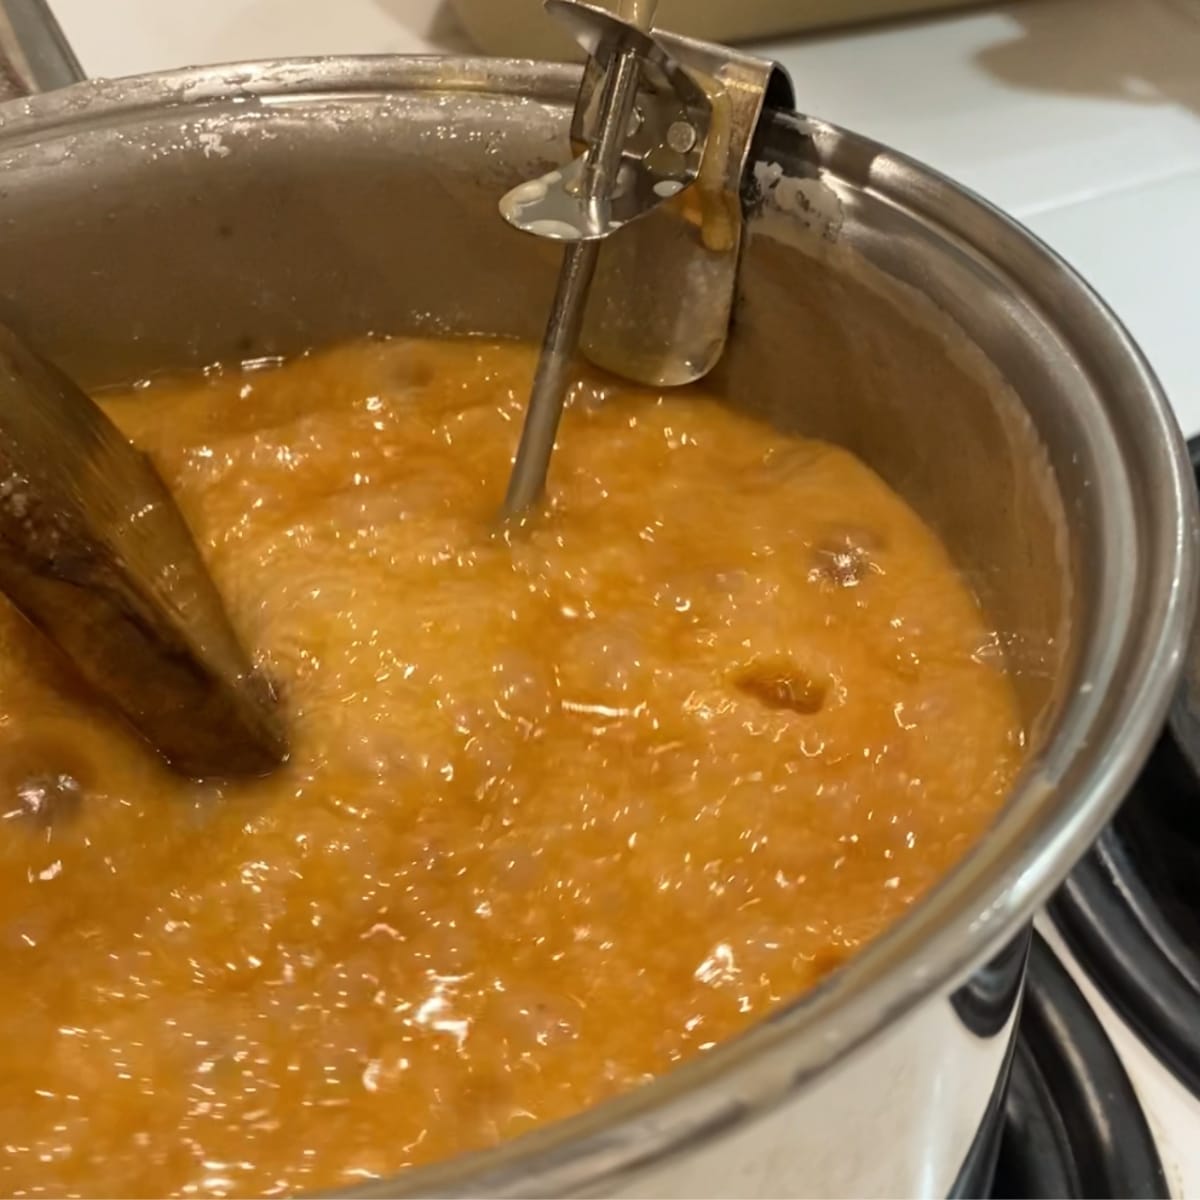
Don’t Overcook: 238-240∘F is the magic number for the soft, chewy texture. Pull the pan off the heat immediately when it hits this mark. Carryover cooking can easily push it up another 2−3 degrees, taking it from soft-and-chewy straight to hard-and-brittle.
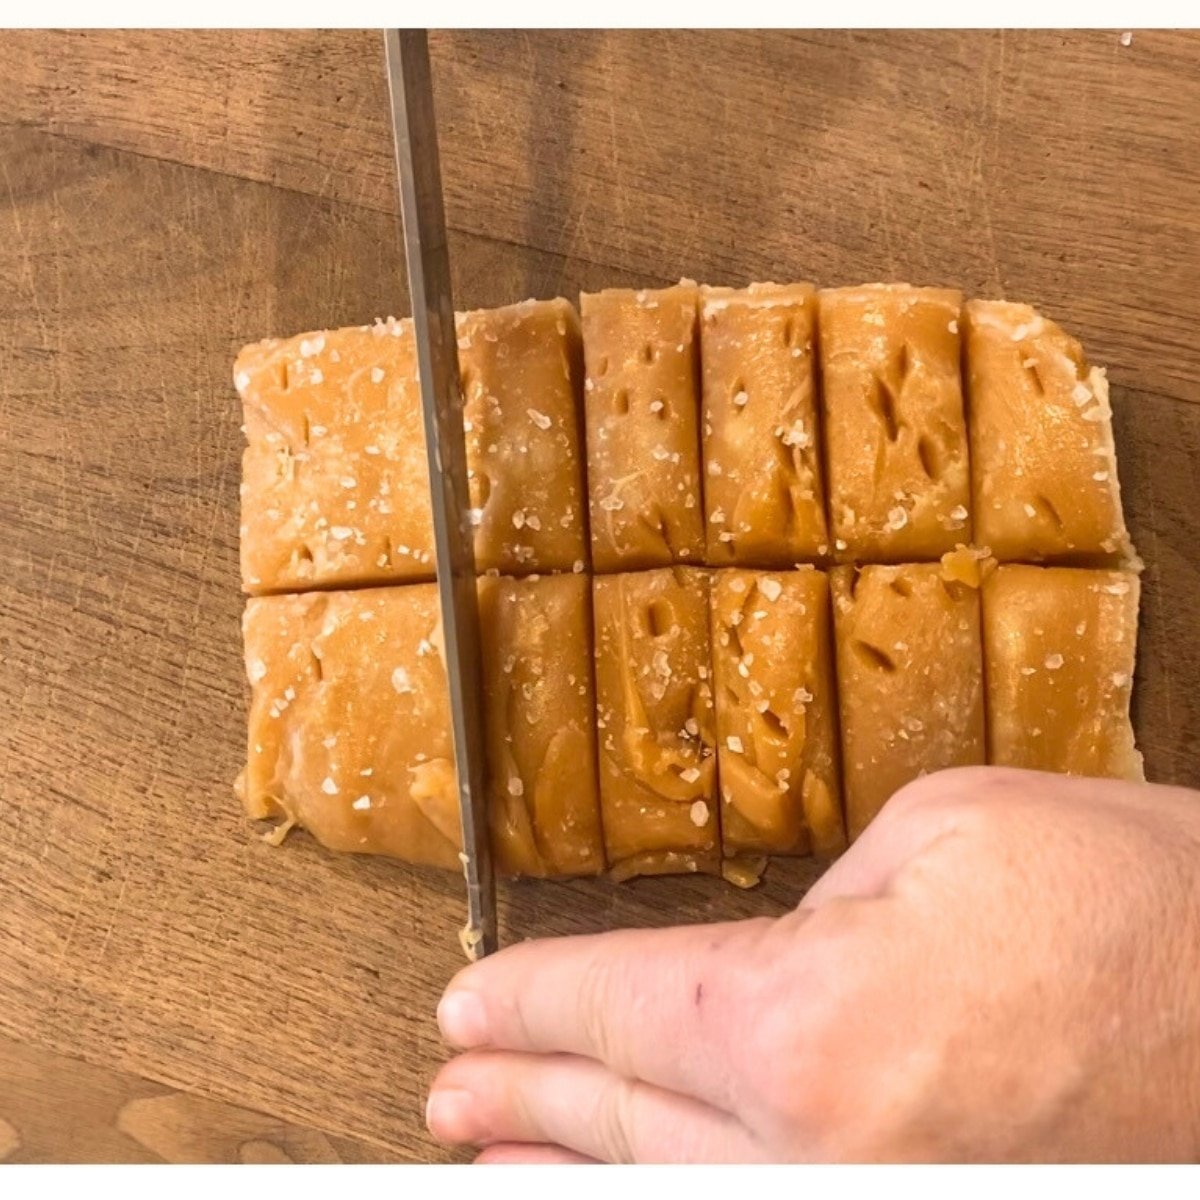
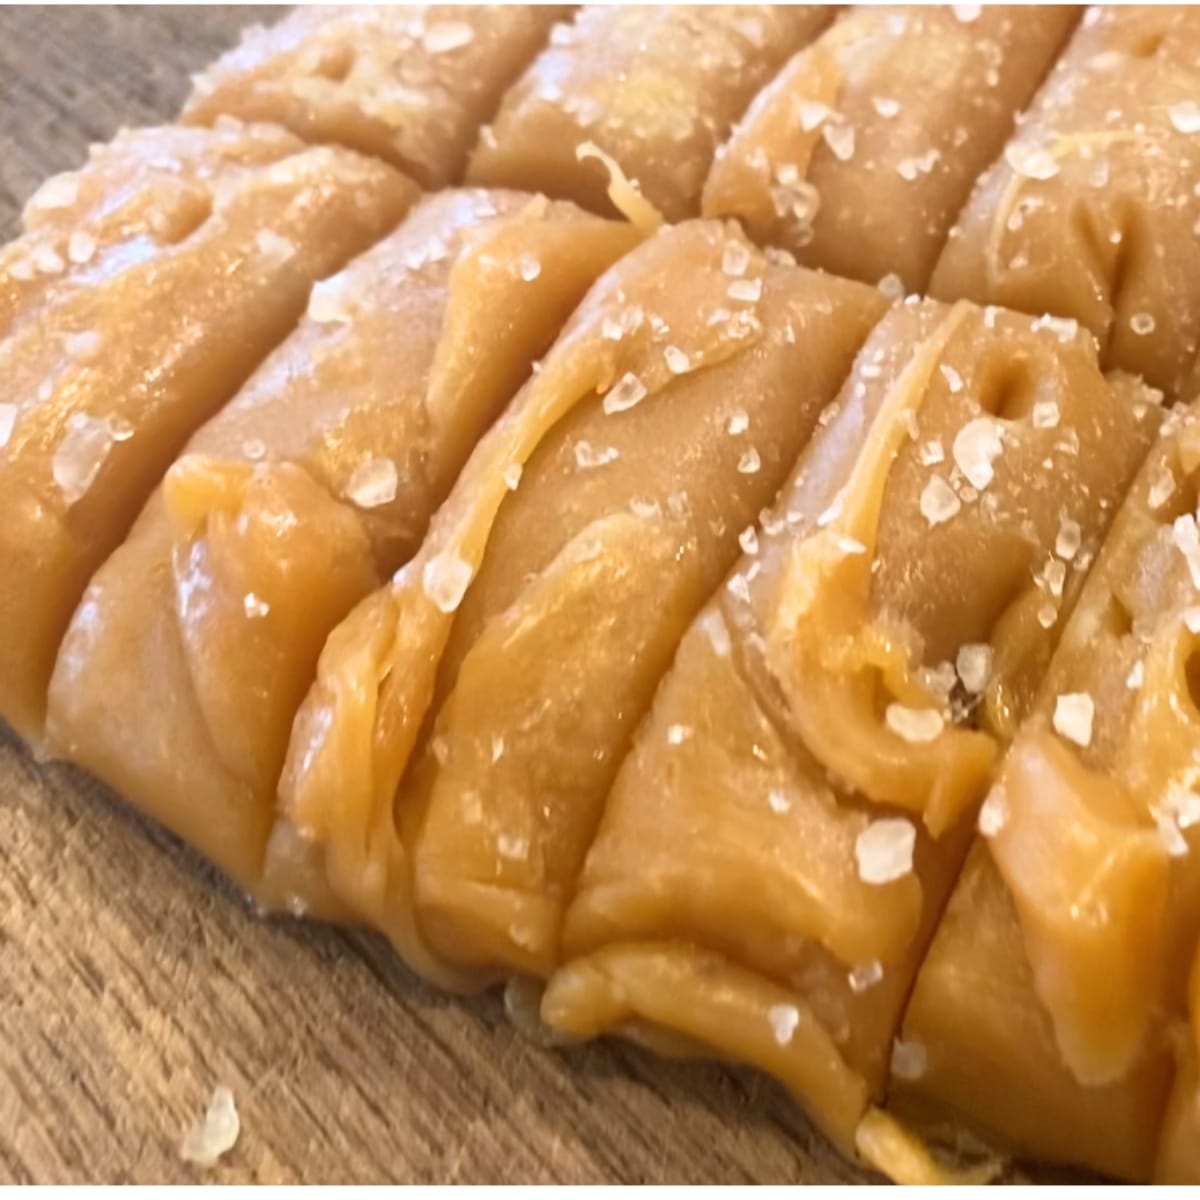
Slicing Your Caramels (The Clean-Cut Method)
A perfect caramel deserves a perfect square. Follow these steps for professional, clean edges:
Let the caramel cool completely until it is firm but still pliable—about 2 to 3 hours at room temperature. If it’s too warm, it will ooze. If it’s chilled completely in the fridge, it will be brittle and crack. Lightly oil your sharp, long-bladed chef’s knife with a flavorless oil (like canola). Re-oil if needed!
Cut, Don’t Saw! Use the knife to press straight down firmly and consistently through the caramel for each cut. Do not saw back and forth. Once cut, wrap the caramels in their individual sheets immediately to prevent them from sticking to each other before storing.
Storage: Keeping Caramels Fresh
Once your caramels are wrapped (a job well done!), they need the right environment to maintain their soft, chewy texture.
Short Term Storage (Up to 2 Weeks)
Place the wrapped caramels in an airtight container or tin. Exposure to air is what causes caramels to dry out and harden. Store your container in a cool, dry pantry or cupboard, away from direct heat or sunlight.
Do not store soft caramels in the refrigerator for long periods… Humidity in the fridge can cause sugar bloom (sweating), making them wet and sticky when they return to room temperature.
Long-Term Storage – Freezing
Caramels freeze beautifully for months, which is perfect if you like to bake big batches! First, wrap caramels individually (cellophane is best for freezing). Place in a freezer-safe, airtight container or a heavy-duty freezer bag. (For maximum protection against freezer burn or odor absorption, double-bag the container.)
Thaw Slowly: To serve, move the container from the freezer to the refrigerator overnight. Then, move them to the countertop for about an hour before unwrapping. This gradual thaw prevents condensation and helps maintain that signature chew!
Planning your full holiday baking list? Don’t stop here! Add these soft caramels to your seasonal favorites:
- Classic Chew: Our Soft Sugar Cookies (The ultimate Christmas Cookie!)
- Tropical Crunch: Easy, Chewy Coconut Macaroons
- Minty Twist: Festive and Fun Candy Cane Cookies
- Buttery Melts: Elegant Mexican Wedding Cookies (or Snowball Cookies)
- Bright & Zesty: Tart and Chewy Lemon Drop Cookies
- Old-School Goodness: Coconut Date Snowball Cookies
I want to know what YOU think, Please review the recipe card!
Grandma’s Famous Soft Caramels
Equipment
- Heavy-bottomed 3-4 quart saucepan (no thin pots allowed!).
- Calibrated Candy Thermometer (mandatory for success).
- 9" x 13" baking pan, lined with parchment paper overhang.
- Flat, heat-resistant spatula (the key to constant scraping).
Ingredients
- 3/4 cup Unsalted Butter Cut into cubes for quick melting.
- 1/4 tsp Salt Essential flavor balancer.
- 1 cup Light Corn Syrup Critical for preventing grainy crystallization.
- 2 cups Granulated Sugar The foundation of the caramel.
- 2 cups total Heavy Cream Divided into two 1 cup additions.
- 2 tsp Pure Vanilla Extract Added off-heat.
Instructions
- Combine the Base: Line a 9" x 13" pan with parchment paper, leaving generous overhang for easy removal.
- In your heavy-bottomed saucepan, combine the butter, salt, corn syrup, granulated sugar, and the first 1 cup of heavy cream.
- Simmer, Scrape, and Cook: Place the saucepan over medium-low heat to ensure a slow simmer—never a hard boil.
- Scraping the Pot: Use your flat-edged spatula to stir and scrape constantly, cleaning the entire bottom and corners of the pot constantly. This prevents scorching, which is the kiss of death for caramel.
- Once the mixture reaches a gentle simmer, slowly stir in the second 1 cup of heavy cream.
- Attach your thermometer and continue cooking, still stirring constantly.
- The Magic Temperature: Cook until the mixture reaches exactly 240∘ F (the Firm Ball Stage). This is the key to achieving that signature soft, chewy texture.
- Immediately remove the pan from the heat.
- Stir in the 2 teaspoons of vanilla extract.
- Pour: Carefully pour the caramel into the prepared pan. Do not scrape the sides of the pot (those last bits are often scorched!).
- Cool: Let the caramel cool undisturbed at room temperature until it is firm but still pliable (about 3 hours).
- Lift the slab out and place it on a cutting board. Lightly oil your sharp knife blade, then press straight down to cut 1″ squares.
- Wrap immediately and enjoy the legacy!
Notes
F (or slightly lower, depending on altitude). If it’s off, adjust your target 240∘ F accordingly. Don’t skip this—your texture depends on it. The Constant Scrape: You must stir continuously using a flat-edged spatula, aggressively cleaning the bottom and corners of the pan. The only thing worse than a scorched bottom is trying to clean a scorched bottom. Use Low Heat: Keep the heat at medium-low so the caramel mixture cooks slowly. This is Grandma’s secret: a slow simmer develops rich flavor and gives you time to react before the temperature skyrockets. Hands Off the Edges: Do not scrape the last bit of caramel from the cooking pot into the pan. This material often contains scorched or crystallized sugar that will make the rest of your batch gritty. Just pour the bulk and leave the rest.
Nutrition

About Juliea
Juliea is a mother of six, a sourdough baker, and a homestead builder living in Idaho. Alongside her husband and their horse, Dude, she manages a busy farmhouse and shares her love for scratch-cooking and simple homemaking. Through her blog and YouTube channel, she helps millions of families every year master the art of the handmade home.


1 comment
Sadie Huffaker
These caramels are so soft and addicting! Perfect for the holidays!