Planning your garden? Grow cabbage… It’s easy to grow, economical, stores well and it’s delicious. This easy-to-follow guide will have you harvesting juicy heads in no time!

Learn how to avoid and fix cabbage plant problems in your home garden! I started Growing cabbage in my home garden when I was a kid with my mom… And it’s one of my favorites! Cabbages heads provide fresh veg for months and keep for a long time as fermented sauerkraut for later use, making them a very sustaining harvest!
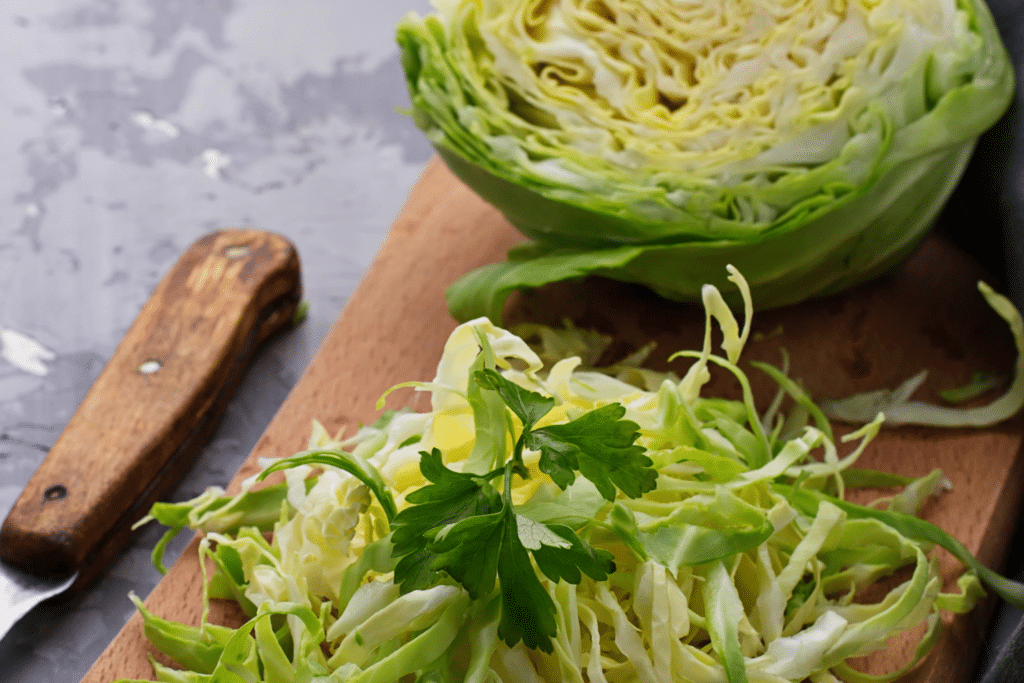
Cabbages are a rewarding crop for beginner gardeners… They’re easy to grow and add a delicious crunch to salads and stir-fries!
I like to grow cabbages from starts, so I don’t sow seeds directly into the soil. You can buy starts are a local farm supply store… Or start seeds inside a month and a half before your last frost date, and transplant them into your garden when danger of frost has passed. 😉
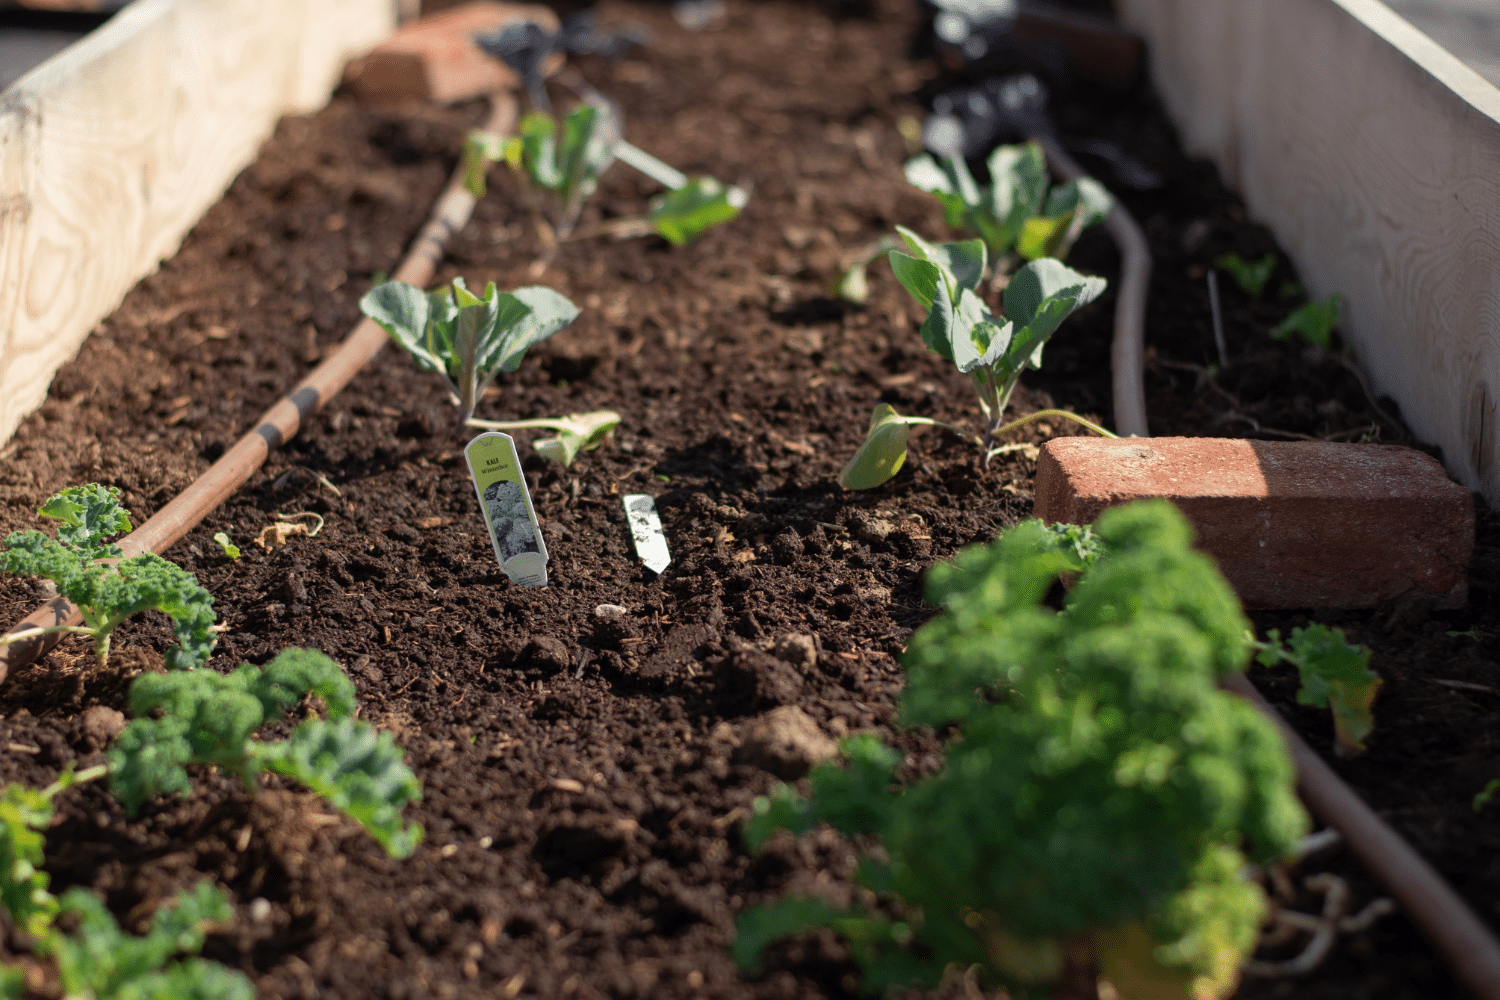
Over the last 3 years I’ve been growing cabbages in raised beds to help control weeds easier, and keep critters out… But you can also plant cabbages directly in your loose garden soil at ground level.
Cabbages love sunshine and don’t like to grow in the same spot every year, so keep that in mind when you’re planning your garden each spring. Basically, give them good soil in a new spot each year, and plenty of sun, and you’ll be harvesting cabbages in 60-100 days!
Growing Cabbage is Easy!
Cabbage Starts – the Easiest Way to Grow Cabbage!
Planting: Location: Choose a sunny location in your garden with well-drained soil. Cabbages need at least 6 hours of direct sunlight per day. Make sure to plant cabbages in different spots then the previous year.
Spacing: Space your starts 18-24 inches apart to allow for proper growth.
Planting: Gently loosen the roots of the starts and plant them at the same depth they were growing in the pot.
Watering: Water thoroughly after planting to settle the soil around the roots.
Soil Prep
First prep your soil, grab a soil test kit and see what your pH and nutrient levels are like. Cabbages are picky; they like their soil a little on the neutral side, and they’re hungry little guys. Once you know what you’re working with, you can amend it. If your soil’s too acidic, throw in some lime to balance it out. And pile on the compost or manure – think of it as giving your soil a super-boost of yummy nutrients and making it nice and airy. Before you plant, make sure to clear out all the weeds, then get in there and loosen up the soil. Mix in your amendments, smooth things out, then plant!
I also like to use drip line for easy watering every other day in the spring and every day when it gets hot.
Growing Cabbage from Seeds
- Timing: If you want to start from seed, begin indoors 4-6 weeks before the last expected frost in your area.
- Planting:
- Seed Starting Mix: Use a seed starting mix specifically designed for vegetables.
- Planting: Sow the seeds ¼ inch deep.
- Conditions: Keep the seed trays consistently moist and warm (around 70°F).
- Transplanting: Once seedlings have developed 4-6 true leaves, it’s time to transplant them outdoors. Harden them off gradually by exposing them to increasing periods of outdoor conditions over a few days before planting.
Planting Cabbage
For a spring harvest, you’ll want to get a head start by sowing those tiny seeds indoors about six weeks before the last frost, or buy starts at your local garden store. Once the soil outside feels workable and has warmed up a bit (around 60°F is the sweet spot), and it’s been a couple of weeks before that last frost date, you can move your little cabbage seedlings outdoors – they’re pretty tough and can handle a light chill. Just make sure they get a good six hours of sunshine every day, the more the merrier!
When you’re planting them, give each plant about 1-2 feet of personal space so they have room to grow into nice heads (closer together means smaller heads, spread them out for bigger ones). If you’re doing rows, leave a couple of feet between them so you can easily walk around. Dig a hole that’s just right for the seedling’s root ball, making sure the lowest leaves are level with the ground, just like they were in their little starter pot. Give them a good drink of water after planting and maybe throw some mulch around them to keep the soil moist and keep those pesky weeds away.
Cabbage Plant Care
Watering: Water your cabbage plants deeply and consistently, especially during dry periods.
Fertilizing: Side-dress your plants with compost or a balanced fertilizer a few weeks after planting to provide essential nutrients.
Weed Control: Regularly weed around your plants to prevent competition for water and nutrients.
Harvesting Cabbage
- Timing: Harvest your cabbages when the heads are firm and dense.
- Cutting: Use a sharp knife to cut the heads at the base of the plant.
Tips for Success:
- Variety Selection: Choose cabbage varieties that are well-suited to your climate and the length of your growing season.
- Soil Preparation: Before planting, amend your soil with compost or well-rotted manure to improve drainage and fertility.
- Pest Prevention: Use organic methods like row covers, handpicking, and attracting beneficial insects to your garden to minimize pest damage.
Control Worms & Pests
It’s usually pretty easy to grow cabbage… But there are a few things that can give you trouble like pests, disease and weather!
As gardeners, we know that pests and diseases can be a challenge. I’ll teach you how to identify common cabbage pests, prevent infestations, and use organic pest control methods. Plus, we’ll tackle disease management to keep your cabbages thriving.
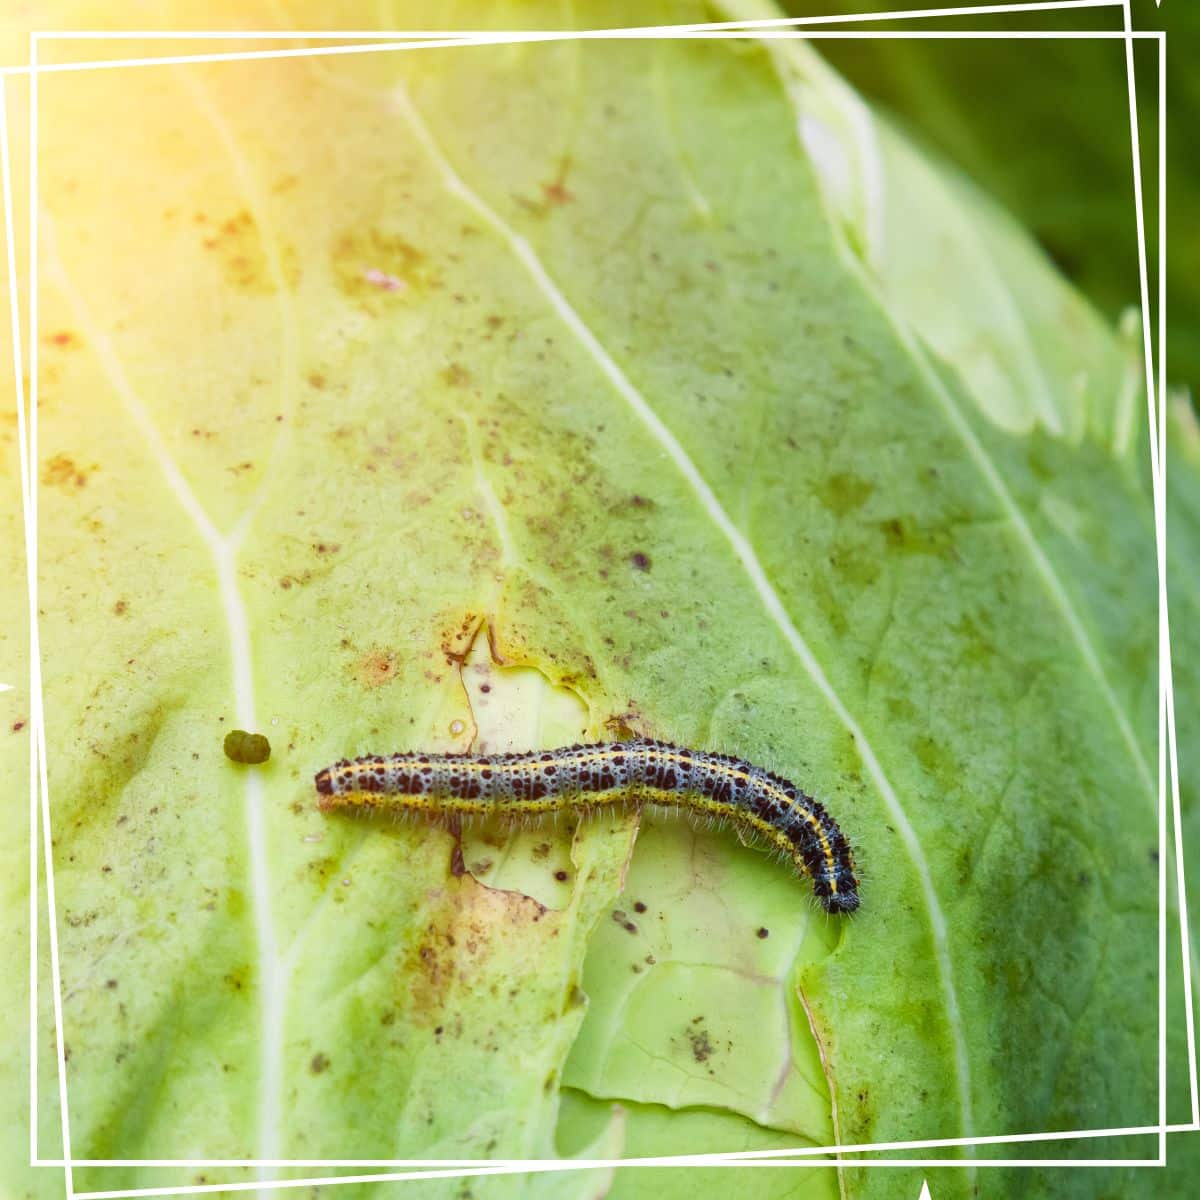
Cabbage Worms are the larvae of white butterflies or moths. The most common types are the imported cabbage worm and the cabbage looper. They feed on cabbage leaves, leaving behind large holes and causing significant damage.
Handpicking: This is the most straightforward method. Regularly inspect your plants for eggs and caterpillars. Handpick them off and drop them into a bucket of soapy water.
Row Covers: Use floating row covers to protect your cabbage plants from adult butterflies that lay eggs. Beneficial Insects: Encourage beneficial insects like ladybugs, parasitic wasps, and lacewings to your garden. They prey on cabbage worms.
Bacillus thuringiensis (Bt): Bt is a naturally occurring soil bacterium that is toxic to caterpillars. It’s safe for humans, pets, and most beneficial insects.
Neem Oil: Neem oil is a plant-based oil that disrupts the feeding and development of insects.
Diatomaceous Earth: This is a fine powder made from fossilized diatoms. It acts like tiny shards of glass, cutting into the exoskeletons of insects.
Cabbage Disease Control
Recognizing Common Diseases
Cabbages are susceptible to various diseases like:
- Black Rot: Caused by a bacterial pathogen, black rot affects the vascular system of the plant, leading to wilting and yellowing of leaves with black veins.
- Clubroot: A soil-borne disease that causes swelling of the roots, stunting, and wilting of the plant.
- Downy Mildew: A fungal disease that causes yellow patches on the upper surface of leaves and a downy growth on the underside.
Effective Disease Management
To manage cabbage diseases, implement the following practices:
- Crop Rotation: Avoid planting cabbages in the same location for several years to reduce the risk of soil-borne diseases.
- Sanitation: Remove and destroy infected plant debris to prevent disease spread.
- Fungicidal Sprays: For severe disease outbreaks, apply organic fungicides following the manufacturer’s instructions.
- Healthy Soil: Maintaining well-draining, nutrient-rich soil promotes vigorous growth and helps plants resist diseases.

Frost Heat & Wind Protection
Mother Nature can be unpredictable, but we won’t let her ruin our cabbage dreams. I’ll show you how to protect your growing cabbages from frost, heat stress, and wind, so they can grow undisturbed.
Frost Cabbage Plant Problems
Cabbages are cool-season crops that can tolerate light frosts but are sensitive to hard freezes. Frost can damage the leaves and cause the cabbage heads to become mushy. To protect growing cabbage plants from frost, consider the following measures:
- Covering: When frost is expected, cover the cabbage plants with frost blankets, old bedsheets, or burlap sacks in the late afternoon or early evening. Ensure the covers reach the ground to trap the heat radiated from the soil. Remove the covers in the morning after the temperatures rise above freezing.
- Watering: Water the soil around the cabbage plants before a frosty night. Moist soil retains heat better than dry soil, offering some protection to the roots.
- Hilling Soil: Mound soil around the base of the cabbage plants to provide extra insulation to the root zone.
Cabbage Heat Stress
While cabbages prefer cool temperatures, they can still thrive in moderately warm conditions. However, extreme heat can cause heat stress and reduce productivity. To manage heat stress in cabbage plants:
- Mulching: Apply a layer of organic mulch around the plants to conserve soil moisture and regulate soil temperature. Mulch also protects the roots from heat stress.
- Watering: Ensure adequate and consistent watering, especially during heatwaves. Cabbages need about 1 to 1.5 inches (2.5 to 3.8 cm) of water per week during hot weather.
- Shade Cloth: Erect shade cloth or create temporary shade using a tarp or row cover to shield the cabbage plants from direct sunlight during the hottest part of the day.
- Proper Timing: Consider planting cabbages so that they mature during cooler months or in the shade of taller plants to mitigate heat stress.
Wind Protection
Strong winds can cause physical damage to growing cabbage plants, break leaves, and dislodge roots. Wind protection is particularly important for young seedlings and transplants. Here’s how to safeguard cabbage plants from wind:
- Windbreaks: Plant tall, sturdy plants or install windbreaks (fences, hedges, or barriers) to shield cabbage plants from strong winds.
- Staking: Stake taller cabbage varieties to provide support against strong winds and prevent them from toppling over.
- Row Covers: Row covers can protect young seedlings from both wind and pests, creating a more sheltered environment.
- Planting Density: Planting cabbages closer together can provide mutual support and reduce the impact of strong winds on individual plants.
Avoiding Cabbage Plant Problems
No garden is perfect, but don’t worry—I’ve got your back! I’ll help you troubleshoot common cabbage issues like yellowing leaves, bolting, and other growth problems, so you can overcome challenges like a pro.
Yellowing Leaves and Nutrient Deficiencies
Yellowing leaves in cabbages can be a sign of nutrient deficiencies. Here’s how to address the issue:
- Nitrogen Deficiency: Yellowing of older leaves while the veins remain green is a common sign of nitrogen deficiency. To remedy this, apply a nitrogen-rich fertilizer following the recommended dosage on the package. Additionally, incorporate nitrogen-rich organic matter like compost or well-rotted manure into the soil.
- Iron Deficiency: Yellowing of younger leaves with green veins indicates an iron deficiency. Treat this issue by applying iron chelate or iron sulfate to the soil according to the package instructions. Improve soil drainage to prevent waterlogged conditions, which can exacerbate iron deficiency.
- Manganese Deficiency: Manganese deficiency causes yellowing between leaf veins. Apply manganese sulfate or foliar spray to address this deficiency. Adjust the soil pH if it’s too high, as manganese uptake is affected by soil acidity.
Bolting & Flowering Cabbages
Bolting refers to the premature flowering of cabbages, which can negatively impact the quality of the heads. Here’s how to handle this issue:
- Variety Selection: Choose cabbage varieties known for their resistance to bolting. Some types, like spring and early-season varieties, are less prone to bolting in warm weather.
- Temperature Management: Bolting is often triggered by temperature fluctuations and prolonged exposure to high temperatures. Plant cabbages in the appropriate season, ensuring they mature before the hottest months. Consider providing shade during the hottest parts of the day to mitigate stress.
- Consistent Moisture: Maintain consistent soil moisture to prevent stress-induced bolting. Water the plants regularly and deeply, especially during dry spells.
By troubleshooting and addressing common issues when you grow cabbages, such as yellowing leaves, bolting, and other growth problems, you can maintain healthy and productive cabbage plants in your garden. Early intervention and proper care will help you overcome these challenges and enjoy a successful harvest of delicious and nutritious cabbages.
You are now equipped with all the knowledge and tips needed to grow cabbage like a seasoned gardener. So, go ahead and start planting those cabbages, and remember that every garden journey is a learning experience. Happy gardening, and may your cabbages flourish abundantly!
If you use this info to grow and store cabbages and love it, Tag me on Instagram @farmhouse_harvest with your crop!
Sources
The National Gardening Association
University of Idaho Extension – Gardening Source