


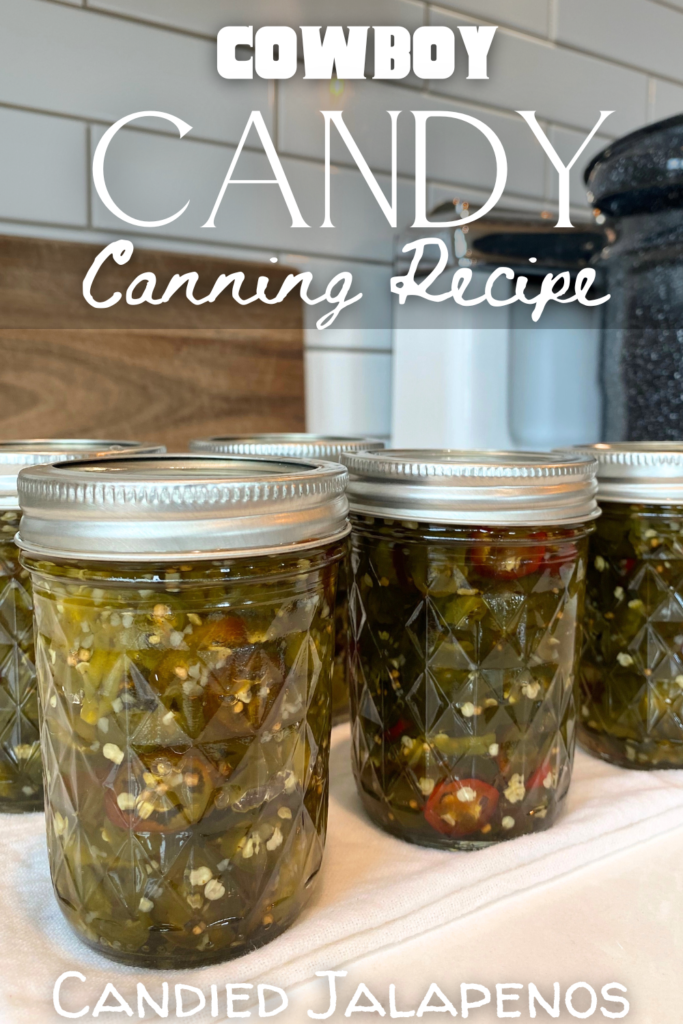
Saddle up for a flavor adventure with this sweet and fiery Cowboy Candy recipe! These candied jalapeños are so addictive, you might just become a legend in your own kitchen.

These candied jalapeños are so irresistibly delicious that you might just find yourself accidentally devouring the entire jar in no time.
This Cowboy Candy recipe is a tastebud fiesta! Sweetness meets heat in a perfect harmony that will have you coming back for more. Don’t let those garden-fresh jalapeños go to waste! Transform them into a delicious treat with this easy Cowboy Candy recipe. Savor the taste of summer sunshine with a fiery kick! This Cowboy Candy is a jar full of Wild West flavor.
I’ve spent all spring and summer tending to the garden, and now my jalapeño plants are bursting with fiery, green peppers (some red ones too)! You may wonder what to do with so many spicy peppers! That’s where this Cowboy Candy recipe comes in! It’s the perfect way to make the most of your harvest and savor those spicy peppers throughout the year… If they last that long!
The best part is, making Cowboy Candy is super easy and oh-so-rewarding. All you need are some fresh jalapeño peppers, a few pantry staples like apple cider vinegar, white sugar, and spices, and your trusty canning jars. You’ll feel like a cowgirl, preserving your very own bounty;)

Serve with Cream Cheese!
Having candied jalapeños on hand to serve as an appetizer on crackers with cream cheese, or to spice up your meals during the colder months is so nice! They add a kick to jalapeno cheddar sourdough bread, potato salad and go great on pulled pork sandwiches!
You can adjust the heat with cayenne pepper. I like to rinse my sliced jalapenos off in a colander to remove the seeds for a mild jalapeno candy too!
Seeing those vibrant red and green jalapeño slices suspended in the sweet brine is gorgeous – it’s like liquid gold in a jar.
Yield & Storage
This recipe will yield approximately 4-5 pint jars of sweet and spicy goodness. It’s always a good idea to have a few extra jars and lids on hand, just in case!
Once you’ve sealed them properly using the water bath method, these jars of cowboy candy can be stored in a cool, dark place like your pantry for up to a year. That’s a whole lot of peace of mind (and deliciousness!) right there.
After you open a jar, you’ll want to store it in the refrigerator. The cowboy candy will stay fresh and delicious for about 3-4 weeks. But honestly, once you start enjoying it, it probably won’t last that long!

Key Ingredients for Cowboy Candy
Here are the stars of the show with cowboy candy and why they’re so important:
Fresh Jalapeño Peppers (3 pounds): These are the heart and soul of cowboy candy! While jalapeños provide that classic, mild-to-medium heat, feel free to mix in other hot peppers like banana or cayenne for added color and a varied heat profile. The freshest peppers will give you the best crisp texture.
Apple Cider Vinegar (2 cups): This isn’t just for tang! The vinegar acts as the preservative base for our candy, giving it that essential bright, acidic kick that perfectly balances the sweetness.
White Sugar (6 cups): Don’t be shy with the sugar! It’s crucial for transforming the fiery peppers into “candy.” As the peppers simmer in this sugary syrup, they become sweetly candied, creating the unique flavor profile cowboy candy is famous for.
Celery Seed (1 tablespoon) & Mustard Seeds (1 tablespoon): These two spices are flavor powerhouses that add a subtle, earthy complexity and a hint of warmth, complementing the heat and sweetness without overpowering them. They’re key to that distinctive cowboy candy taste.
Garlic Powder (2 teaspoons): For a touch of savory depth. Garlic powder provides a mellow, aromatic background that rounds out all the other flavors.

Equipment You’ll Need
- Large pot
- Food processor or sharp knife for slicing
- Slotted spoon
- Canning tongs
- Sterile canning jars (pint jars work well)
- Two-piece lids
- Damp paper towel or washcloth
- Water bath canner
- Cooling rack

Expert Tips for Perfect Cowboy Candy (FAQs & Troubleshooting)
These little tricks and tips will make your cowboy candy a legend in a jar!
Understanding the Brine’s Magic: That spicy, syrupy goodness isn’t just delicious; it’s the secret to why your cowboy candy is so fantastic and shelf-stable! The high sugar content in that mixture works with the vinegar to perfectly preserve the peppers and give them that “candy” texture we all love…. Simmer the peppers for just 5 minutes… If you go longer they can get mushy, and no one wants soggy jalapeños! The goal is to soften them just enough so they absorb that sweet brine while keeping a lovely, firm texture.
Customizing the Heat: You get to be the boss here… The majority of a jalapeño’s heat comes from the seeds and the white membrane inside. My tip is to simply rinse the sliced peppers in a colander to remove most of the seeds for a milder flavor. If you’re a heat seeker, you can leave them all in! For an extra kick, a little cayenne pepper goes a long way. Start with 1/2 teaspoon for a moderate kick, or go for a full teaspoon for a real fiery finish! You can even mix in other peppers, like red bells for a beautiful color or serranos if you want to really feel the burn.
The Canning Process: Don’t be intimidated by the water bath! It’s the key to making your cowboy candy last for over a year on the shelf. The hot water bath creates a vacuum seal that keeps your jars fresh and safe. When you put on the lids, make sure they are “fingertip tight”—just tight enough that they stay on, but not so tight that air can’t escape. This is crucial for a good seal. And definitely don’t skip the step of letting the jars sit in the canner for 5 extra minutes after you turn off the heat. That little rest period is important for a successful and safe seal.
“Liquid Gold”: Don’t Waste the Syrup: Seriously, that leftover syrup is too good to toss! It’s a sweet, spicy, and tangy condiment all on its own. You can use it as a glaze for grilled chicken or pork, or drizzle it over cream cheese as a super-easy dip. Or use a spoonful of it in your favorite salad dressing for a spicy-sweet kick!
Patience is a Virtue: I know the wait is the hardest part, but trust me, it’s worth it! While your cowboy candy is technically ready to eat once it’s sealed and cooled, the flavor only gets better over time… As it sits, the jalapeños and the brine get to know each other, and all those amazing flavors meld together perfectly. Try to wait at least a week or two before opening your first jar for the best experience.
Your Cowboy Candy, or candied jalapeños, are ready to enjoy! This sweet and spicy treat is perfect for sandwiches, tacos, salads and even on pizza! And they make a great homemade Christmas gift as too!
Is It Hot?
Yes, Cowboy Candy is hot, thanks to the jalapeño peppers and cayenne pepper used in the recipe. The candied jalapeños are prepared in a boiling syrup mixture with apple cider vinegar, white sugar, and spices like celery seed, mustard seeds, and garlic powder, creating a perfect balance of sweetness and heat!
How to Serve Cowboy Candy
Cowboy candy can be enjoyed in so many ways. My favorite is to pair it with cream cheese on crackers! The smooth and creamy texture of cream cheese is a perfect complement to the spiciness of the candied jalapeños! To serve, use a slotted spoon to carefully remove the candied jalapeños from their jar.
The red and green colors of candied jalapeños make them a a beautiful addition to any dish… Home canned cowboy candy can be stored for over a year of future use!
More Canning Recipes
Cowboy Candy, Candied Jalapenos Canning Recipe
Applesauce Canning Recipe without sugar!
Please let me know what You think… Leave a Review!

Sweet & Spicy Cowboy Candy Canning Recipe
Ingredients
- 3 pounds fresh jalapeno peppers you can mix in some other hot peppers like banana peppers or cayenne peppers for variety and color
- 2 cups apple cider vinegar
- 6 cups white sugar
- 1 tablespoon celery seed
- 1 tablespoon mustard seeds
- 2 teaspoons garlic powder
- *Optional – 1/2 teaspoon cayenne pepper adjust to your desired level of heat
Instructions
- Fill a water bath canner with enough water to cover your jars (I use half-pint jars). Bring the water to a rolling boil.
- Slice the fresh jalapenos into 1/4-inch rounds using a food processor or a sharp knife. You may want to wear gloves to protect your hands from the heat of the peppers. Remove the seeds for a milder flavor or leave some seeds in for extra spiciness…. I just leave them in!
- In a large pot, combine apple cider vinegar, white sugar, celery seed, mustard seeds, garlic powder, and optional cayenne pepper. Bring the mixture to a full rolling boil over medium-high heat, stirring constantly until the sugar dissolves. Reduce the heat to medium and let it simmer for 8 minutes.
- Gently add the sliced jalapeños into the boiling syrup mixture. Let them cook for 5 minutes, ensuring they are fully coated in the syrup
- At this point, your water bath should be at a rolling boil. Sterilize your jars and lids in the boiling water to increase the shelf life and ensure freshness. Once all jars and lids are sterile, set aside.
- Using a slotted spoon, carefully remove the jalapeño slices from the syrup and place them into the bottom of the sterile jars. Leave about a 1/4 inch of the upper rim of the jar (headspace from the top of the jar.)
- Continue boiling the leftover sweet brine down for another 10 minutes. This will reduce the liquid and make it thicker and more like a syrup.
- Carefully ladle the hot syrup over the jalapeño slices in the jars, ensuring they are fully submerged. Leave about a 1/4-inch of headspace from the top of the jar.
- Use a clean, damp paper towel or a plastic spatula to remove any air bubbles from the jars. Simply run the paper towel or spatula around the inner walls of the jar to release trapped air.
- Wipe the rims of the jars with a damp paper towel to remove any residue or stickiness. Place the flat lids on top and screw on the two-piece lids until finger tight.
- Using canning tongs, place the filled and sealed jars into the water bath canner. Ensure that the jars are covered with at least 1 inch of water. Keep the water at a rolling boil and boil for 20 minutes.
- After 20 minutes, turn heat off, and let jars stay in the water bath for an additional 5 minutes before removing! (Don't skip this step!)
- Carefully remove the processed jars from the water bath canner and place them on a paper towel or a cooling rack. Let them cool completely at room temperature. As they cool, you may hear a popping sound, which means the jars are sealing properly. This cooling could take up to 12 hours before all jars pop.
- If any jars don't seal, store them in the refrigerator and consume within 30 days. I like to take a piece of painters tape and write the canning on the lid for reference.
Nutrition

About Juliea
Juliea is a mother of six, a sourdough baker, and a homestead builder living in Idaho. Alongside her husband and their horse, Dude, she manages a busy farmhouse and shares her love for scratch-cooking and simple homemaking. Through her blog and YouTube channel, she helps millions of families every year master the art of the handmade home.


10 comments
John
I made for first time and was easy and delicious. Will need to double amount because already out thanks
Gretchen
I made cowboy candy and had leftover syrup so I process it as well. Can I use it to make more cowboy candy as I would making fresh syrup?
Juliea Huffaker
Hi Gretchen, That’s a great question! I hate seeing any of that ‘liquid gold’ go to waste, which so I recommend canning the leftovers separately. For food safety and quality, I don’t recommend using that processed syrup to start a fresh batch of peppers… When the first batch of peppers simmers, they release moisture that dilutes the vinegar. Since safe canning relies on a precise pH level to prevent spoilage, using ‘used’ syrup means we can no longer guarantee the acidity is high enough for a second round of peppers. Plus re-boiling the syrup can cause the sugars to over-concentrate, leading to a syrup that has a slightly burnt flavor.
Since you’ve already processed those jars of syrup, they are shelf-stable and incredibly versatile! It makes a great glaze for grilled salmon, a kick for marinades, or drizzled over cornbread. Better to play it safe with a fresh brine for the peppers and keep that extra syrup for your next BBQ!
Adrienne
I’m not a big fan of apple cider vinegar. Can I substitute white vinegar?
Thank you!
Juliea Huffaker
Hi Adrienne! Yes you can sub for white vinegar;) Thanks for asking!
Jessica
Can I chop them instead of slice?
Juliea Huffaker
Hi Jessica… Yes you can chop instead of slice the jalapenos! It wont change anything in the recipe except that they’ll be chopped into little bits instead of rounds;)
Juliea Huffaker
Hi Shirley… I’ve never added onion. I’m not sure if it would be safe. This is a tested recipe, and safe with the correct acidity for water bath safe canning.
Jess
Is the processing time for sea level?
juliea
Hi Jess! Yes add for your elevation!