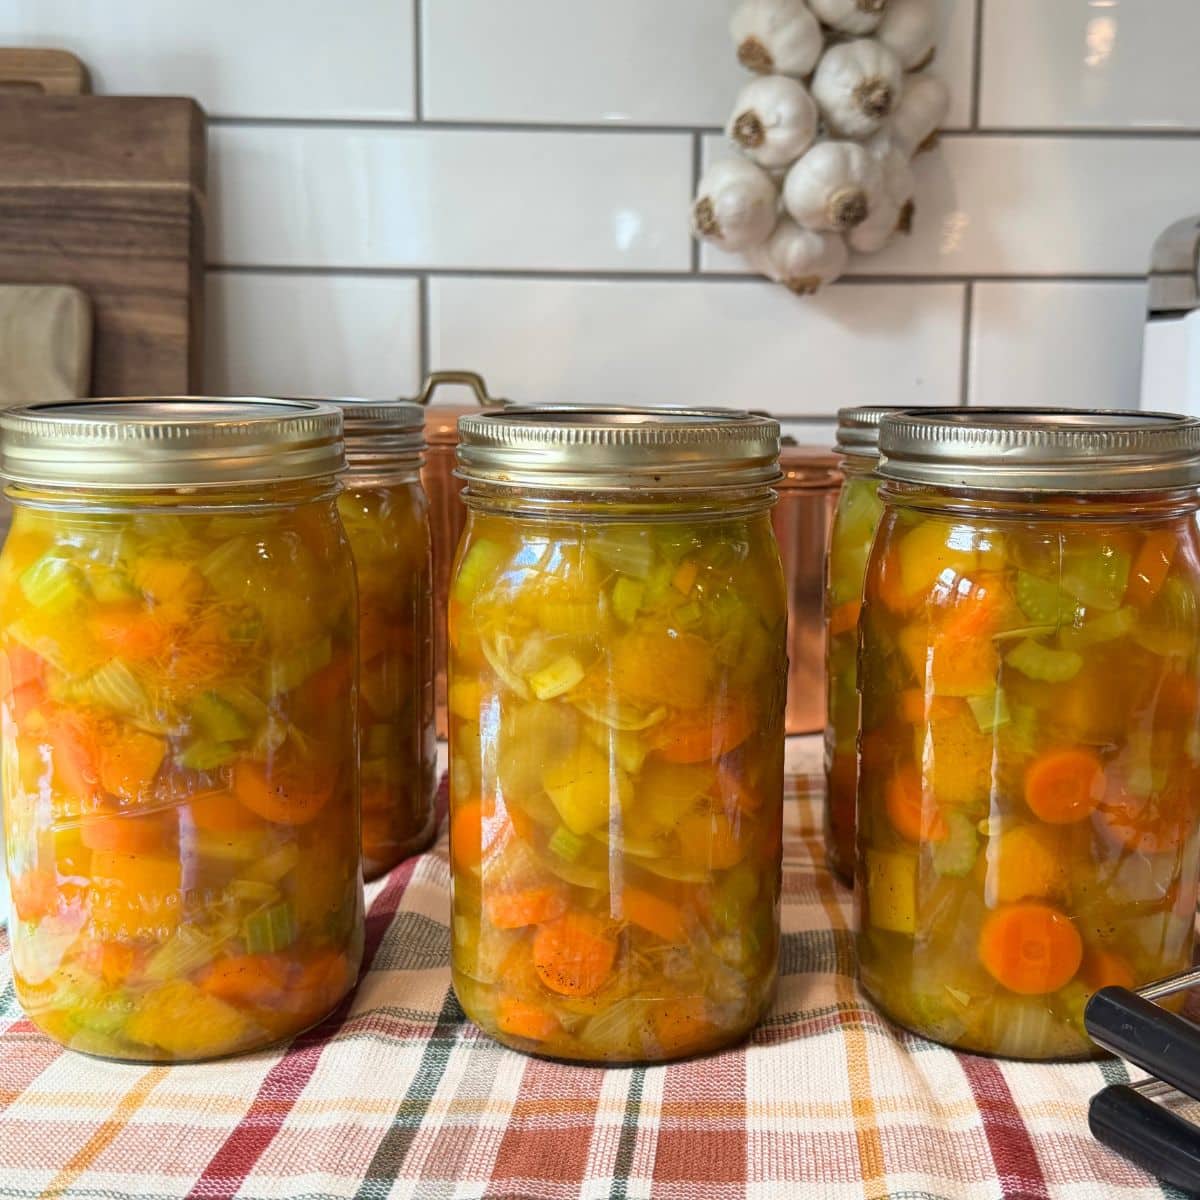
This Butternut Squash Soup Canning Recipe gives you the ultimate long-term meal in a jar… When you’re ready to serve, all it takes is a splash of rich cream or coconut milk and a quick buzz with an immersion blender to transform these shelf-stable cubed vegetables into a velvety, top-quality soup!
Why This Butternut Squash Soup Canning Recipe Is NCHFP Safe
When it comes to butternut squash soup canning, safety always comes down to strict density and heat penetration rules. According to NCHFP (National Center for Home Food Preservation) guidelines, pureed or mashed squash should never be canned because it creates a thick, dense paste that prevents heat from reaching the center of the jar to destroy harmful bacteria like Clostridium botulinum.
This recipe stays completely safe by adhering to certified NCHFP standards:
Cubed, Not Pureed: The butternut squash and vegetables remain cubed in a clear liquid broth during processing. This allows hot water currents to circulate freely around the pieces inside the pressure canner, ensuring proper heat distribution throughout the full 90-minute process for quart jars.
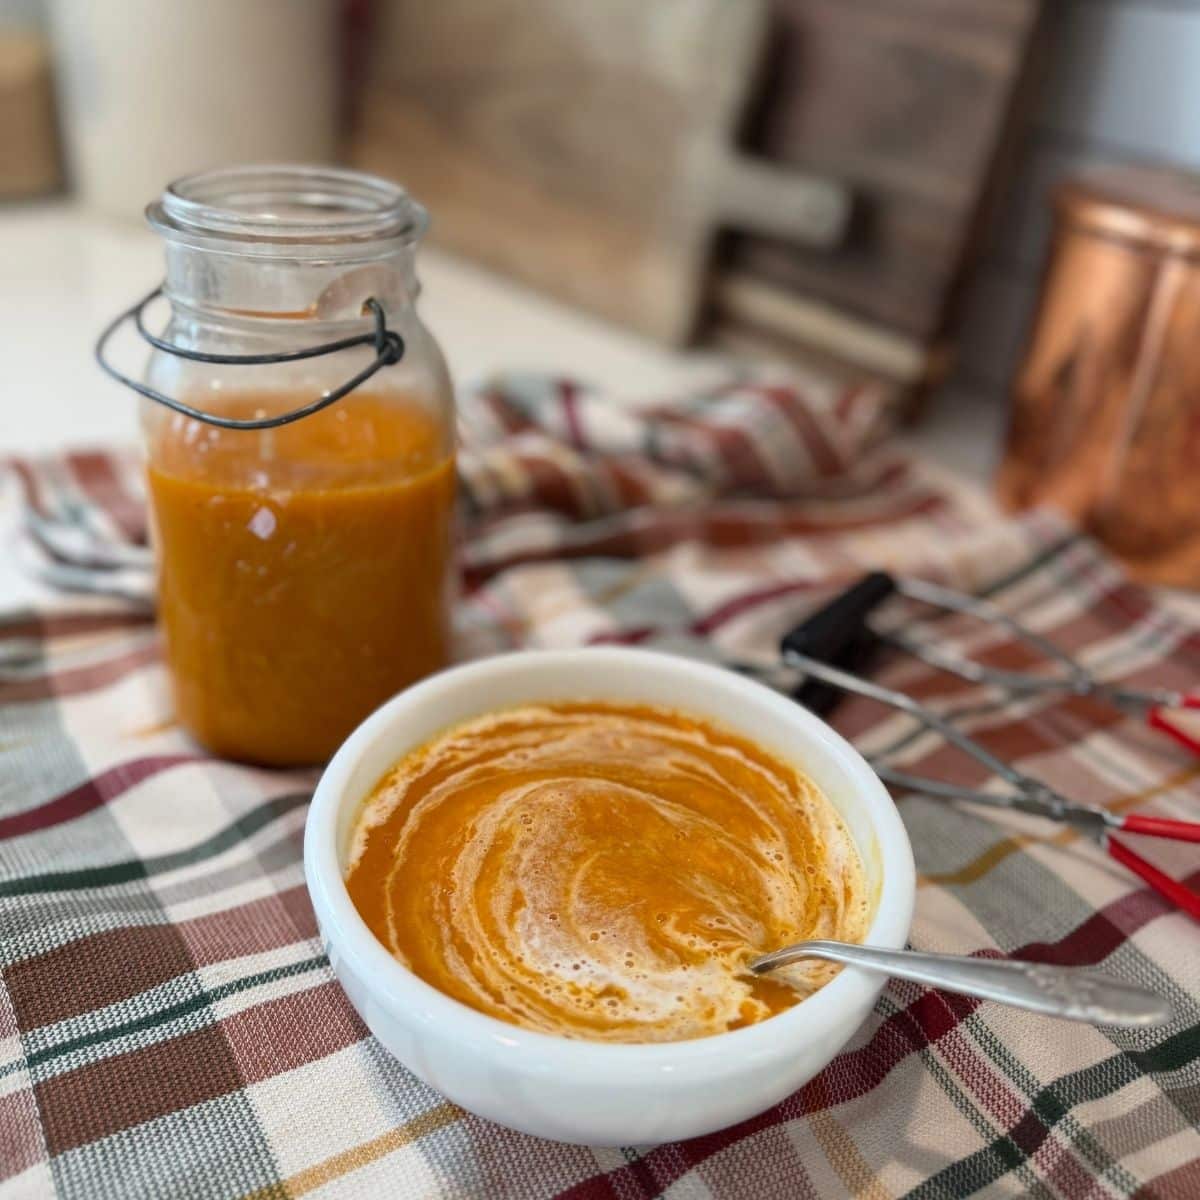
Puree at Serving: Straining and blending are reserved strictly for serving day, giving you that silky, restaurant-style texture safely at the table rather than in the jar.
We took the classic, USDA-tested recipe for home-canned winter squash and gave it two major upgrades:
Maximized Canner Efficiency (Full 7-Quart Load): Standard recipes often leave you with awkward partial batches. We scaled the vegetable and liquid ratios specifically to yield a complete, full load of 7 quart jars so every pressure canning run maximizes your time and energy.
Kicked Up Flavor with Curry: Plain squash can be a bit one-note. Warm spices like curry powder, black pepper, and aromatic alliums “bloom” beautifully during pressure processing, cutting through the sweetness of the squash and turning a basic pantry staple into a rich, flavorful base.
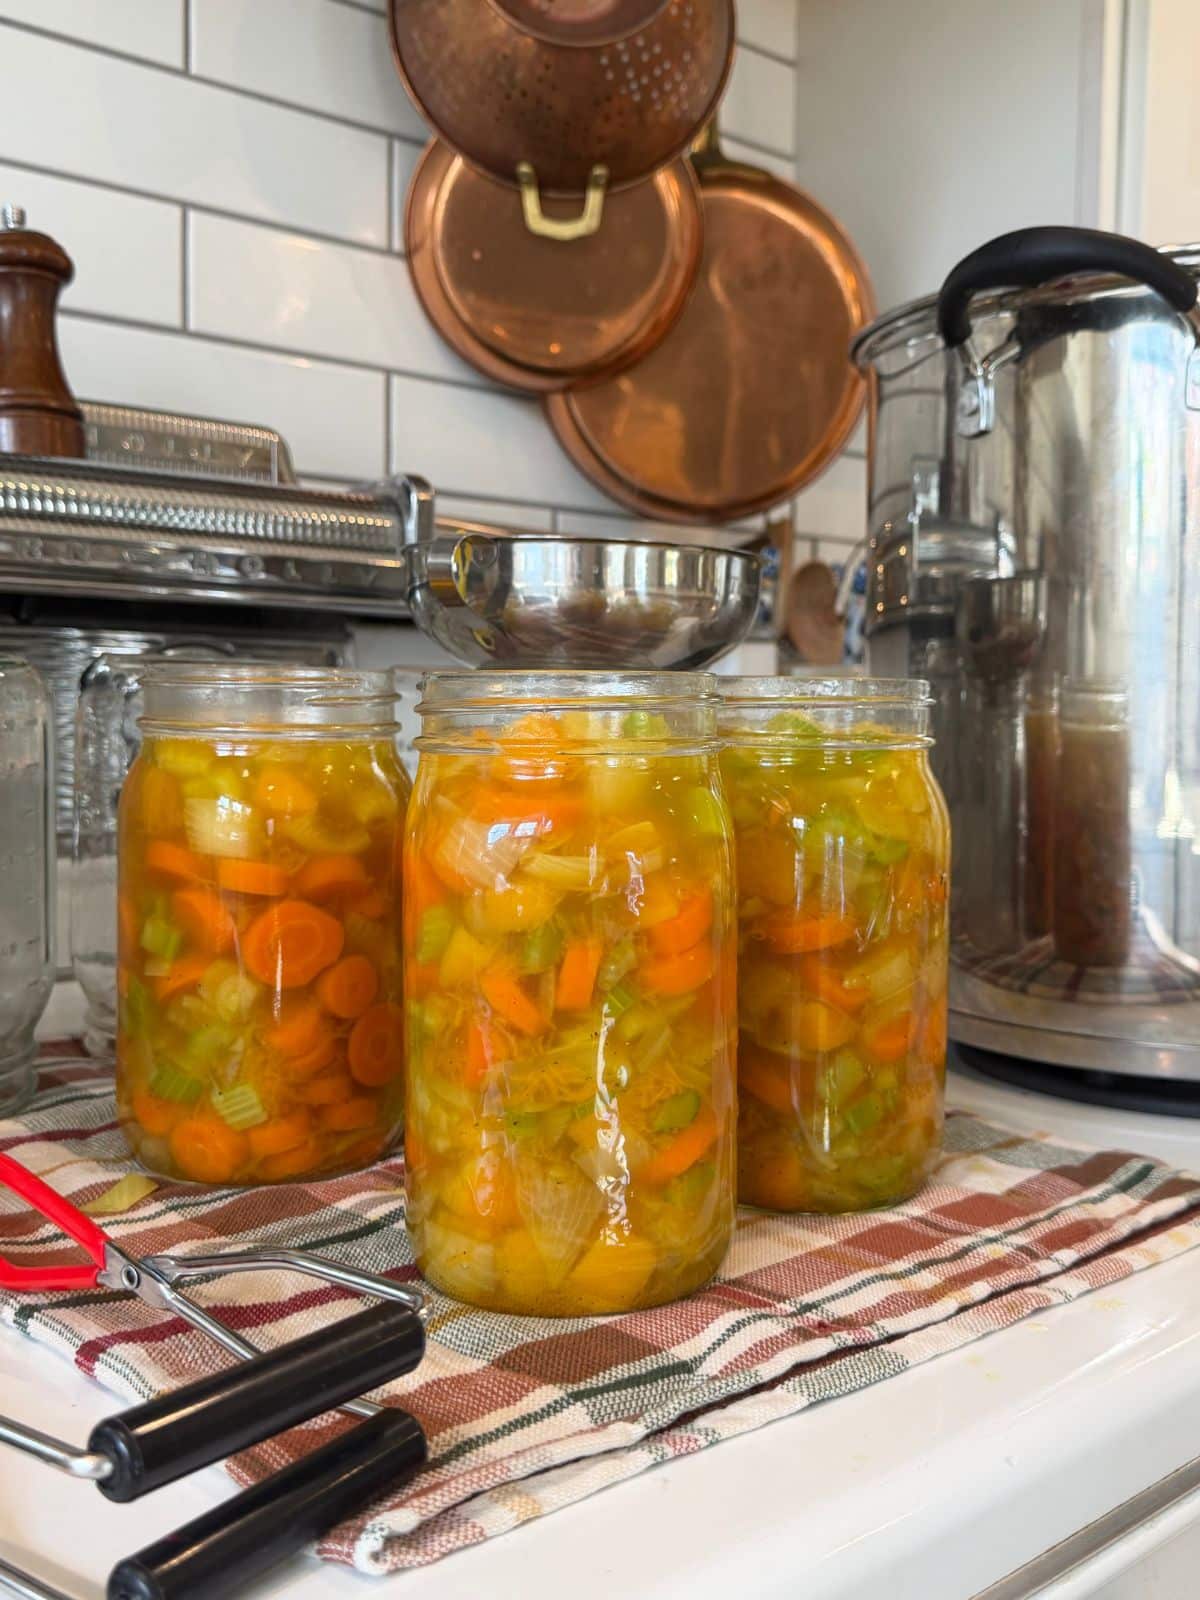
Can You Raw Pack Butternut Squash? (Why Hot Packing Matters)
If you’ve ever made raw pack “meal in a jar” recipes, you might wonder if you can skip heating the squash and just pack the raw cubes straight into your jars. The short answer from the NCHFP and Ball testing labs is no—winter squash must always be hot packed.
Here’s why taking those few extra minutes to simmer your squash before ladling it into jars is a total game-changer for safety and quality:
- Heat Penetration: Winter squash is dense and naturally low-acid. When you start with hot, simmered cubes, heat travels straight to the center of every piece much faster during pressure canning. That high heat is what destroys dangerous spores like botulinum and keeps your pantry food completely safe to eat.
- No Shrinking or Liquid Loss: Raw squash holds onto a lot of trapped air and moisture. If you pack it raw, the pieces shrink drastically once the heat hits them inside the canner. That leaves you with half-empty jars, floating veggies, and liquid boiling over (which often ruins your seals).
- Better Texture: It surprising, but raw-packed squash actually absorbs too much water inside the canner, leaving you with soggy, waterlogged veggies. Giving them a brief 5-minute simmer first locks in their structure so they hold up nicely. 😉
You might see raw packing approved for green beans and meats, but starchy crops like butternut squash are strict exceptions to the rule… Keeping that 5-minute pot simmer ensures every single jar comes out perfectly sealed, safe, and delicious!
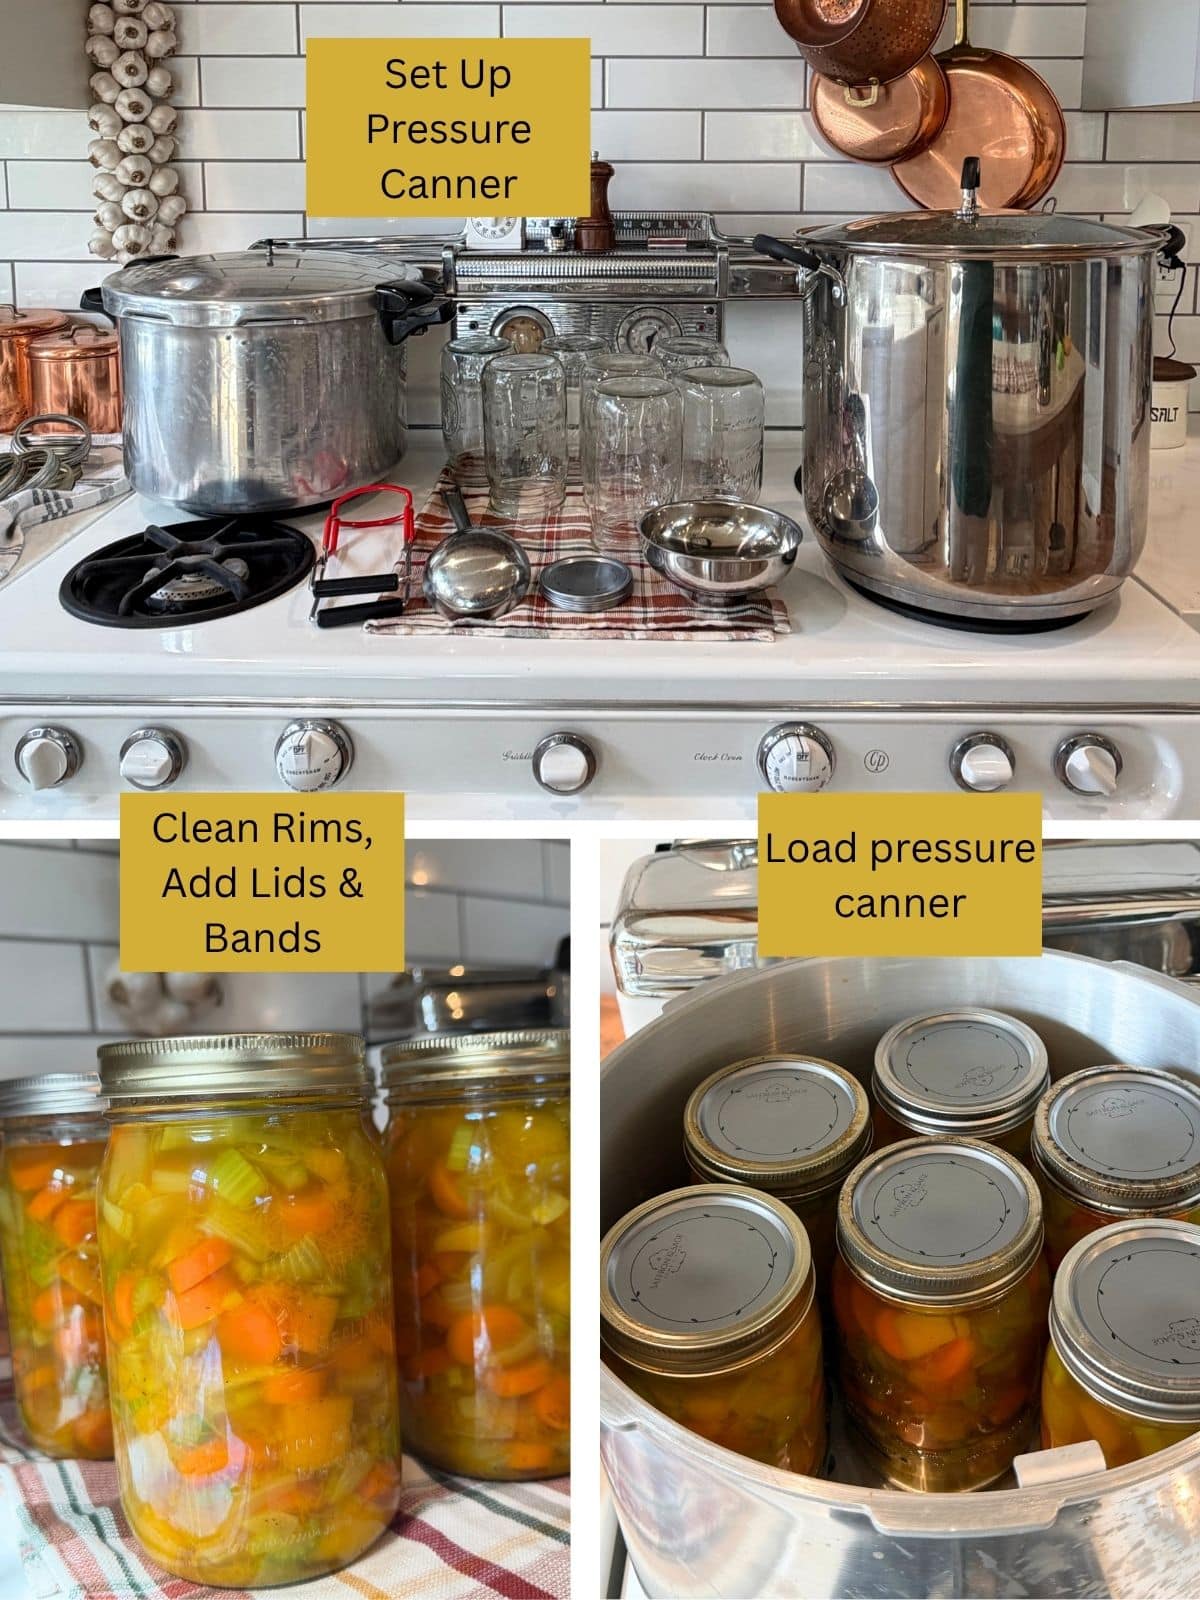
Step-by-Step Pressure Canner Setup for Butternut Squash Soup Canning Recipe
Before you fill your jars, make sure your canner is set up for success!
- Add Water & Vinegar to Canner: Add 2 to 3 inches of water (or whatever amount your specific canner manual calls for) to your pressure canner and bring it to a warm simmer over low heat. Add a splash of white vinegar to prevent mineral buildup on your jars.
- Warm the Jars: Keep your clean quart jars warm in the canner water so hot liquid won’t cause thermal shock and crack the glass when filled.
- Vent for 10 Minutes: Once filled jars are loaded and the lid is locked, bring the water to a boil and let steam vent steadily from the vent pipe/petcock for a full 10 minutes before putting your weight or gauge on.
- Adjust Pressure for Your Altitude: After your pressure canner comes to pressure, process for 90 minutes at the proper pressure for your elevation above sea level:
| Altitude (feet) | Dial Guage Pressure | Weighted Gauge Pressure |
| 0 – 1,000 ft | 11 PSI | 10 PSI |
| 1,001 – 2,000 ft | 11 PSI | 15 PSI |
| 2,001 – 4,000 ft | 12 PSI | 15 PSI |
| 4,001 – 6,000 ft | 13 PSI | 15 PSI |
| 6,001 – 8,000 ft | 14 PSI | 15 PSI |
- Natural Cool Down: When the 90 minutes are up, turn off the heat and let the canner depressurize completely on its own. Never force-cool the canner, or you’ll draw liquid right out of the jars!
How to Serve this Butternut Squash Soup
When you’re ready to turn a jar from your pantry into a cozy supper, finishing it off couldn’t be simpler:
Warm It Up: Pop open a quart jar and dump everything—the veggies and all that flavorful broth—right into a pot. Bring it to a gentle simmer on the stove for about 5 minutes until it’s nice and hot.
Blend It Smooth: Grab an immersion blender and blend everything right in the pot until it’s completely smooth and velvety. (If you’re using a standard blender, just let it cool slightly first and blend in quick batches.)
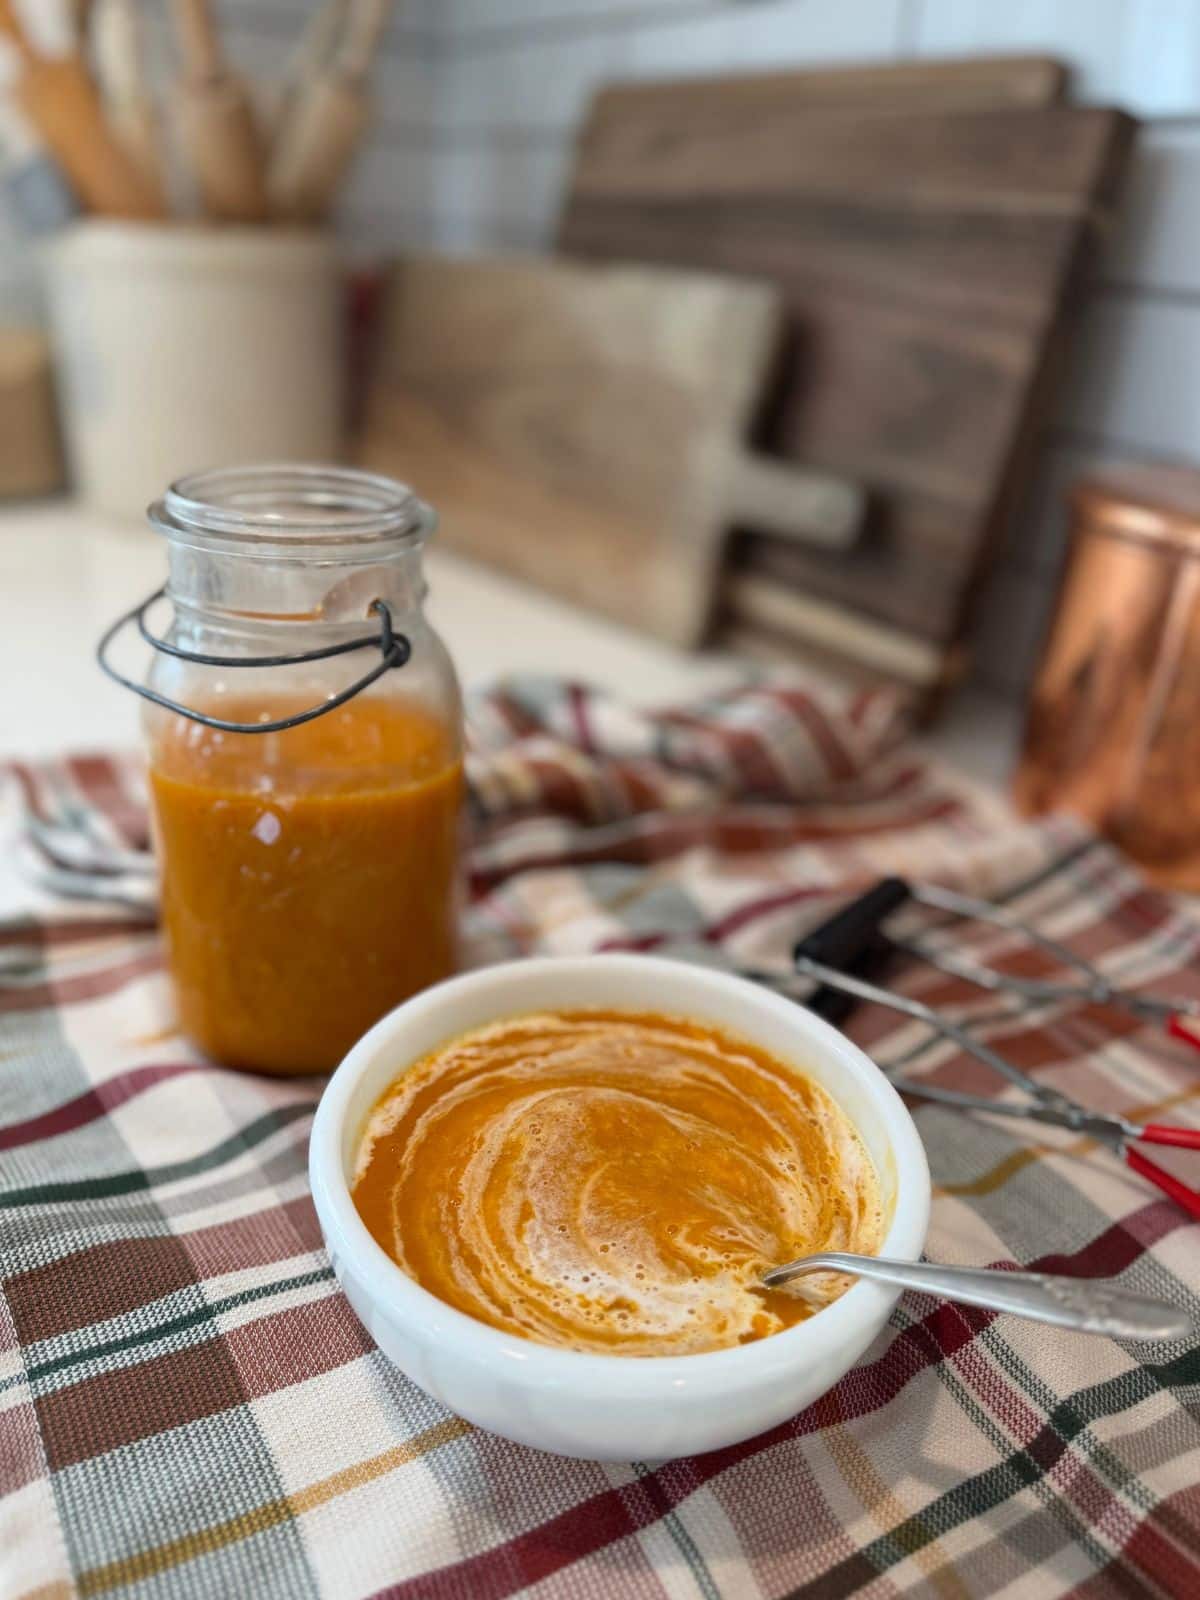
Make It Creamy: Pour in 1/2 to 3/4 cup of heavy cream, half-and-half, or full-fat canned coconut milk. Stir well over low heat until it’s completely warmed through.
Dish It Up: Ladle your hot butternut squash soup it into bowls and top with a sprinkle of roasted pumpkin seeds, an extra drizzle of cream, or a bit of fresh cilantro if you have it on hand. This soup goes perfect with soft dinner rolls, or better yet, buttery sourdough rolls!
If you like a thicker, richer soup, start with 1/2 cup of cream and let it simmer for a couple of extra minutes to reduce down. If you prefer a lighter broth, use the full 3/4 cup or add a splash of extra stock!
Try this Butternut Squash Soup Canning Reicpe & Dont forget to review the recipe card!
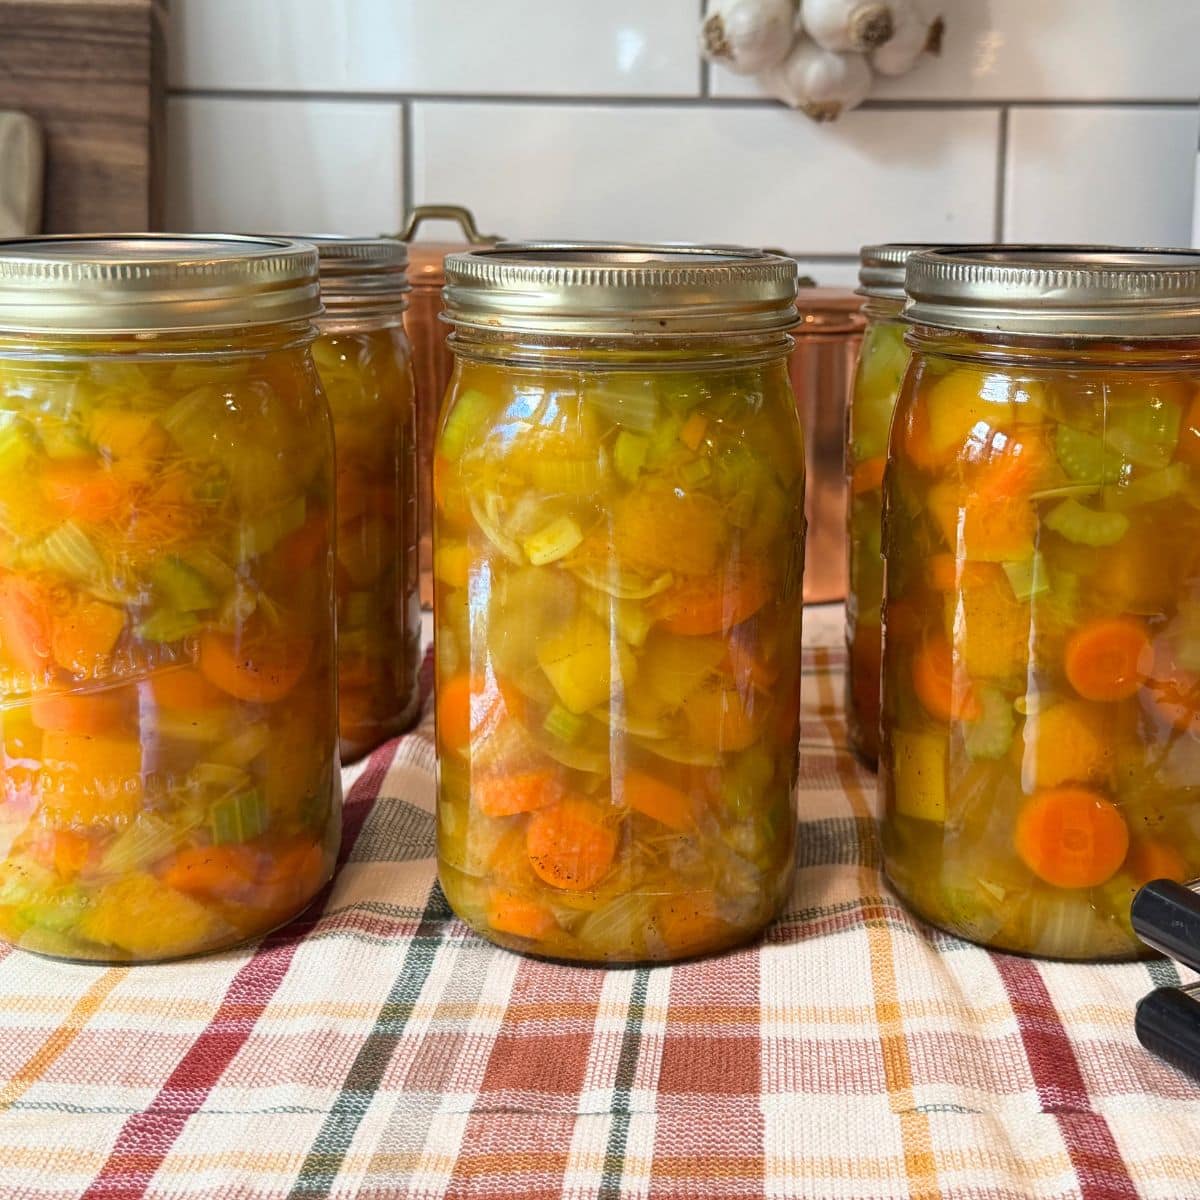
Butternut Squash Soup Canning Reicpe
Equipment
- 1 Pressure Canner
- 1 jar lifter
- 7 Quart Jars, with lids and bands
Ingredients
- 10 lbs Butternut Squash peeled, seeded, and cubed into 1/2-inch pieces. (About 14 cups – 2 cups per jar)
- 7 Carrots medium, peeled and chopped
- 7 Celery Stalks chopped
- 4 1/2 Onions Yellow or White, chopped
- 2 1/2 Tbsp Canning Salt or 1 tsp per quart jar
- 1 1/2 Tbsp Curry Powder about 3/4 to 1 tsp per quart jar, adjusted to taste
- 1 tsp Black Pepper about 1/8 to 1/4 tsp per quart jar
- 4.25 quarts Broth or Water enough to fill jars to 1-inch headspace
Instructions
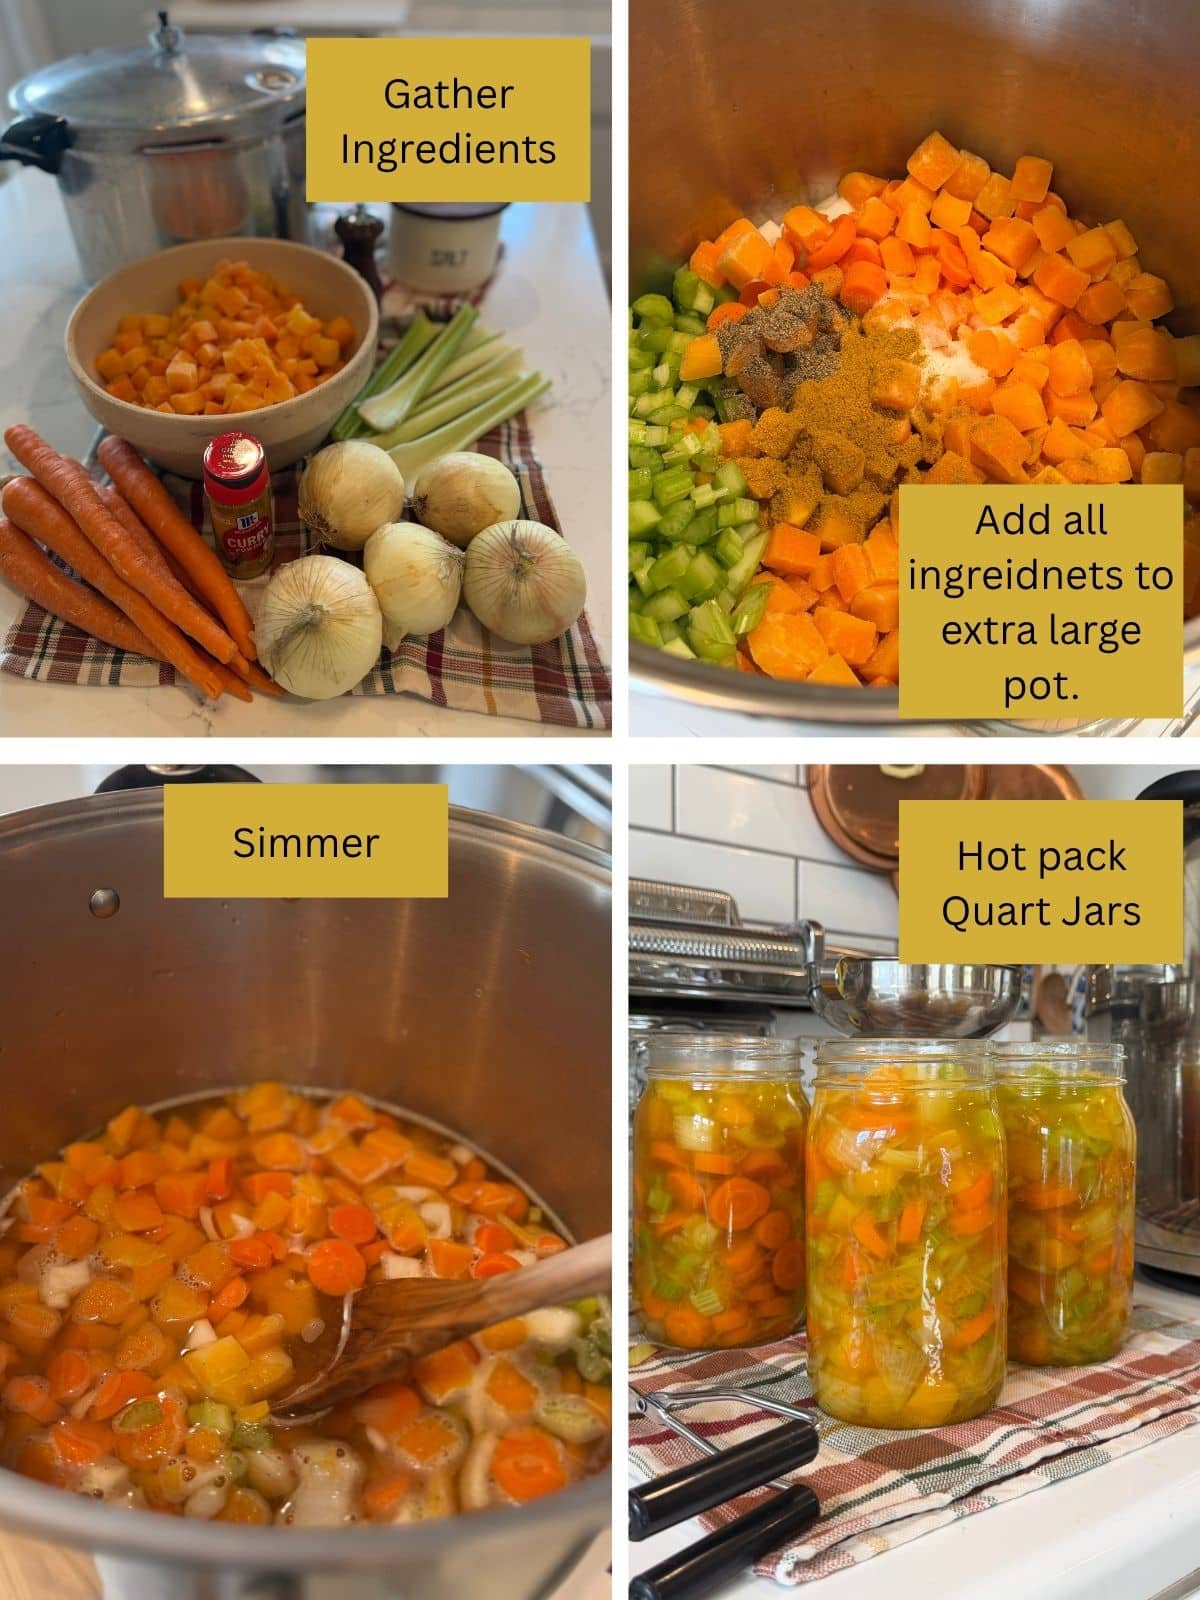
- Prep Vegetables: Wash all vegetables thoroughly. Peel the butternut squash and carrots, then scoop out and discard all squash seeds. Cut the squash, carrots, celery, and onions into uniform 1/2-inch cubes.
- Preheat Soup Base: Transfer all cubed vegetables, canning salt, curry powder, and black pepper into a large stockpot. Pour in broth or water to cover. Bring to a boil over medium-high heat, then reduce heat and simmer for 5 minutes to heat everything thoroughly. (Do not overcook).
- Prep Jars & Canner: While the vegetables simmer, prepare your pressure canner with 2 to 3 inches of water and bring it to a warm simmer. Keep 7 clean quart jars warm in the canner water to prevent cracking when filled.
- Pack Jars: Using a slotted spoon, divide the hot vegetable solids evenly among the 7 warm quart jars, leaving 1 inch of headspace at the top.
- Add Liquid: Ladle the hot seasoned broth over the vegetables in each jar, maintaining a strict 1-inch headspace.
- Debubble & Seal: Gently run a non-metallic bubble remover tool around the inside of each jar to release trapped air. Adjust broth levels if needed to maintain 1 inch of headspace. Wipe the jar rims clean with a damp paper towel, center the lids, and screw bands down until fingertip-tight.
- Vent Canner: Place jars on the rack inside your pressure canner and lock the lid. Turn heat to medium-high and let steam vent steadily from the vent pipe for a full 10 minutes before placing your weight or dial gauge on.
- Process Jars: Bring canner up to proper pressure for your altitude (11 PSI for dial gauges at sea level, or 15 PSI for weighted gauges above 1,000 ft). Process quart jars for 90 minutes, adjusting heat as needed to maintain steady pressure throughout.
- Cool Naturally: Turn off heat when time is up. Allow the canner to cool down and depressurize completely on its own—never force-cool. Carefully remove jars with a jar lifter and let them sit undisturbed on a towel-lined counter for 24 hours before checking seals.
- To Serve: Dump 1 quart jar into a pot, simmer for 5 minutes until hot, and blend smooth with an immersion blender. Stir in 1/2 to 3/4 cup of heavy cream or full-fat coconut milk over low heat, ladle into bowls, and enjoy!
Notes
- Safe Canning Rules: Winter squash must always be hot-packed and pressure canned in cubed form. Never puree, mash, or add dairy/coconut milk prior to canning, as high density and dairy create safety hazards. Pureeing and adding cream are strictly reserved for serving day.
- Prep Tip: Cut your squash and root vegetables into uniform 1/2-inch cubes so they heat through evenly in the pot and process safely in the pressure canner.
- Serving Suggestion: One 1-quart jar makes roughly 3 to 4 bowls of soup once blended with 1/2 to 3/4 cup of heavy cream or full-fat canned coconut milk.
- Storage: Store sealed, wiped jars in a cool, dark pantry for up to 12–18 months.
Processing time remains 90 minutes for quart jars (or 55 minutes for pint jars) regardless of elevation. Adjust your canner pressure based on your altitude above sea level:
| Altitude (Feet) | Dial Gauge Pressure | Weighted Gauge Pressure |
| 0 – 1,000 ft | 11 PSI | 10 PSI |
| 1,001 – 2,000 ft | 11 PSI | 15 PSI |
| 2,001 – 4,000 ft | 12 PSI | 15 PSI |
| 4,001 – 6,000 ft | 13 PSI | 15 PSI |
| 6,001 – 8,000 ft | 14 PSI | 15 PSI |


I have a little leftover in my pot after filling my jars, and use it
the same day for a little lunch;)
Nutrition

About Juliea
Juliea is a mother of six, a sourdough baker, and a homestead builder living in Idaho. Alongside her husband and their horse, Dude, she manages a busy farmhouse and shares her love for scratch-cooking and simple homemaking. Through her blog and YouTube channel, she helps millions of families every year master the art of the handmade home.