


If you crave the tangy flavor and airy crumb of sourdough, combined with the crisp crust of a French baguette, this recipe is for you.

This long-fermented method creates three beautiful and flavorful sourdough baguettes. Perfect with hard boiled eggs or for ham sandwitches!
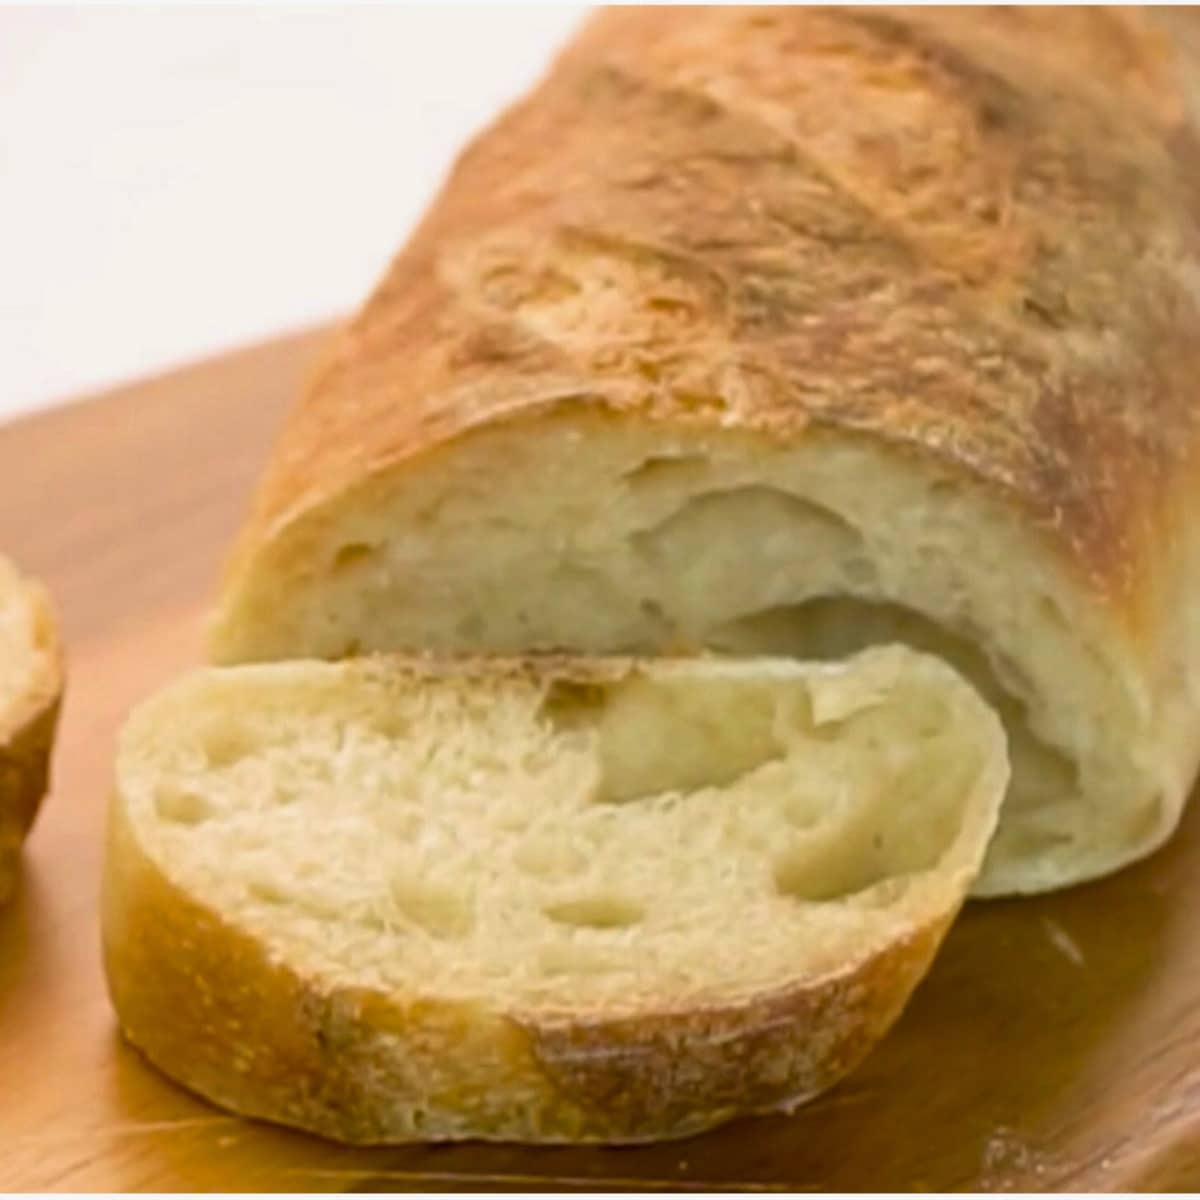
There’s something so satisfying about making your own baguettes from scratch! These sourdough baguettes come out with a beautiful crunchy crust and a chewy tangy flavor inside… Delicious!
Long fermentation is key to achieving the classic sourdough taste and texture. First, you’ll create a levain sourdough starter and let it rise till at least doubled. Then, you mix up the dough and let it rise, do stretch and folds to build up it’s gluten structure. After shaping and a final rise, you’ll bake these beauties to perfection!

Simple Ingredients
This recipe makes 3 medium-sized baguettes that are about 12-14 inches long. Of course, the number of baguettes can vary depending on the size and shape you prefer!
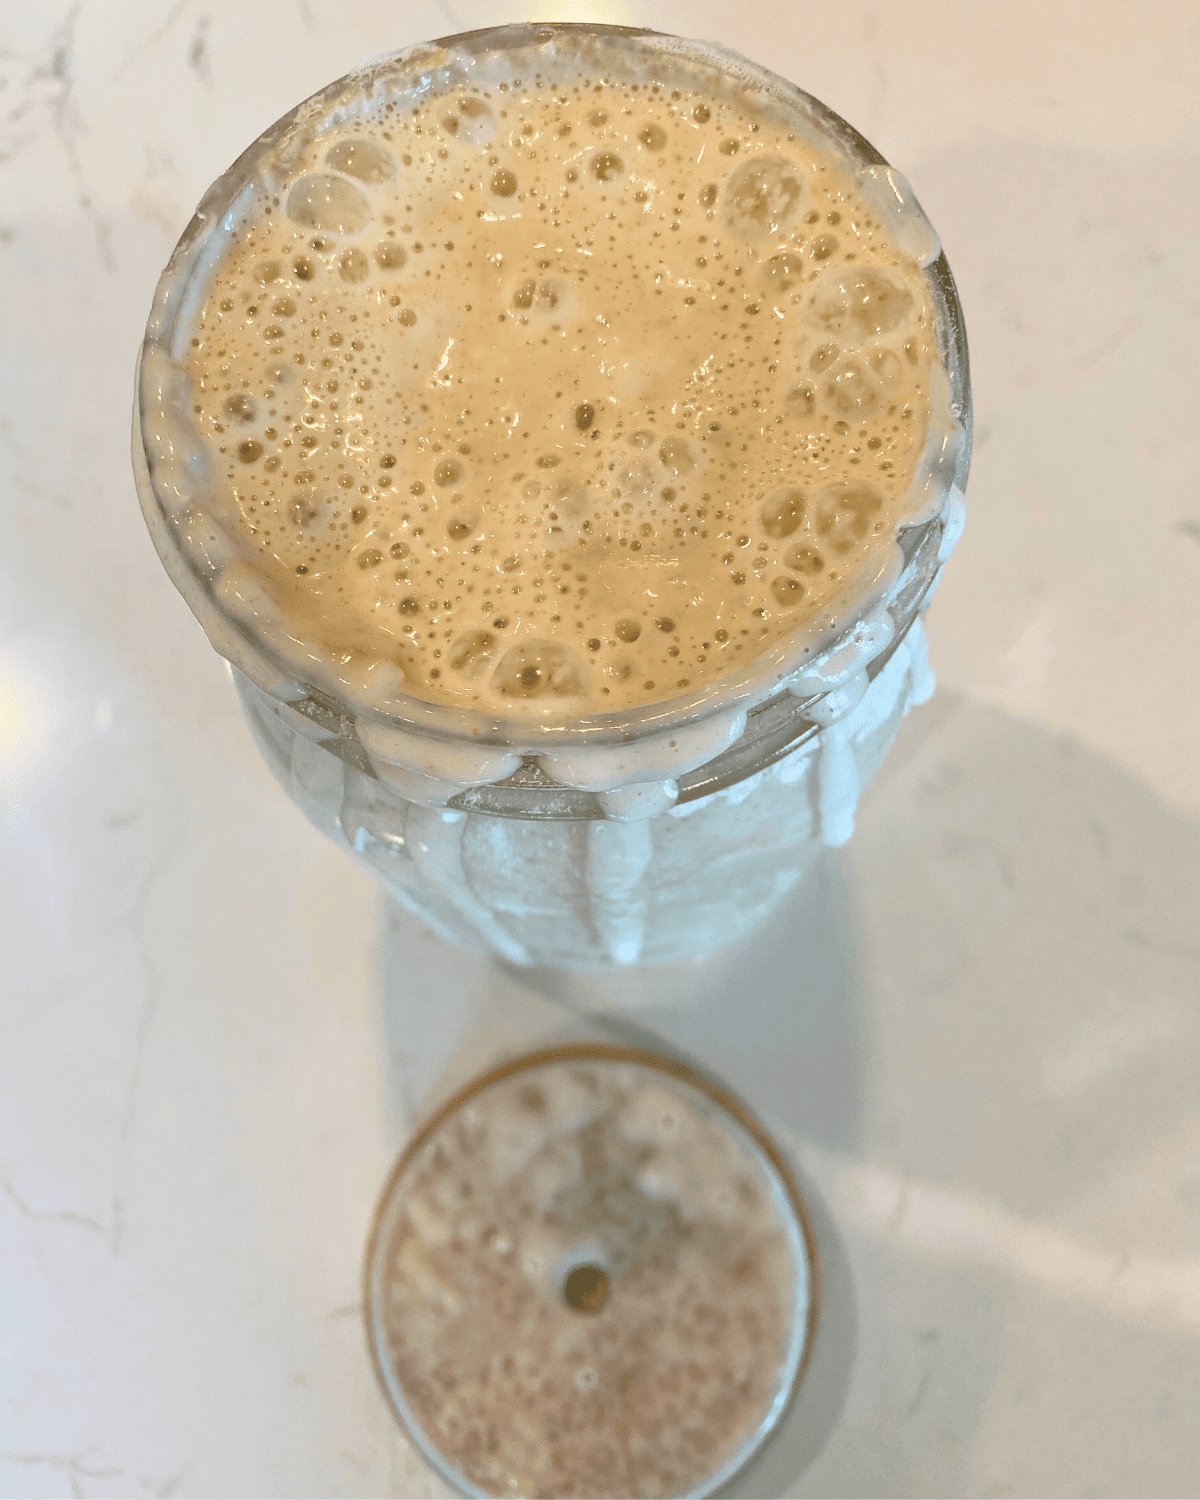
First, we need our levain sourdough starter. Think of this as our little colony of wild yeasts and bacteria, the lifeblood of our bread. We feed it bread flour and water to get it nice and bubbly, ready to leaven our dough.
Flours: Then, for the baguette itself, we’re using mostly bread flour, it’s the high protein content that gives us that chewy, airy crumb we love. And we’re adding a touch of all-purpose flour for a bit of tenderness, or if you’re feeling adventurous, you can swap it for whole wheat flour for a nuttier flavor and added complexity.
Water & Salt are crucial, it hydrates the flour and brings the dough together. And lastly, salt isn’t just for flavor, it also strengthens the gluten and controls the fermentation, ensuring a beautifully structured baguette. While I’ve given you cup measurements, I really encourage you to use a scale if you can.
How to Make Sourdough Baguettes
Build the levain. I treat it like nurturing a tiny pet. I prefer building it in a mason jar, so I can easily see the activity. If my starter’s been snoozing in the fridge, I give it a good 12 hours to wake up and get bubbly. Patience is key! I’ve found that a well-fed, active levain makes all the difference in the final rise and flavor.
Then comes the autolyse. This is my secret weapon for that airy, open crumb. I know it seems like just letting flour and water sit, but trust me, it’s worth it! By allowing the flour to fully hydrate before adding the levain, we kickstart gluten development without overworking the dough. This translates to a more extensible dough, which means lighter, more voluminous baguettes. It’s a gentle approach, skipping the initial kneading, and it really pays off….
When it’s time to mix, I love using a Danish whisk. It gets everything incorporated quickly without over-handling the dough. And don’t forget the salt! It’s not just flavor; it strengthens the gluten and slows down fermentation, giving us better control.

Now, for the bulk fermentation and stretch and folds. This is where we build strength and structure. I swear by my 30-minute intervals—it gives the gluten time to relax and stretch. And that quarter turn after each fold? It ensures even development. If your dough is feeling sticky, don’t be afraid to wet your hands. It’s a lifesaver! I find this method superior to long, continuous kneading because it develops the gluten gently, preventing a tough, dense baguette.
Shaping is where things get personal. I like to pre-shape into rectangles first, giving the gluten a little rest before the final shaping. It makes the final shaping so much easier! And a well-floured surface or couche is essential. I always keep a spray bottle of water handy to lightly dampen my couche, which helps prevent sticking.
For the final fermentation, I’ve learned to trust my instincts over the clock. Kitchen temperature plays a huge role. Look for puffiness and a slight wobble in the dough.

Preheating the oven is non-negotiable! A hot oven and baking stone are crucial for that crispy crust and oven spring. And don’t forget the steam! It helps the crust expand and gives it that beautiful sheen. Put a cast iron skillet on the bottom rack to preheat!
Scoring is my favorite part! A sharp blade or razor is essential for clean cuts. It’s like signing your masterpiece. Those diagonal cuts aren’t just for looks; they control the expansion of the dough.

Finally, cooling. I know it’s hard to resist, but letting the baguettes cool on a wire rack for at least an hour allows the crumb to set and the flavors to fully develop. Trust me, the wait is worth it!
Tips & Tricks
Store your baguettes in a paper bag or wrap them in a clean kitchen towel to keep them fresh… Avoid plastic bags, because they make the crust soft and it’ll lose its crunch!
Freezing: Sourdough baguettes freeze well. After they cool, wrap them tightly in plastic wrap or aluminum foil and freeze.
Be Patient! Sourdough baking takes time, especially with long fermentation. Don’t rush it!
High-quality bread flour and filtered water make a big difference. Use flour with a higher protein content, like bread flour for better baguettes. Use non chlorinated water… If you have city water, use a filter if possible.
Let Sourdough Baguette Cool – Let your baguettes cool completely on a wire rack before slicing. Cutting them while they’re still warm can result in a gummy crumb.
I want to know what YOU think, Please review the recipe card!
If you try this recipe and love it, I’d love if you give it 5 stars! Tag me on Instagram @farmhouse_harvest with your delicious creation!
Sourdough Baguette Recipe with Video
Ingredients
Sourdough Starter Levain
- 50 g active sourdough starter 100% hydration ≈ 1/4 cup
- 100 g bread flour ≈ 3/4 cup
- 100 g water ≈ 1/2 cup
For the Sourdough Baguette Dough
- 350 g bread flour ≈ 2 3/4 cups
- 150 g all-purpose flour ≈ 1 1/4 cups
- 300 g water ≈ 1 1/4 cups
- 9 g salt ≈ 1 1/2 teaspoons
Instructions
The First Day
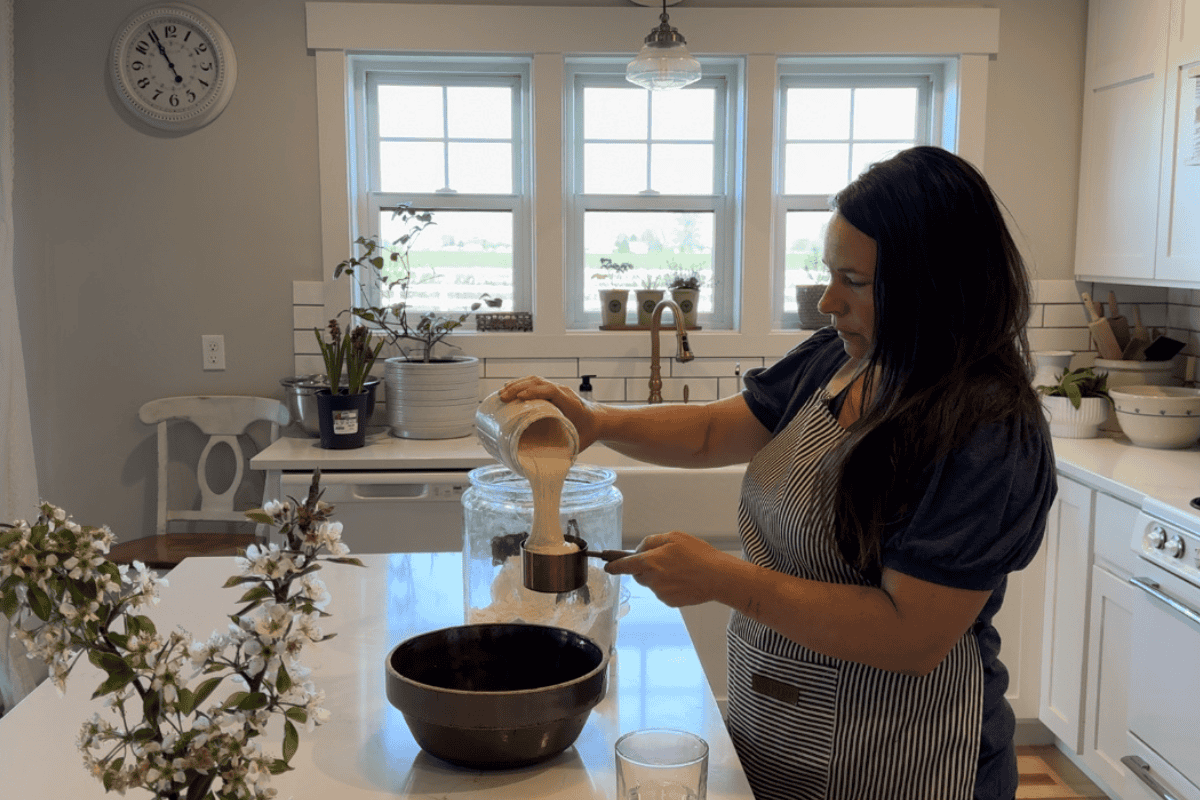
- Build the starter (levain): In a mixing bowl, combine 50g of active sourdough starter with 100g of bread flour and 100g of water. Mix well until it forms a stiff dough. Cover the bowl and let it ferment at room temperature (ideally around 70°F/21°C) for about 12 hours or until it has doubled in volume and shows signs of activity (bubbles and a slightly sour smell).
On the Second Day
- Autolyse: In a large mixing bowl, combine the bread flour, all-purpose flour, and water. Mix until just combined, without kneading. Cover the bowl and let it rest for 1 to 2 hours. This allows the flour to fully hydrate, improving the dough's extensibility.
- Mix the dough: Add the levain to the autolysed dough and mix until well combined. Then, add the salt and continue to mix until the dough is smooth and cohesive. You can use the "stretch and fold" technique during this process, gently pulling one side of the dough and folding it over the top. Repeat this process several times to strengthen the dough.
- Bulk fermentation: Cover the bowl and let the dough rest at room temperature for about 4 to 5 hours. During this time, perform a series of stretch and folds every 30 minutes for the first 2 hours. This helps develop the gluten and improves the dough's structure. The exact fermentation or proofing time may vary depending on your starter's strength and the temperature of your kitchen;)
- Shape the baguettes: Gently divide the dough into 3 equal pieces. Pre-shape each piece into a small rectangle and let them rest for 15-20 minutes. Then, shape each piece into a baguette by elongating the dough and tucking the sides under. Place the shaped baguettes on a well-floured surface, parchment lined baking sheet, or a couche (a floured linen cloth).
- Final fermentation: Cover the shaped baguettes with a damp cloth and let them ferment at room temperature for another 4 to 5 hours, until they have are puffy. The fermentation time may vary depending on the temperature and the strength of your starter.
- Preheat the oven: Place a baking stone or an upside-down baking sheet in the middle rack of your oven. Place a cast iron skillet on the bottom rack while preheating. Preheat the oven to 475°F/245°C at least 30 minutes before baking.
- Score the baguettes: Right before baking, score the tops of the baguettes with diagonal cuts using a sharp blade or a bread lame. This will help the bread expand and create a beautiful crust.
- Bake: Carefully transfer the baguettes onto the preheated baking stone or sheet. Bake at 475°F for the first 10 minutes (with steam), then lower the temperature to 425°F for the remaining 10-15 minutes.
- Cool: Allow the baguettes to cool on a wire rack for at least an hour before slicing. As tempting as it may be, letting them cool ensures the crumb structure fully develops and the flavors mature.
Video
Notes
- Adjust the Water Amount – Depending on your flour and humidity, you may need to adjust the water amount slightly. The dough should be tacky but not overly sticky.
- To Steam: When you put the bread in, pour 1 cup of boiling water into the hot cast iron skillet (carefully!) to create a burst of steam.
- Storing Sourdough: To keep your baguettes fresh, store them in a paper bag or wrap them in a clean kitchen towel. Avoid plastic bags, as they can make the crust soft and lose its crunch.
- Freezing: Sourdough baguettes freeze well. Once cooled completely, wrap them tightly in plastic wrap or aluminum foil and freeze. Thaw at room temperature or reheat in a preheated oven when ready to eat.
- Sourdough Variations: Once you’ve mastered the basic sourdough baguette recipe, feel free to experiment with different flour combinations, like adding whole wheat or rye flour, to create unique flavor profiles.
Nutrition

About Juliea
Juliea is a mother of six, a sourdough baker, and a homestead builder living in Idaho. Alongside her husband and their horse, Dude, she manages a busy farmhouse and shares her love for scratch-cooking and simple homemaking. Through her blog and YouTube channel, she helps millions of families every year master the art of the handmade home.


1 comment
Timber
This recipe is super easy. The sourdough baguettes are perfect for any meal. They are delicious and nutritious.