

I’m excited to share with you my tried and true recipe for oven-roasted tri-tip. This lean and flavorful cut of meat is bound to become a favorite in your household! It’s rich and flavorful and oh so tender.
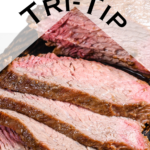
Oven Roasted Tri-Tip
Oven roasted tip-tip is a mouthwatering family favorite perfect for special occasions! Delight your taste buds with tender and juicy oven-roasted tri-tip, seasoned with a mouthwatering dry rub that will leave you craving for more.

A Flavorful Gem
This cut of beef has a personality all its own… And it’s bound to captivate your taste buds with its flavor!
Tri tip is a triangular cut of beef that comes from the bottom sirloin… It’s known for its rich flavor and tender texture. With its marbling and thin layer of fat, tri-tip is perfect for roasting, because it stays juicy and succulent even when cooked to medium or medium-rare.

Whether you’re hosting a backyard barbecue or preparing a special family dinner, the tri-tip is sure to steal the show with its striking appearance.
But don’t let its dazzling looks fool you—this cut of beef is also incredibly versatile. Its robust flavor pairs beautifully with a variety of seasonings, from classic dry rubs to zesty marinades. Its adaptability shines through in various cooking methods, whether it’s being roasted, grilled, or even cooked sous vide.
Tri-tip isn’t just a cut of beef—it’s an experience. It represents the spirit of the West Coast, with its origins rooted in Santa Maria-style barbecue traditions.
Recipe Overview
1. Preparing the Tri-Tip
To ensure the best results, it’s essential to prepare the tri-tip properly. Begin by removing the roast from the refrigerator and letting it sit at room temperature for about 30 minutes. This allows the meat to cook more evenly. Meanwhile, preheat your oven to 425 degrees F.

2. Seasoning
Now it’s time to infuse the tri-tip with flavor. Prepare a dry rub by combining garlic powder, black pepper, and your favorite spices in a small bowl. Apply about 1/4 a cup of mustard to your tri tip. Then, massage the rub into the mustard covered tri-tip, covering all sides generously. The combination of spices will create a mouthwatering crust on the meat as it roasts!
3. Roasting
Place the seasoned tri-tip on a rack in a roasting pan with the fat side facing up. This position allows the fat to melt and baste the meat during cooking, adding even more flavor. Roast the tri-tip in the preheated oven for approximately 25-30 minutes or until the internal temperature reaches 130-135 degrees F. for medium-rare, or 140 for medium.
Medium-rare: 130°F Medium: 130-140°F Medium-well: 140-150°F
4. Resting & Slicing
Once the tri-tip reaches the desired temperature, remove it from the oven and let it rest on a cutting board. Tent it loosely with aluminum foil to keep it warm. Resting allows the juices to redistribute, resulting in a more tender and flavorful steak. Give it about 10-15 minutes, and then get ready to slice.
Using a very sharp knife, slice the tri-tip across the grain into thin slices. This cutting technique guarantees each bite is tender and easy to chew. Arrange the slices on a serving platter, and get ready to watch your family’s faces light up with delight as they savor the rich flavor and juiciness of the tri-tip.
5. Pairing & Serving
Now that the tri-tip is perfectly roasted and sliced, it’s time to complete the meal. Serve it alongside creamy mashed potatoes, grilled vegetables, Green Goddess Salad, or soft sourdough rolls! You can also drizzle some homemade BBQ sauce over the slices for an extra flavor kick. This versatile dish pairs well with a variety of sides, so feel free to get creative and cater to your family’s preferences!
Ingredients
- 1 tri-tip roast (approximately 2-3 pounds)
- 1/4 cup mustard.
- Dry rub of your choice, or use my delicious recipe!
- Salt and pepper to taste!
Savory Spice Blend for Sensational Roasts
Here’s a delicious dry rub recipe to enhance the flavor of your oven roasted tri-tip!
- 1.5 teaspoon salt
- 1/4 teaspoon dried rosemary
- 2 tablespoons garlic powder
- 1 tablespoon black pepper
- 1 tablespoon paprika
- 1 tablespoon brown sugar
- 1 teaspoon cumin
- 1 teaspoon chili powder
- 1/2 teaspoon cayenne pepper (adjust to taste)
Dry Rub Instructions
- In a small bowl, combine all the dry rub ingredients: garlic powder, black pepper, paprika, brown sugar, salt, cumin, chili powder, and cayenne pepper.
- Mix the ingredients together until well combined.
- Taste the dry rub and adjust the seasonings according to your preferences. Feel free to add more salt, pepper, or cayenne pepper for a little heat.
- Generously sprinkle and rub the dry rub mixture onto all sides of the tri-tip roast, ensuring even coverage.
- Pat the dry rub into the meat to help it adhere.
- Let the seasoned tri-tip sit at room temperature for about 30 minutes to allow the flavors to penetrate the meat.
- Proceed with roasting instructions.
Feel free to adjust the spices and seasonings in the dry rub to suit your taste preferences. This flavorful dry rub will add a tasty crust and enhance the overall deliciousness of your oven-roasted tri-tip. Enjoy!
Instructions
- Remove the tri-tip roast from the refrigerator and let it sit at room temperature for about 30 minutes.
- Preheat your oven to 425 degrees F (220 degrees C).
- In a small bowl, combine the dry rub ingredients: 1.5 teaspoons salt, 1/4 tsp dried rosemary, 2 tablespoons garlic powder,1 tablespoon black pepper,1 tablespoon paprika,1 tablespoon brown sugar,1 teaspoon salt,1 teaspoon cumin,1 teaspoon chili powder,1/2 teaspoon cayenne pepper (adjust to taste). Mix till well combined. Taste and adjust according to your liking.
- Pat the tri-tip dry with a paper towel, then generously season it on all sides with the dry rub mixture. Let your tri tip sit at room temperature with the dry rub applied for at least 30 minutes to absorb flavors (or overnight!)
- Place the seasoned tri-tip on a rack in a roasting pan with the fat side facing up.
- Transfer the roasting pan to the preheated oven and roast the tri-tip for approximately 25-30 minutes, or until the internal temperature reaches your desired level of doneness. Aim for an internal temperature of 130-135 degrees F (55-57 degrees C) for medium-rare.
- Once the tri-tip reaches the desired temperature, remove it from the oven and transfer it to a cutting board. Tent the meat loosely with aluminum foil and let it rest for about 10-15 minutes. This resting period allows the juices to redistribute, resulting in a more tender and flavorful steak.
- After resting, slice the tri-tip across the grain into thin slices. Cutting against the grain ensures a more tender bite.
- Arrange the sliced tri-tip on a serving platter and serve alongside your preferred sides, such as roasted potatoes, grilled vegetables, or a fresh green salad.
- Optional: Drizzle some homemade BBQ sauce over the sliced tri-tip for an added flavor kick.
- Enjoy the deliciousness of your homemade oven-roasted tri-tip!
Note: Remember to adjust the cooking time based on the thickness of your tri-tip roast and your preferred level of doneness.

Tips
Choose a quality cut: When selecting a tri-tip roast, visit your local butcher or grocery store to ensure you’re getting a fresh and well-marbled piece of meat. Look for a triangular cut with a thin layer of fat on one side, known as the fat cap, which adds flavor and moisture during cooking.
Prepare the tri-tip in advance: To maximize flavor, season the tri-tip with the dry rub and let it sit in the refrigerator overnight! This allows the spices to penetrate the meat and enhances the overall taste.
Bring the tri-tip to room temperature: Before cooking, allow the tri-tip to come to room temperature for about 30 minutes. This ensures more even cooking and helps the meat retain its juiciness.
Use a digital meat thermometer: To achieve your desired level of doneness, invest in an instant-read digital meat thermometer. Insert it into the thickest part of the tri-tip, away from any bones or fat, to accurately measure the internal temperature.
Let it rest: After roasting, resist the temptation to immediately slice into the tri-tip. Instead, transfer it to a cutting board and loosely cover it with foil. Allowing the meat to rest for 10-15 minutes allows the juices to redistribute, resulting in a more tender and succulent steak.
Slice against the grain!
To ensure maximum tenderness, always slice tri-tip against the grain. Look for the direction of the muscle fibers and cut perpendicular to them. This creates shorter muscle fibers in each bite, resulting in a more enjoyable eating experience.
Don’t forget the fat cap: When placing the tri-tip in the roasting pan or on the grill grates, ensure that the fat cap is facing up. As it renders and melts during cooking, it will baste the meat, adding flavor and moisture.
Personalize with your favorite BBQ sauce: While tri-tip is delicious on its own, you can make it even tastier by brushing your preferred BBQ sauce during the last few minutes of roasting. This adds a caramelized glaze and a touch of sweetness to the savory tri-tip.
Cooking times and temperatures may vary based on the thickness of the tri-tip and personal preference for doneness. By following these tips and using the recommended techniques, you’ll be well on your way to a perfectly roasted and flavorful tri-tip that will impress your family and friends.
Notes
Adjust cooking time for desired doneness: Cooking times provided in the recipe are a general guideline and may vary based on the thickness and size of the tri-tip. Use an instant-read thermometer to monitor the internal temperature and adjust the cooking time accordingly to achieve your preferred level of doneness.
Carryover cooking: Remember that the tri-tip’s internal temperature will continue to rise by a few degrees as it rests, a phenomenon known as carryover cooking. To ensure you don’t overcook the tri-tip, remove it from the heat source when it’s a few degrees below your desired final temperature.
Using a Cast Iron Skillet
If you prefer a delicious sear on your tri-tip before roasting, consider using a cast iron skillet. Preheat the skillet over medium-high heat and sear the tri-tip for a couple of minutes on each side before transferring it to the oven to finish cooking.
Serve with bbq baked beans, garlic bread, and a strawberry salad. These side dishes perfectly complement the rich flavors of the tri-tip.
More Recipes

About Juliea
Juliea is a mother of six, a sourdough baker, and a homestead builder living in Idaho. Alongside her husband and their horse, Dude, she manages a busy farmhouse and shares her love for scratch-cooking and simple homemaking. Through her blog and YouTube channel, she helps millions of families every year master the art of the handmade home.


1 comment
Juliea Huffaker
Hi Ann! Yes just 1 teaspoon of salt, that was a typo… Thanks for letting me know! The spice rub is:
1.5 teaspoon salt
1/2 teaspoon dried rosemary
2 tablespoons garlic powder
1 tablespoon black pepper
1 tablespoon paprika
1 tablespoon brown sugar
1 teaspoon cumin
1 teaspoon chili powder
1/2 teaspoon cayenne pepper (adjust to taste)