


This fall apart pork butt roast recipe is slow-roasted, packed with flavor, and guaranteed to be fall-apart tender!

Whether you’re using it for pulled pork or enjoying it on its own, its rich flavor, derived from slow marination (12 hours up to 3 days) in a brown sugar and herb dry rub, is sure to impress. And with just 12 hours of roasting in the oven, it’s a perfect choice for family gatherings and any special occasion!
The Pork Butt (Shoulder)
Despite the confusing name, the Butt isn’t from the pig’s backside – it actually comes from the upper shoulder (go figure, right?). That’s why you’ll also hear it called “pork shoulder” or “pork butt.” The name “Boston Butt” probably comes from Boston, Massachusetts, where this cut was a go-to for pork roasts back in the day. Name quirks aside, this cut is packed with flavor and super versatile – perfect for slow roasting, smoking, or braising.

This bone-in pork shoulder – aka pork butt, aka Boston Butt – brings serious flavor and versatility, especially when cooked low and slow. Thanks to its marbling, fat cap, and muscle fibers, it turns into the most tender, juicy pork you can imagine.
A simple spice rub with garlic powder, brown sugar, black pepper, and kosher salt works some serious magic, giving the meat an irresistible flavor. Let it hang out in the oven (or smoker) at 250°F for about 12 hours, and you’ll be rewarded with fall-apart, melt-in-your-mouth goodness.
Whether you roast it, smoke it, or let it do its thing in a crockpot, pork butt is hands down the best choice for pulled pork. It’s a staple in my kitchen, and after you try this recipe, I’m pretty sure it’ll be in yours too! 😄
Equipment and Tools
Before we get cooking, let’s round up the essentials:
- Roasting Pan or Large Cast Iron Skillet – This is where the magic happens. A roasting pan ensures even heat distribution, while a cast iron skillet locks in heat like a champ and gives you a killer sear.
- Roasting Rack – Keeps your pork elevated for better airflow and those perfectly crispy edges. No soggy bottoms here!
- Paper Towels – Things are gonna get messy.
- Aluminum Foil or Pink Butcher Paper – These MVPs help lock in moisture. Foil traps all the juices, while butcher paper lets steam escape while keeping things nice and tender.
- Meat Thermometer – No more guessing! You’ll want to hit 200°F for that perfect, fall-apart tenderness.
- Large Cutting Board – Once your pork is cooked to perfection, you’ll need a solid surface to carve up all that juicy goodness.
- Airtight Container – Because leftovers are a gift! Keep your extra pork butt fresh and ready for round two. The meat will store for 3-5 days in the fridge or up to 3 months in the freezer.
Key Ingredients
Great ingredients are the secret to a mouthwatering, fall-apart Boston Butt. Here’s what each one brings to the party:
- Pork Butt Roast (Shoulder Roast) – Of course the main ingredients here is the pork butt roast… Make sure to get a nicely marbled one… Don’t shy away from the fat. It keeps this pork roast moist and adds so much flavor!
- Garlic Powder & Onion Powder – These two pack a punch, adding deep, savory layers of flavor as the roast slowly cooks.
- Brown Sugar – A little sweetness balances out the savory goodness and helps form that irresistible caramelized crust.
- Kosher Salt – The MVP of seasoning, it enhances flavor, ensures even seasoning, and helps lock in moisture.
- Black Pepper – Adds just the right amount of heat to complement all the other flavors.

Instructions
Cooking a pork butt low and slow is the secret to juicy, fall-apart meat with that perfect crispy bark. Let’s break it down with some helpful tips along the way!
Step 1: Make the Spice Rub
- In a small bowl, mix together kosher salt, black pepper, thyme, brown sugar, onion powder, and garlic powder.
- Why? This blend hits all the right notes—sweet, savory, and just a little heat—to build layers of flavor as it cooks.
Step 2: Season Like You Mean It
- Rub the spice mix all over the pork, making sure to work it into every nook and cranny. This is a big piece of meat. So, be generous with your dry rub. There’s almost no such thing as “too much seasoning” when it comes to a pork butt.
- Pro Tip: Let it sit for a few minutes so the seasoning sticks better.

Step 3: Let It Marinate (Patience Pays Off!)
- Place the seasoned pork in the fridge and let it marinate for at least 12 hours (overnight is best).
- Why? This gives the flavors time to seep deep into the meat, making it even more flavorful and tender.

Start Cooking
Step 4: Prep for Searing
- Take the roast out of the fridge 30 minutes before cooking so it can come to room temp.
- Why? A cold roast won’t cook evenly. Plus, that high heat at the start helps create a killer crust, or bark. As they say in the restaurant kitchens—no color, no flavor!
- Preheat your oven to 450°F.
Step 5: Sear for That Perfect Crust
- Place the pork fat side up on a roasting rack in a pan.
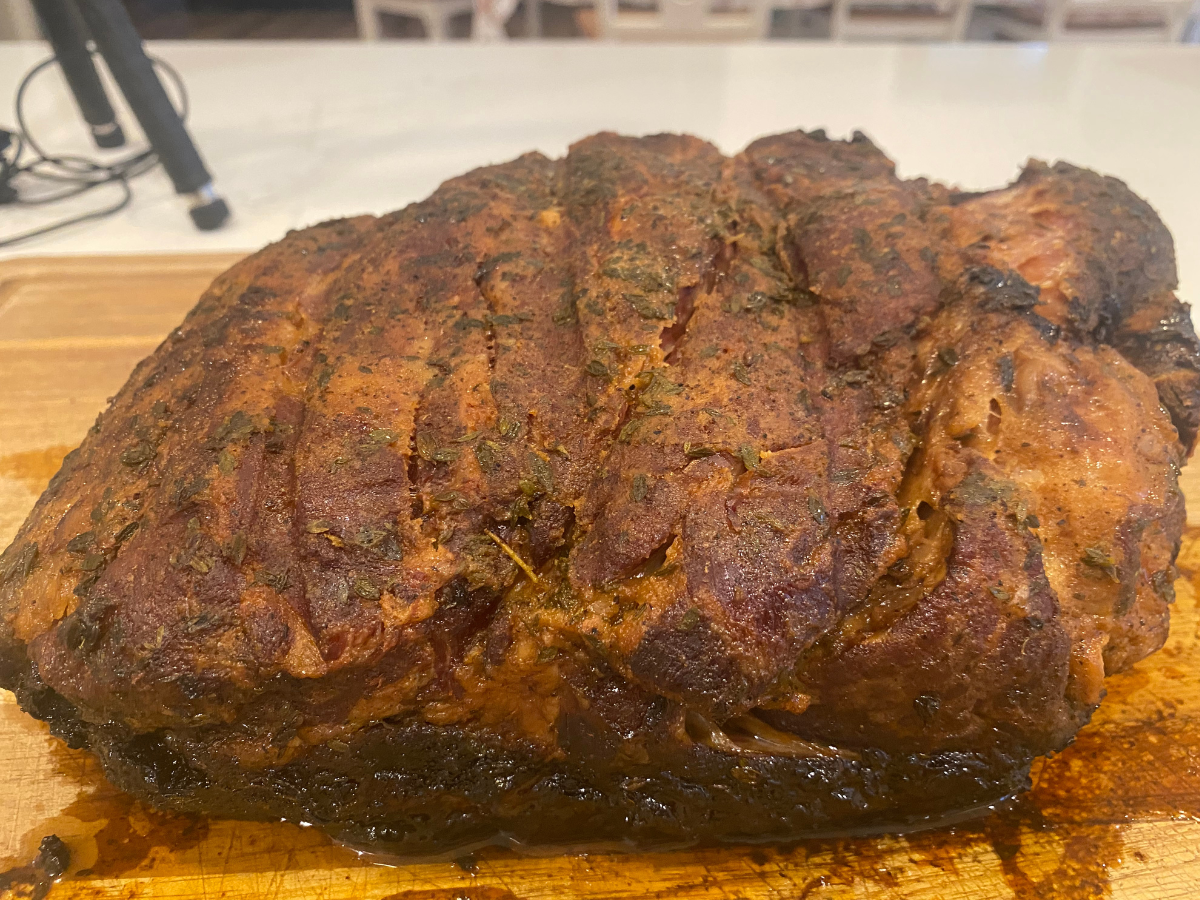
- Roast uncovered at 450°F for 30 minutes to develop a deep, flavorful crust (a.k.a. the “bark”).
- Why fat side up? As the fat melts, it bastes the meat, keeping it juicy.

Step 6: Low and Slow is the Way to Go
- Drop the oven temp to 250°F and continue roasting uncovered for 6-8 hours (for a medium-sized roast).
- What’s happening? The exterior will form a crispy bark while the inside slowly becomes tender as the muscle fibers break down under the low, consistent heat.
Wrap and Keep Cooking
Step 7: Wrap It Up for Ultimate Tenderness
- Once the bark is set (it should look dark and firm, not soft or wet), take the roast out and wrap it tightly in two layers of heavy-duty aluminum foil or pink butcher paper.
- Why?
- Foil: Locks in all the juices, creating ultra-tender meat.
- Butcher paper: Allows steam to escape while keeping moisture, preventing a soggy crust.


Step 8: Finish It Off Low and Slow
- Place the wrapped roast back in the oven at 250°F for another 2-5 hours, depending on size.
- Why? This slow finish breaks down all the connective tissue, making the meat ultra-tender.
Step 9: Check for Perfect Doneness
- Use a meat thermometer and aim for 195-200°F internal temp.
- Important: Never pull it out before 195°F or it won’t shred properly.

The Final Steps
Step 10: Let It Rest (Don’t Skip This!)
- Remove the roast from the oven and let it rest for 15-20 minutes before slicing or shredding.
- Why? This lets the juices redistribute, so every bite is moist and flavorful.
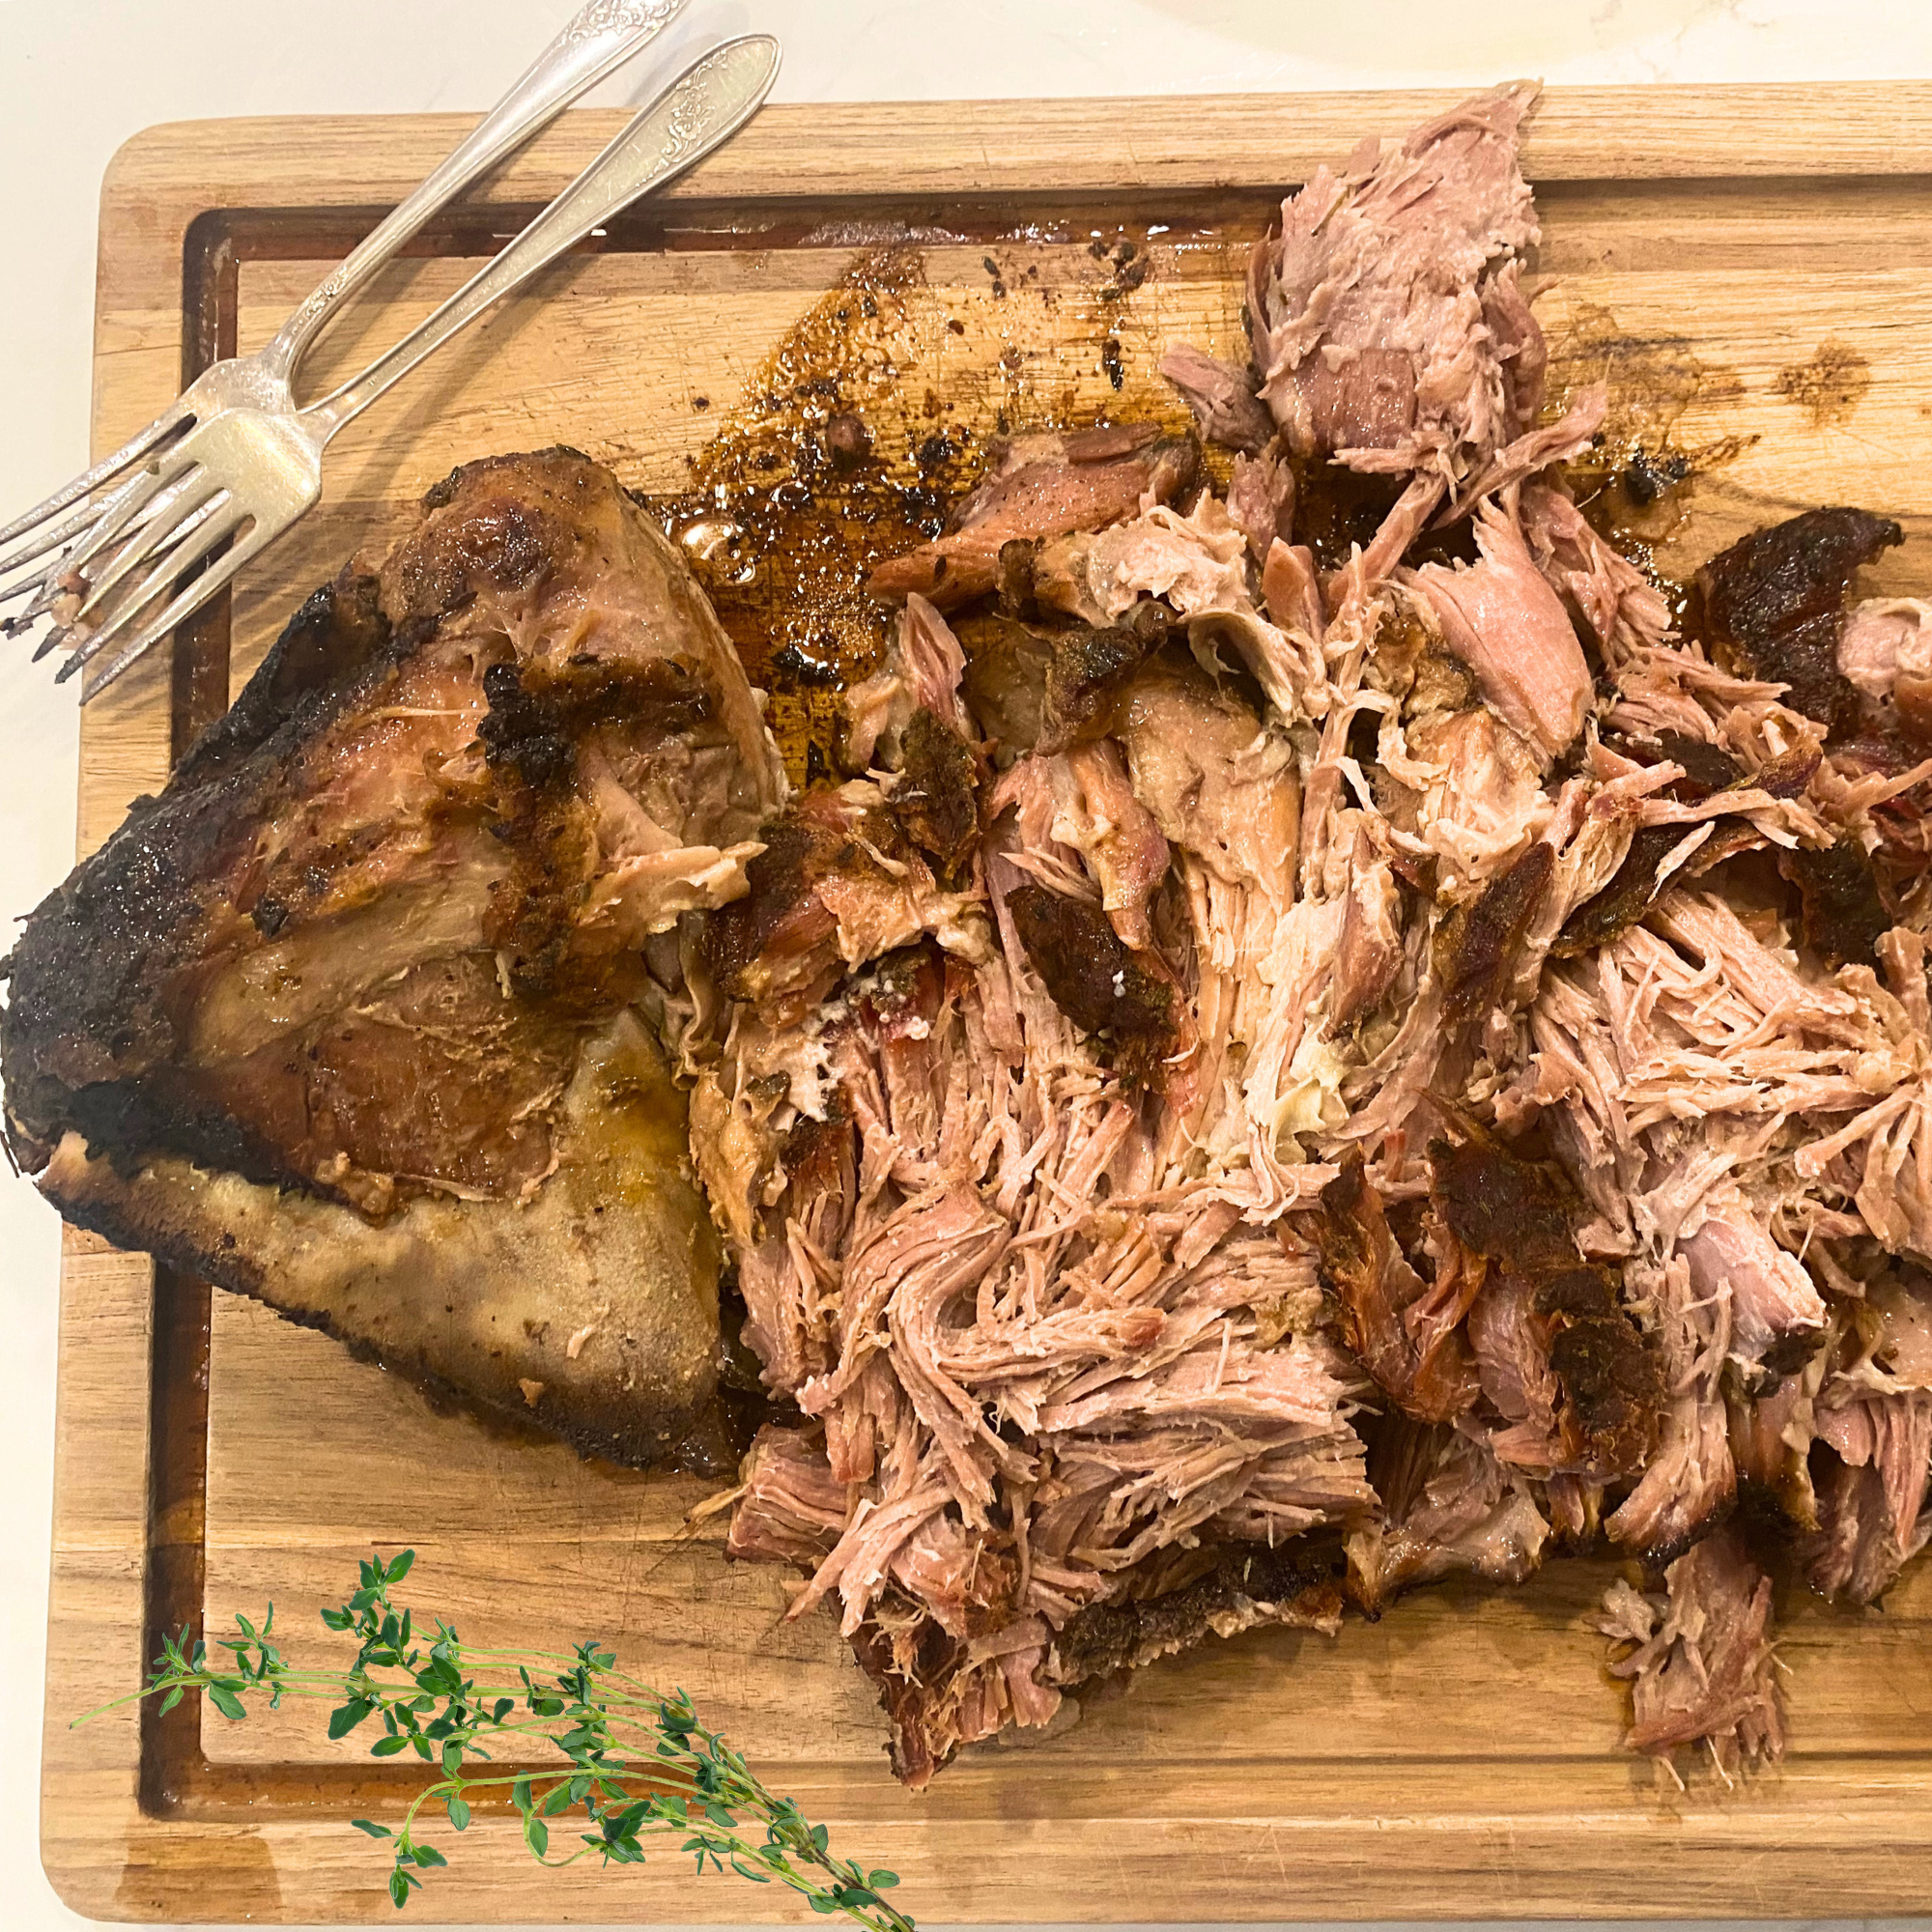
Step 11: Slice or Shred – Your Choice
- For sliced pork: Cut against the grain for tender bites.
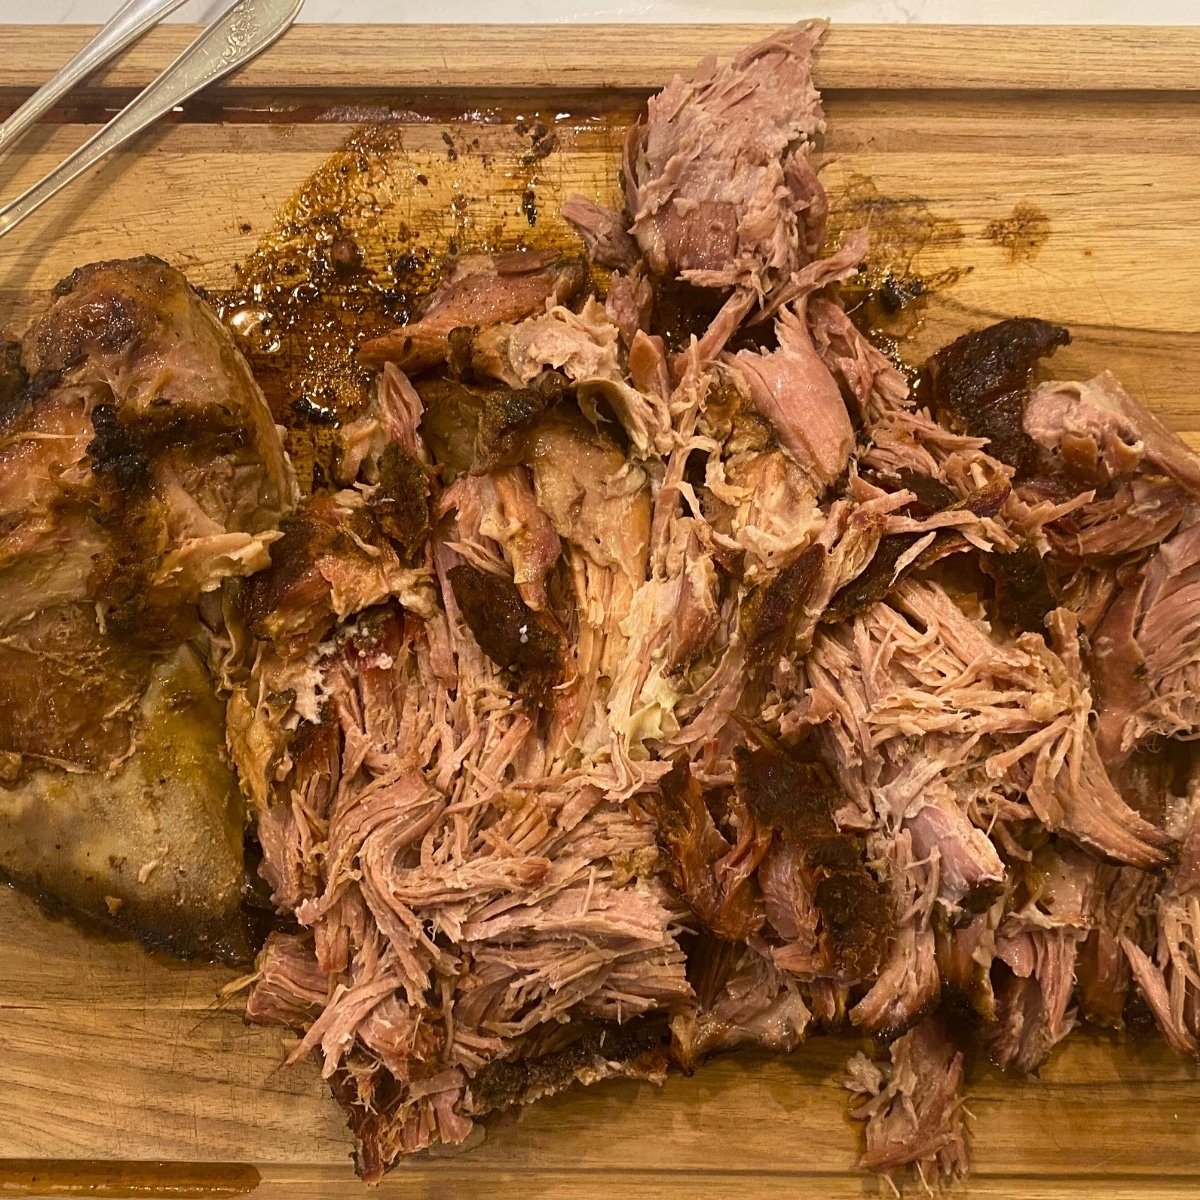
- For pulled pork: Use two forks (or your hands) to shred it into juicy, smoky strands.
Step 12: Serve and Enjoy!
- Serve as-is or with your favorite barbecue sauce for an extra punch of flavor.
- Leftovers? Store in an airtight container in the fridge for 3-5 days or freeze for later.
Now grab a plate, because this pork is about to be next-level delicious! 😋🔥

Pairing
I love to serve this pork butt roast as pulled pork drizzled with BBQ on Soft Sourdough Rolls or quick an easy Moist Cornbread. For the perfect side dish Baked BBQ Beans and fermented red sauerkraut are always a hit.
Store & Reheat Like a Pro
Cool your cooked roast completely before storing. Divide into portions and store in airtight containers. Refrigerate for 3-5 days or freeze for 3 months.
Reheat gently using the oven, slow cooker, or stovetop. Add a touch of liquid to retain moisture. Enjoy roast pork butt leftovers as pulled pork sandwiches, tacos, or as a main course.

More Pork Recipes
I want to know what YOU think… Review the recipe card!
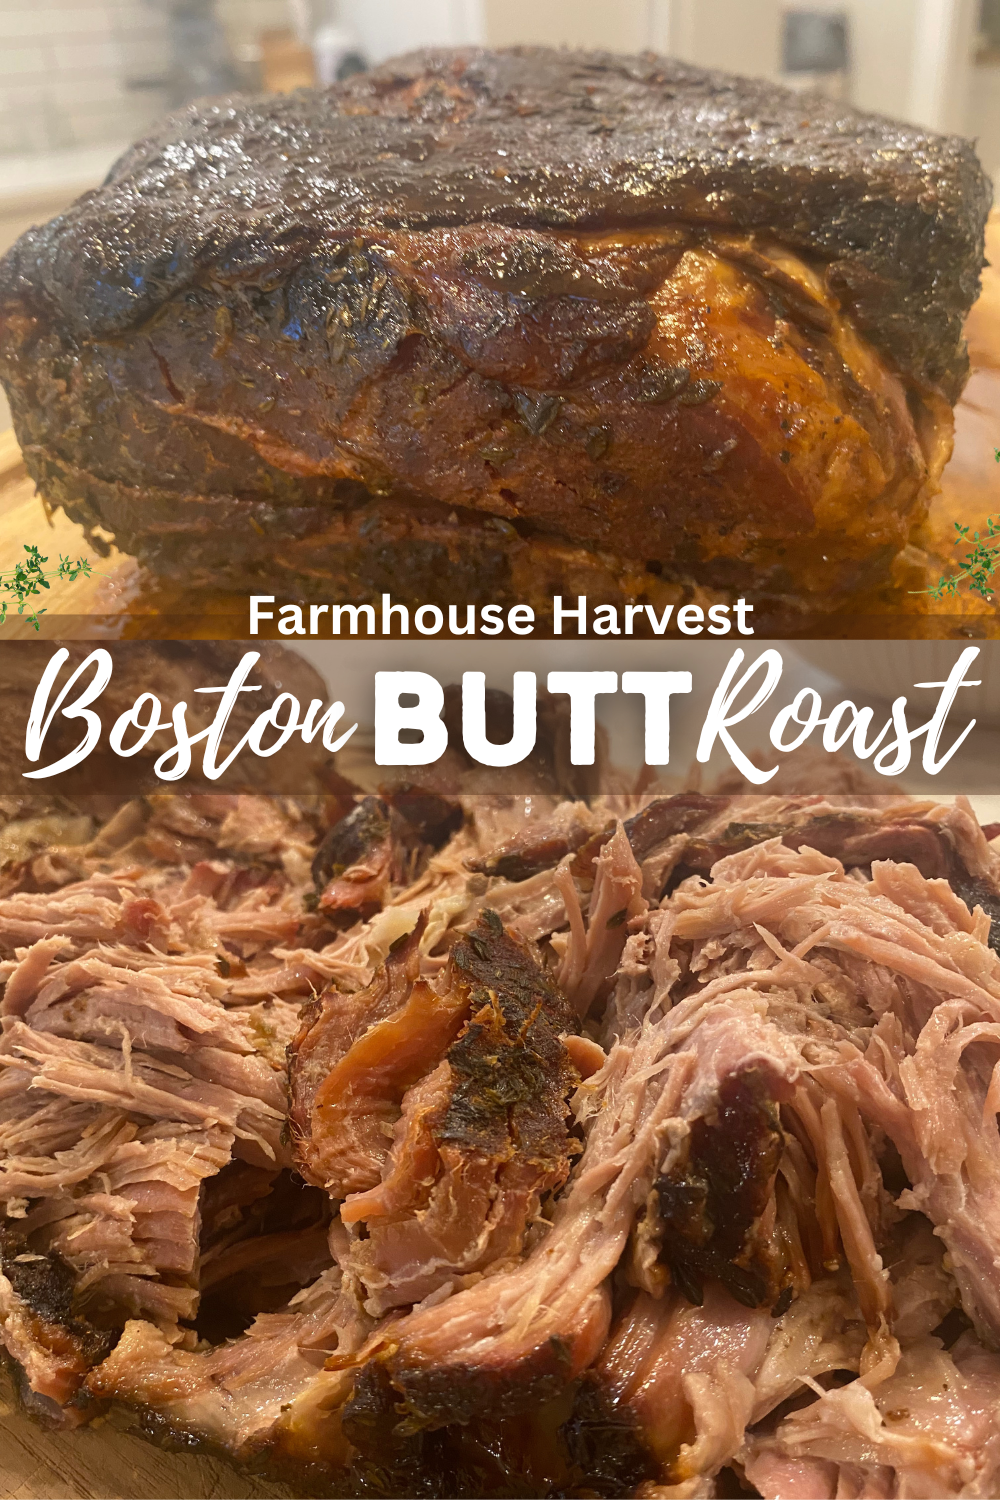
Fall Apart Pork Butt Roast Recipe
Ingredients
- 6-8 pound pork shoulder, also referred to as pork butt or Boston Butt
- 1 1/2 tablespoon salt
- 2 teaspoons of ground black pepper
- 1 tablespoon dried Thyme
- 1/2 cup brown sugar
- 1 tablespoon onion powder
- 1 tablespoon garlic powder
Instructions
Marinate
- In a small bowl, combine the salt, pepper, thyme, brown sugar, onion powder, and garlic powder. Rub the dry rub on all sides of the meat. I do this in a large bowl to prevent a mess. Cover and refrigerate for at least 12 hours, or up to 3 days for best results. If you are short on time, skip the marinating step and go straight to the oven.
Roast
- Preheat oven 450°F.
- Set a wire rack in the bottom of a large roasting pan. Take the pork butt out of the refrigerator and place the roast fat-side up on the rack. Let it reach room temperature while the oven preheats.
- Place the pork butt, uncovered, in the hot oven and cook for 30 minutes.
- After 30 minutes, reduce the oven temperature to 250°F and let the pork butt cook uncovered until the exterior develops a "bark"—a crispy crust—about 6–8 hours for a 6-pound pork butt. You'll know the bark is good when it's dark, ranging from deep mahogany to nearly black, with a glossy sheen.
- Carefully remove the roast from the oven and wrap it in pink butcher paper or two layers of aluminum foil.
- Return the roast to the oven and continue cooking at 250°F until the internal temperature reaches 195-200°F at the thickest part (about 2-5 more hours).
- Transfer the roast to a cooling rack or cutting board and let it rest for 20-30 minutes to allow the juices to redistribute.
- Slice the pork butt against the grain, or pull it apart with forks. Serve with your favorite BBQ sauce or enjoy on its own!
Video
Notes
- Give your self plenty of time with this recipe… You can let it marinate in the fridge for up to 3 days!
- Start cooking it early in the morning the day you'll serve it. I start at 6 am to serve it at 6pm.
- Take the internal temperature by pushing my instant read thermometer right through the butcher paper or aluminum foil wrapping.
- If you don't have pink butcher paper, you can use heavy-duty aluminum foil. However, pink butcher paper is better at allowing steam to escape while still retaining moisture.
- Let the pork come to room temperature before cooking for more even cooking.
- The internal temperature of the roast is the best way to determine doneness. Don't rely on time alone.
- For pulled pork, you can add your favorite BBQ sauce to the shredded meat or drizzle over the top!
Nutrition

About Juliea
Juliea is a mother of six, a sourdough baker, and a homestead builder living in Idaho. Alongside her husband and their horse, Dude, she manages a busy farmhouse and shares her love for scratch-cooking and simple homemaking. Through her blog and YouTube channel, she helps millions of families every year master the art of the handmade home.


58 comments
Michelle
Hands down the best bbq! I pop it in before bed and cook all night. I don’t cover with tinfoil at all. Then 10-12 hrs later depending on size I let rest an hr and shred. Be sure to save juices and put back on meat to keep moist for re heating.
Juliea Huffaker
Thanks for the tip, Michelle! Saving those juices for reheating is exactly what I recommend to keep the meat from drying out. So glad it worked out perfectly for your overnight cook!
Diane
I’m thinking of breaking this into 2 days of cooking. 1st day 450 for 30 minutes then 250 for 6 to 8 hours.
Wrap in foil and cool. Next day 2 to 5 more hours at 250.
Will this work? Has anyone ever tried this?
Juliea Huffaker
Hi Diane! I love the way you’re thinking—breaking up a 12-hour roast sounds like a total lifesaver! I wouldn’t recommend hitting “pause” right in the middle of the cook. When you cook a big, thick roast like a pork butt, you’re slowly raising the internal temperature to break down all that tough tissue. If you stop at 6 or 8 hours, the meat is likely right in the “danger zone” (between 40°F and 140°F) where bacteria love to grow. Even if you put it in the fridge, a giant 6-8 pound roast takes a long time to cool down in the center, which can actually be a safety risk.
Plus, from a “tasty” perspective, if you let that meat cool down and then try to bring it back up to 200°F the next day, it often ends up much tougher than if you just pushed through the first time!
My Best “Two-Day” Strategy:
If you want to save time, I’d suggest doing the “Day 2” work on Day 1 instead!
Cook it all the way through on Day 1. Get it to that 200°F fall-apart stage.
Shred it while it’s warm. It is much easier to shred when it’s fresh out of the oven!
Store it in the fridge with the juices. Put all that shredded goodness and the pan drippings into a container.
Day 2 (Party Day): Just reheat it gently in a slow cooker or a covered dish in the oven with a splash of apple juice or broth. It’ll taste just as fresh and be totally stress-free!
I hope this helps!!!
Betsy
I made this with a ten pound roast. It took 9 1/2 hours to “black” and then 3 hours to 200’.
It turned out PERFECT!! I can’t get over how tender it is. I will do it this way from now on.
Betsy
I made this with a ten pound roast. It took 9 1/2 hours to “black” and then 3 hours to 200’.
It turned out PERFECT!! I can’t get over how tender it is. I will do it this way from now on. Absolutely delicious!!
Mimi
This looks so good! What do you recommend for a smaller portion of roast? About 2lbs. Shorter times or lesser temps?
Juliea Huffaker
Hi Mimi! Yes you’d just shorten the roasting time, and cook to the final temp of 200 degrees internally!
Mimi
Thanks a lot! I’m so excited to how it turns out.
Sandy
Very tasty, easy to prepare. Horrendously long time to wait. Almost 9pm sunday eve, I just finished, after 2 days. Looking forward to enjoying it tomorrow.
Maureen
Hi! This is scrumptious and I love it for a big gathering. I’m feeding 18 people and want to use my Nesco roaster with two 5 pound pieces of meat. Do you have any idea how the temperature and timing would need to change for a Nesco?
Thank you!
Juliea Huffaker
Hi Maureen!
That’s fantastic you’re going to try this for a big gathering! Using two 5-pound pork butts in your Nesco roaster is a great idea for feeding 18 people. You’ll definitely need to make some adjustments to the temperature and timing compared to a conventional oven, but it’s absolutely doable for a delicious result.
Nesco Roaster Adjustments for Two 5-lb Pork Butts
Your Nesco roaster is excellent for achieving fall-apart tender pork, but its enclosed nature means we’ll tweak the process slightly from a conventional oven. For preparation, marinate both pork butts exactly as the recipe states. This step remains the same.
In a conventional oven, we use high heat initially to develop a crispy “bark.” A Nesco can struggle to create the same effect due to its more humid environment. For the best bark, I highly recommend searing each pork butt in a large, heavy-bottomed pan (like cast iron) on your stovetop before placing them in the Nesco. Heat a little high-smoke point oil over medium-high heat until shimmering, then sear each pork butt on all sides until deeply browned—about 3-5 minutes per side. If your pan isn’t large enough for both, sear them one at a time. This stovetop sear is crucial for flavor and texture. If you prefer to keep it all in the Nesco, you can try setting it to its highest temperature (usually around 400-425°F) for the first 30-45 minutes, but be aware the bark might not be as pronounced.
After searing, place both pork butts (fat-side up) in the Nesco roaster. You might need to rotate them if they’re a tight fit to ensure even cooking. Reduce the Nesco temperature to 225°F – 250°F. Cook them uncovered for approximately 4-6 hours to develop that crucial colored exterior. While it might not get as crispy as in a conventional oven, this stage is vital for building flavor. Once you’ve achieved good color, carefully remove the roasts and wrap them individually in pink butcher paper or two layers of heavy-duty aluminum foil. Return them to the Nesco and continue cooking at 225°F – 250°F until the internal temperature reaches 195-200°F in the thickest part. For two 5-pound pork butts, this wrapped stage could take an additional 3-6 hours or even longer, depending on your specific Nesco model and the roasts’ density. Always use a reliable meat thermometer to accurately track the internal temperature; it’s your best friend for knowing when they’re truly done.
Finally, transfer the cooked roasts to a cooling rack or cutting board and let them rest for 20-30 minutes. This allows the juices to redistribute, ensuring a tender and incredibly juicy result. Then, simply pull them apart with forks and serve with your favorite BBQ sauce or enjoy them on their own!
Jimmy Cash
Just found this recipe and have never made this before. Boston Butt was on sale, and I picked up 7.5 LBS for next to nothing. From the comments this sounds like something I would need to try. I’ll definitely post after. Thanks.
Sally Hess
Had a 3 1/2 pound bone in shoulder and want to try your recipe. Followed directions to a tee and results were amazing. Will definitely make this again . Just the two of us so plenty of meat and sooooo tender and moist!
Juliea Huffaker
Hi Danielle! I stabbed through the foil to do the final temp test… IT was at 200 degrees F… You don’t open the foil till it reaches the 200 degree mark;) Thanks for asking!
Juliea Huffaker
Hi Leslie! Yes the dutch oven should work just as well as the foil;) Thanks for asking!
Cina H.
This Boston Butt Pork Roast was delicious! I did not have 11 hours though. Followed the spice rub to a T and let it sit in the refrigerator for 12 hours+. Then my 6 pound roast sat out while the oven heated to 450. I placed it in a lined pan and cooked at 450 for 20 minutes. Reduced to 350 for 4 1/2 hours. Dropped the temp to 250 for about 2 hours or until we were ready to eat. It would have been done basically anytime after the 4/12 hour. Best pulled pork with burnt ends we’ve had. Enjoy!
Sharon P.P.
I have a 15 pound cut of meat for a large gathering. The way I am reading this is to cook at 450 for half hour and 14 hours at 250 before wrapping? Just want to make sure becasue that seems like an eternity, but it is a large piece of meat. Thanks for your help!
juliea
Hi Sharon… Thanks for stopping by my blog! That is a huge cut of meat… How fun! Yes, 450 for 1/2 hour at first, then lower the oven temp to 250. You do cook this for hours, I’m not sure exactly how many hours it will take before a good bark develops, but I think 14 hours would be too much time… The bark or crusty exterior wont take that much longer for a bigger cut of meat, Your roast will take longer to get to 195 or 200 degrees internally just because it’s so big. But the crust will develop faster because it’s on the outside. I’d check the roast for a good crust on the outside about 8 hours after roasting, and then wrap it after you have a nice crisp “bark”. wrap it, and continue roasting it till the internal temp reaches 195-200 degrees at the thickest part. Then let it rest for 20 minutes before cutting/shredding it!
Maggie
Hi, trying this for the first time. Just wanted to say I have a 5.5 lb roast, put it in at 9 a.m and as of 5:20, it’s only at 182 deg. Seems like it takes a lot more than 8 hrs to cook. I even raised the temp to 260, around 3 pm.
Thanks.
juliea
Hi Maggie! Thanks for the comment! That is interesting. Every oven and roast are different. Did you wrap it after the crust developed?
juliea
Hi Shannon… Thanks stoppping by and trying my Boston Butt Roast Recipe… And for comming back and commenting!
Sarah
After 17 years of marriage, my husband said this might be the best meat I’ve ever made! It was so good! It never did get to 200; we had to eat, and it was only 180, but it was still amazing. I wasn’t sure when to wrap it in foil, so I did it after it had been at 250 for about 6 hours. Thank you so much for the recipe!
Susan Moore
How do you reheat when making the day before the event? I don’t want it to be dry.
juliea
To reheat a Boston Butt roast for pulled pork while keeping it moist, you can follow these steps:
Preheat your oven to 325°F.
Place the roast in an oven-safe dish and cover it with foil. Make sure the foil is tightly sealed to prevent any moisture from escaping.
Put the dish in the preheated oven and allow it to heat up for about 15 to 20 minutes.
Remove the foil and baste the roast with any juices that may have collected in the dish.
Cover the roast with the foil again, making sure it is tightly sealed.
Place the dish back in the oven and continue heating for another 45 to 60 minutes, or until the internal temperature of the roast reaches 165°F.
Once the roast is heated through, remove it from the oven and let it rest for 10 to 15 minutes before shredding it with a fork.
Diane Eblee
Can the tablespoon of salt be reduced or even not uses ( due to kidney issues. Or can salt substitute be used?
juliea
Hello Diane! Yes of course you can reduce the salt! I think there is a magnesium based salt substitute in the salt section that you could use too… I believe Hain or Hayne makes it!
Charlotte Lindsay
First time butt roast! Let me just say that this was a labor of love! I had a 5 pounder. 30 mins at 425 because I used convection oven. Then 225 (bc convection) for 8 hours. Very nice bark and crisp. Then wrapped in foil for 4 more hours! It still was not up to 200! More like 170. We had burgers for supper 🙂 I cooled it some and put in fridge. Began re-cooking at 4pm the next day in a 350 oven. At 530 it was up to 180. We had pork chops. Haha! By about 7pm it was up to 200. If I’d read the whole post, we might have eaten it the first day. But the samples we ate last night were worth the wait!! I will definitely be making this again but will allow more time in day one and probably cook at 250 even on convection. Thank you!!
Lisa
Just made this recipe… It’s 10 o’clock in the morning. I’m standing at the stove top, pulling the pork apart, and took my first taste. OMG… Now my second, third, fourth taste….this is FANTASTIC. Best pork I ever made. I didn’t realize, till I defrosted the meat, that I bought the shoulder butt, not the Boston Butt. I was afraid all the work I was going to put into it, still might not make it tender enough. But I went for it because that’s the piece I had. It is phenomenal. This recipe will go into my personal recipe box. Thank you so much for this recipe.
juliea
Hi Lisa! I’m so glad your shoulder butt roast turned out great with this recipe! Thanks for just going for it, and stopping by to leave your comment!
Pam Jenkins
First time ever making a pork roast but I wanted to try something different. I cannot believe how tender and delicious this is. Thanks for the recipe
Pam
I’m cooking a very small roast for just me and husband. Roast is not even 3 lbs. when do I use the meat thermometer? Do I put it in the roast then wrap in foil? Thank you for a response.
KerryAnn
When wrapping in foil the top layer of fat is pretty dark but still soft to the touch. Should this be crispy before wrapping? or can I broil it at the end to crisp it up? It’s an 8 lb roast, did the 450 for half hour and 8 hours at 250 before wrapping.
juliea
Hi KerryAnn! Yes, this should be crispy or “bark-like” before wrapping it in foil or pink butcher paper!
Jordan Evans
Thank you for this crowd pleaser! Made this yesterday for a family bbq/gathering. Planned for pulled pork sandwiches, Bbq sauceon the side. Lets just say not one person even touched the bottle of BBQ sauce!! Everyone LOVED it as is. 2 nights in the fridge marinating in the rub/ and some pineapple orange juice drizzled over it. 30 mins at 450, 7 hours at 250, another 2 and a half hours wrapped in foil at 250. The roast came out delicious! My family couldn’t stop raving about how much they loved it!! Thank you again for my new favorite pork roast!!
juliea
Hi Jordan! Thanks for the feedback.. I’m so glad you all enjoyed this for pulled pork! Love your pineapple orange juice addition, what a great idea!
Donna in Michigan
Very tasty, moist results. Followed dry rub instructions and baking instructions. Very well written and informative. Turned out perfect. Served it on buns with a slaw-type topping we call US31 Barbecue Sauce (named after local restaurant known for their pulled pork & beef sandwiches). Will definitely make again.
juliea
Hi Donna! So glad you tried and enjoyed my Boston Butt Roast recipe and thanks for leaving a comment! Your US31 BBQ sauce sounds yummy!
juliea
Hi Ellen, Thanks for the comment! That’s interesting, Do you know what size your roast was in pounds? How did it turn out?
Debra
Hi, how much time and what temperature would you recommend for a 7# “boneless” pork butt.
traci
Made this at 3:30 this am, looks absolutely amazing! Just waiting for the kids to arrive so I can eat some more. Lol of course I cheated and tried it… Yummy this will be my recipe from here on out!!! So happy thanks so much.
Laura
I want to make this for Mother’s Day and do not think I will have 8 hours to cook it. If I make it the day before how would you recommend I reheat it? Or do you think that will make it tough? Also will you send the answer to my email address?
Thank you!
juliea
This is very good the next day! Just wrap it well before refrigerating it! And reheat in the oven before serving!
Andrew Griffin
I did this for an Easter roast instead of a traditional ham that my family usually does. There were no leftovers. I also wanted to mention the origins of the Boston Butt name. It is absolutely true that the name is derived from the Port city of Boston as mentioned above, while the “Butt” portion of the name comes from the huge storage barrels that were used to store and brine these cuts called “butts”.
juliea
Hi Andrew! So glad everyone loved the Boston butt roast! And good to know about the “butt” in Boston Butt! Makes sense that they were brined in barrels!
Jennifer
How should I reheat this if I cook it a day before I need it? I would have it pulled and ready to go for sandwiches. I would probably want to reheat it all at once since it’s for a party. I thought about doing it in the oven at a low temperature, but didn’t know if it would dry out.
Hannah
Just wondering if you just cover the top of the roasting pan with foil? Or do wrap the entire roast in foil, then return it to the roasting pan?
juliea
Hi Hannah! I wrap the entire roast with foil! Thanks for asking!
Beth
Made this today for Thanksgiving. . . and we ate it tonight! Tomorrow we’ll enjoy the leftovers. Awesome. My very FIRST pork roast and it turned out perfect. I forgot a few steps in the rush at the last minute, but it was all good. I did the dry rub last night so it got to sit all night, then cooked for 6 hours today. Will be doing this one again. We thank you for making our Thanksgiving “just perfect!”
juliea
Hi Beth! So glad you tried and liked it! Happy thanksgiving!
Alexis
I am so excited to try this for Thanksgiving! Thank you for the recipe!! Approximately how long should it take after wrapping it in foil for it to reach the appropriate temperature? My cut is 4 pounds and I am just trying to get a gauge of time for when I should start in order for it to be ready in time. I am making it at home then transporting it to my parent’s house about 35 minutes away. My thoughts are to make it fully at home then unwrap it from the foil cook when I get to their house. Thoughts?
juliea
Hi Alexis! So glad you appreciate this recipe! Do you have a meat thermometer? I’m not perfectly sure how much time it will take from foil to finish with a 4 pounder, but you can’t go wrong with a meat thermometer! They are pretty cheap, and you can pick them up at any Walmart or on amazon. I have a big family, so I usually get 6 pounds plus. However, I’d recommend 6 hours for the first roast, till “bark” is nice and established, then count on at least 2 hours in foil. You can take it out when the internal temp reaches 190 degrees and it will continue to go up in temp after you take it out on your way to your parents house!
Paula
Hello, planning to make this this week. Is it necessary to add water to the roast pan so it doesn’t dry out?
juliea
Hi Paula! Thanks for stopping by and for your question! When I roast my Boston Butt in the oven I do not add water. There is a good amount of fat in the roast itself, and that fat keeps it moist inside… ALso allowing the bark to form on the outside also locks in moisture. I hope this helps!
Sara Guthrie
Perfect for keto, I will swap the brown sugar for swerve brown sugar and follow your cooking directions!! Delish!
Allie
I love a good pork recipe. Thanks so much for sharing this and. Yum yum.
Danielle
Delicious! I might have to become a lot more patient and organized to get it going so far in advance. Thanks for this recipe!
Martha Clark, RN
I made this recipe with very few subs (for once!). Didn’t have time to marinade, used the rub spread on a 4 lb Boston Butt pork roast early this morning. Didn’t use cumin, instead used Morton’s Natures Seasonings and thyme.
OMG, this technique is amazing! Crispy-chewy-savory ‘bark’ overall – juicy ‘wet’ meat inside (but not TOO wet like a crockpot roast!). 1/2 hr at 450F, 6hr at 250F.
I can’t say enough about this recipe (and technique especially). The house smelled soooo good all day!
I worried the meat would get dry at such a long and low roast. But NO! Crispy salty deliciousness outside – juicy and perfectly-melted-fat-deliciousness inside.
Thanks so much!! My new BF is going to love this when I make it next weekend. The roast I made today is all for ME for the work week. ?????