


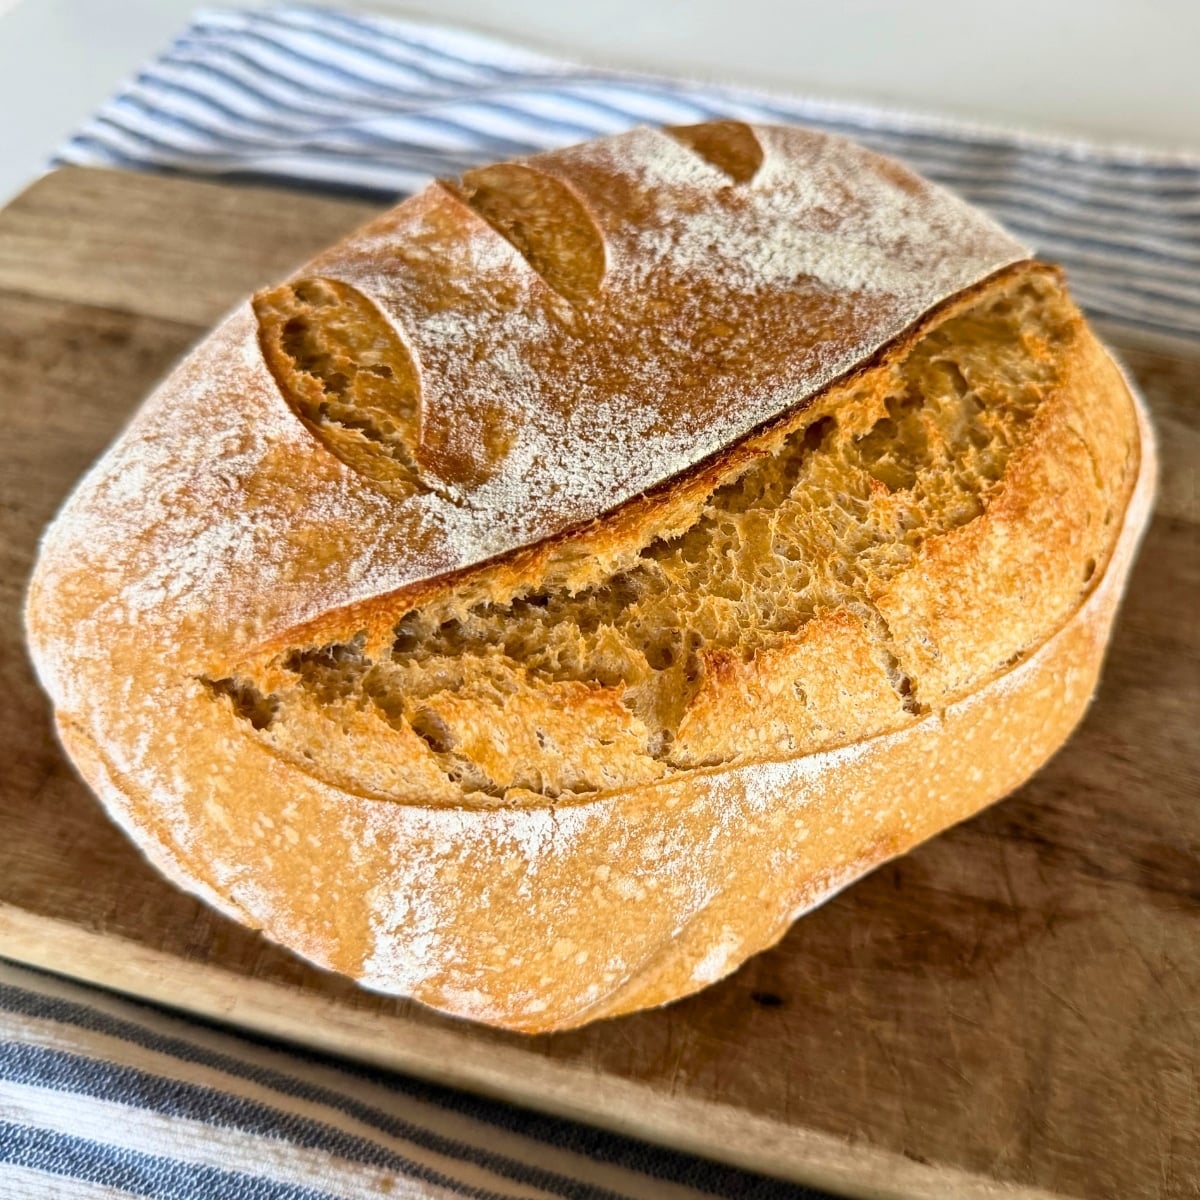
My Easy Whole Wheat Sourdough bread recipe is a light, approachable loaf that balances the nutty nutrition of hard white wheat with the reliable lift of all-purpose flour.
There is something so deeply satisfying about the smell of fresh, whole-wheat bread cooling on a farmhouse counter. If you’ve been intimidated by whole wheat sourdough in the past – expecting a dense, heavy brick – this recipe is for you. I’ve adapted this method from my Easy Sourdough Bread Recipe for Beginners, which so many of you already love… It’s a natural evolution from my very first post, the High Starter Sourdough Bread, but with the added nutrition and nutty flavor of whole grains.
Whether you are a fan of the traditional stretch-and-fold method or you want to let your KitchenAid stand mixer do the heavy lifting to save time, this recipe fits perfectly into a busy homestead schedule.
By using a long, cold refrigerator ferment overnight, we develop that signature sourdough tang and a beautiful crumb without having to babysit the dough all day… Then, bake it in a screaming-hot Dutch oven at 425°F to get that perfect, crackly crust that goes great with butter melted on top and strawberry freezer jam, or roast beef for dinner every single time!
Why You’ll Love This Easy Whole Wheat Sourdough Bread Recipe
If you’ve ever felt like sourdough was a full-time job, this recipe is going to be your new best friend. Here is why it works so well for a busy homestead life:
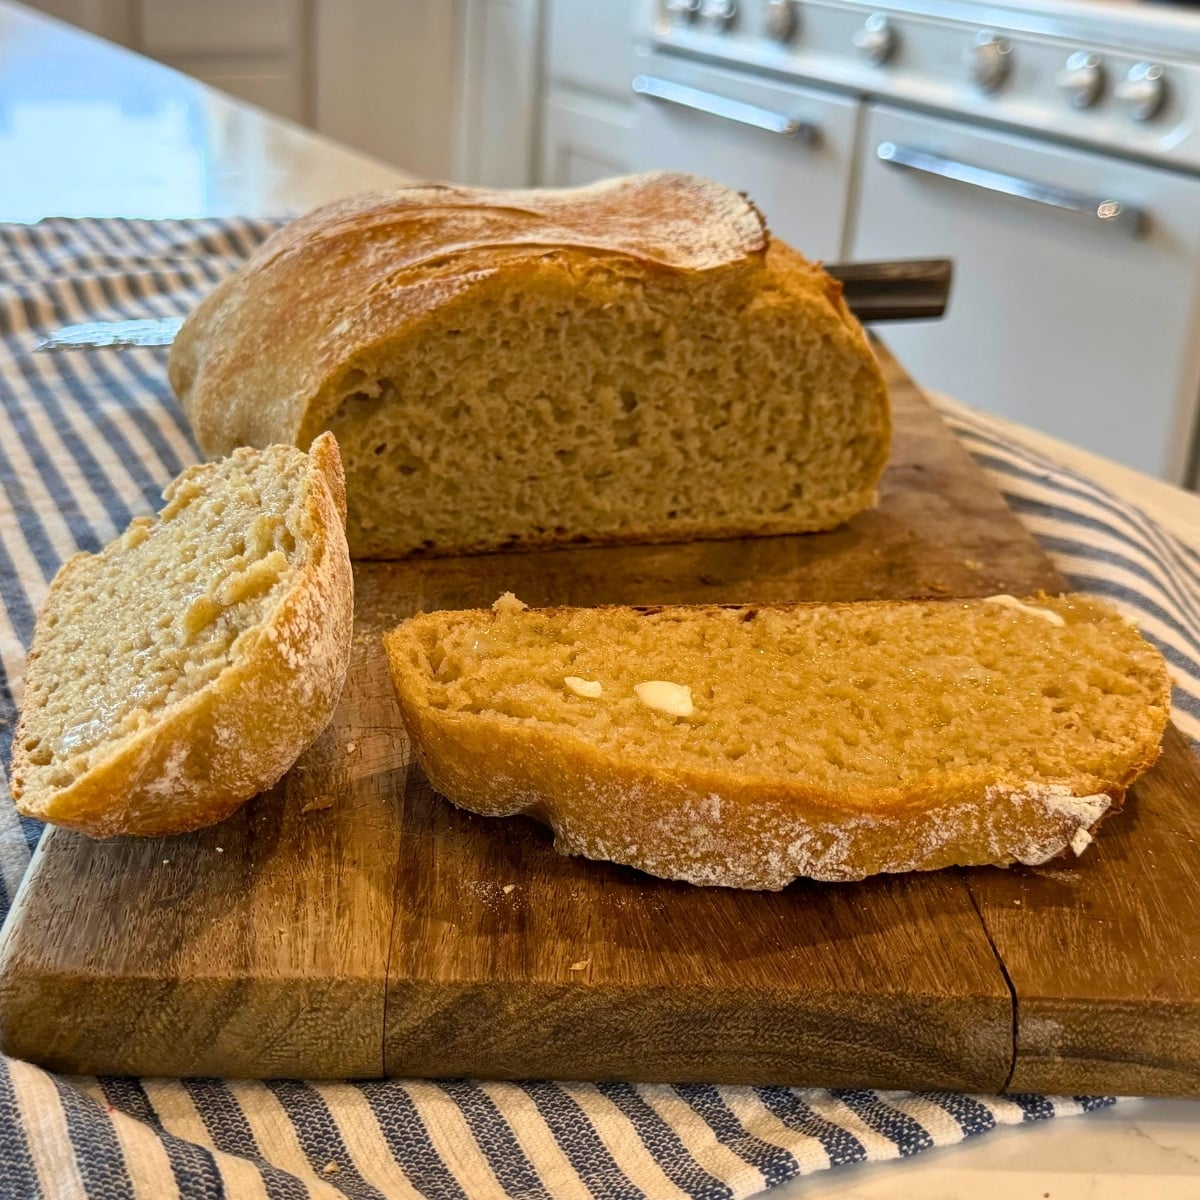
The Perfect Blend – I use a specific ratio of 2 cups hard white wheat flour to 1 cup all-purpose flour. Hard white wheat is the secret to getting all that whole-grain nutrition and nutty flavor without the bitterness of traditional red wheat… And, mixing in a bit of all-purpose flour ensures the loaf stays light and soft – making it “kid-approved” and perfect for sandwiches!
The Hands-Off Factor – While I love the ritual of the traditional stretch-and-fold method, let’s be honest… Sometimes life is just too busy! This easy whole wheat sourdough bread recipe is designed to work beautifully in a KitchenAid stand mixer. It’s a total game-changer for “launched” moms and busy bakers… You get that perfect gluten development without the sticky hands or the constant timer-setting!
A “Bake-and-Go” Schedule – There’s no need to babysit your dough all day long. This easy whole wheat sourdough bread recipe utilizes a long refrigerator ferment overnight. You prep the dough in the evening, let it sleep in the fridge, and then simply pop it into the Dutch oven the next morning. It turns sourdough into a manageable morning routine that fits between chores.
My Pro Tips & Tricks
The “Windowpane” Test: Even when using a stand mixer, check your dough! Pull a small piece and stretch it gently. If it stretches thin enough to see light through it without tearing, your gluten is perfectly developed.
Watch the Water Temp: Since we are using a fair amount of whole wheat, ensure your water is “baby bath” warm (around 90°F-95°F). This helps the thirstier whole grain flour hydrate faster.
Don’t Skimp on the Salt: 1.5 teaspoons might seem like a lot, but whole wheat needs that extra salt to bring out the nutty flavor and control the fermentation speed.
Gradual Flour Addition: Don’t dump all your flour in at once! Start with the 2 cups of wheat and the first 1/2 cup of all-purpose flour. Then, add the final 1/2 cup of all-purpose flour gradually while mixing. Stop as soon as the dough forms a smooth ball that pulls away from the sides of the bowl. Depending on the humidity in your kitchen or the specific brand of flour you’re using, you might need the whole cup, or you might find that holding back a tablespoon or two keeps the dough from becoming too stiff. Trust your hands over the measurements!
Step-by-Step Instructions
Whether you are using a stand mixer for a hands-off method or sticking to the traditional stretch-and-folds, these steps make it easy:
- Mix the Dough
In your KitchenAid bowl (or a large mixing bowl), combine your 1/2 cup sourdough starter, 1 1/2 cups warm water. Whisk until the starter is dissolved. Add the 2 cups hard white wheat flour, 1/2 cup all-purpose flour, and 1.5 teaspoons salt… Gradually add the last 1/2 cup of all purpose flour till the dough feels like a nice, smooth ball that pulls away from the sides…. You may find you need the whole cup, or you might hold back a tablespoon or two depending on the humidity and your specific flour!
Stand Mixer Option: Use the dough hook on low speed for about 5 – 7 minutes until the dough is smooth and pulls away from the sides.
Manual Option: Stir with a wooden spoon until a shaggy dough forms, then let it rest for 20 minutes before starting your folds.
- Bulk Fermentation & Folds – If you didn’t use the mixer, perform 3 sets of stretch and folds every 30 minutes. If you used the mixer, you can skip straight to the rest! Cover the bowl with a damp cloth and let the dough sit at room temperature for about 4–6 hours (depending on the warmth of your kitchen) until it has grown by about 50%.
- Overnight Refrigerator Ferment – This is where the magic happens for “bake-and-go” convenience. Shape your dough into a round boule and place it into a floured banneton or a bowl lined with a tea towel. Cover it tightly and place it in the refrigerator overnight (for about 12 hours).
- The Bake – Preheat your oven to 425°F with your Dutch oven inside so it gets screaming hot.
- Carefully turn your cold dough out onto parchment paper and score the top.
- Place the dough (and parchment) into the hot Dutch oven.
- Bake with the lid on for 20 minutes to trap the steam.
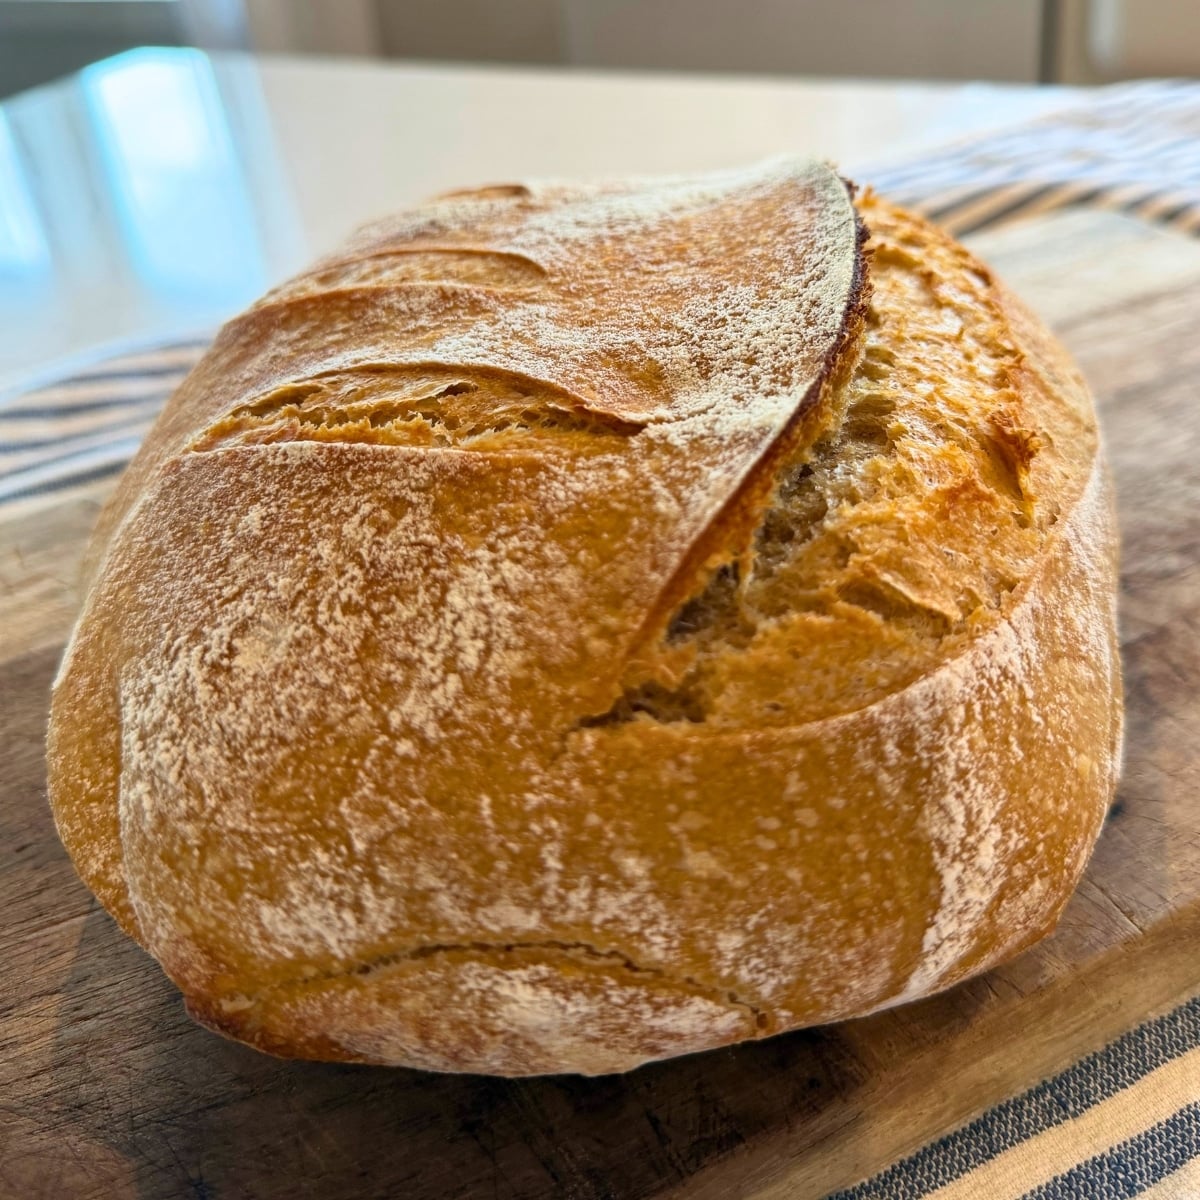
- Remove the lid and bake for another 20 minutes until the crust is a deep golden brown.
- Cooling – I know it’s tempting to slice into it right away, but let it cool on a wire rack for at least an hour for the best result… This lets the internal structure to set so you don’t have a gummy loaf. 😉
Troubleshooting Whole Wheat Sourdough Bread
The Dough Feels Too Dry: If the dough feels like a stiff brick while mixing, add 1 tablespoon of water at a time. Whole wheat varies by brand and grind, so don’t be afraid to adjust until it feels tacky but not “soupy.”
The Loaf is Dense: This usually happens if the bulk ferment (the room temperature rise) was cut short. Since whole wheat is heavier, it needs that full 50% growth to ensure it has enough strength to lift in the oven.
The Crust is Too Hard: If you find the crust is a bit too “farmhouse tough” for the kids, try placing a small pan of water on the bottom rack of the oven during the bake. The extra steam keeps the crust soft while it expands.
Over-fermenting in the Fridge: If you leave it in the fridge for more than 18–24 hours, the acid can start to break down the gluten in the whole wheat, leading to a flatter loaf. Stick to that 12-hour sweet spot for the best height!
I wanna know what YOU think, Please review the recipe card!
Easy Whole Wheat Sourdough Bread Recipe
Ingredients
- 1/2 cup sourdough starter bubbly active starter – stirred down. If it's bubbly it will look like 1 cup 😉
- 1 1/2 cups warm water
- 2 cups hard white wheat flour 240 grams
- 1 cup all-purpose flour 120 grams
- 1.5 teaspoons salt
- *Optional: 1 tablespoon honey or maple syrup for a touch of sweetness
- 1 tbsp olive oil
Instructions
Mixing & Kneading
- Dissolve the Starter: In your KitchenAid bowl or a large glass bowl, whisk together the sourdough starter, warm water, and honey (if using) until the starter is mostly dissolved and the water looks milky.
- Combine Ingredients: Add the 2 cups of hard white wheat flour and the first 1/2 cup of all-purpose flour, along with the salt.
- The Secret Touch: Begin mixing, then add the final 1/2 cup of all-purpose flour gradually… Stop once the dough feels like a nice, smooth ball that pulls away from the sides. You may find you need the whole cup, or you might hold back a tablespoon or two depending on the humidity and your specific flour!
- The Mix: * Stand Mixer: Mix on low speed with the dough hook for 5–7 minutes. The dough should pull away from the sides and feel smooth and elastic.
- By Hand: Stir with a sturdy spoon until a shaggy ball forms. Let it rest for 20 minutes, then perform 3 sets of "stretch and folds" every 30 minutes.
The Long Ferment
- Bulk Rise: Cover your bowl with a damp tea towel or plastic wrap. (you can oil the bowl for easy removal if you like.) Let it sit in a warm spot on your counter for 4–6 hours. You are looking for the dough to grow by about 50% and look slightly bubbly on top.
- Shape: Gently turn the dough onto a lightly floured surface. Fold the edges into the center to create a round "boule."
- Overnight Cold Proof: Place your shaped dough into a floured banneton basket or a bowl lined with a tea towel. Cover tightly and put it in the refrigerator for 12 hours (up to 18). This cold rest is what develops that amazing sourdough flavor!
Scoring & Baking
- Preheat: Place your Dutch oven (with the lid on) into the oven and preheat to 425°F. Let it get nice and hot for at least 30 minutes.
- Score the Dough: Carefully flip your cold dough out onto a piece of parchment paper. Use a sharp knife or a "bread lame" to cut a long slash across the top about 1/2 inch deep. This controls where the bread expands!
- The Bake: Use the parchment paper to lift the dough into the hot Dutch oven.
- Lid ON: Bake for 20 minutes (this creates the steam needed for a crackly crust).
- Lid OFF: Remove the lid and bake for another 20 minutes until the crust is a deep golden brown.
- The Hardest Part: Let the loaf cool on a wire rack for 1 hour before slicing. Cutting into hot bread can make the inside gummy, and you don't get as clean a slice… But, I do it all the time and it's delcious!
Video
Notes
To Store: Keep your loaf in a linen bread bag or a paper bag on the counter for up to 3 days. Avoid plastic bags, as they make the crust soft and gummy. To Freeze: This bread freezes beautifully! Slice the loaf completely, then place the slices in a freezer-safe bag. You can pop a single slice directly into the toaster for a quick farmhouse breakfast. Substitutions
Hard Red vs. Hard White Wheat: I prefer Hard White Wheat for this recipe because it has a milder, sweeter flavor. If you only have Hard Red Wheat, you may want to add an extra tablespoon of honey to balance the stronger “wheaty” taste.
Nutrition

About Juliea
Juliea is a mother of six, a sourdough baker, and a homestead builder living in Idaho. Alongside her husband and their horse, Dude, she manages a busy farmhouse and shares her love for scratch-cooking and simple homemaking. Through her blog and YouTube channel, she helps millions of families every year master the art of the handmade home.


5 comments
Timber
This is so delicious!!!!! My favorite bread of all time make it!
Dixie Clements
I literally crave this. It was absolutely amazing. Moist, spongy & delicious! Slather this bad boy with some butter & it’s irresistible.
Darin
This is so delicious , easy to follow directions, would definitely do again!!
Ekasinoceske_Rush
I’ve been wanting to try whole wheat sourdough. Do you think it needs any special care compared to regular sourdough?
Juliea Huffaker
Hi! That is a great question. Whole wheat sourdough does require a little bit of special care because the flour is much ‘thirstier’ than all-purpose.
My best tip – and what I do with this recipe – is to add the final 1/2 cup of all-purpose flour gradually. I mix it in bit by bit until it feels like a nice, smooth dough that pulls away from the bowl. You might find you don’t need the entire last half cup, or you might need just a touch more depending on the humidity!
I’ve also included a Troubleshooting section in the post to help you navigate the hydration and fermentation quirks of whole wheat. Let me know how it goes if you give it a try!